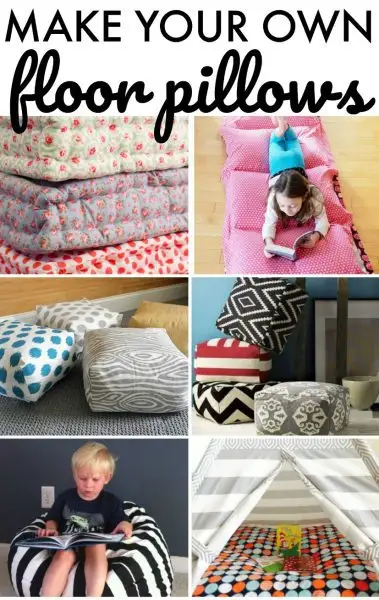
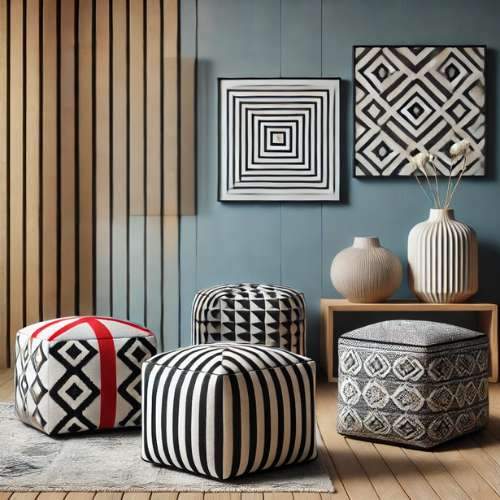
Do you ever want to sit on something other than a couch or chair? Or provide extra seating for guests or kids? Thank goodness for wonderfully giant and soft floor pillows! While a luxury couch is the perfect spot for relaxing in style, floor pillows offer a casual, cozy alternative when you want to switch things up. Whether you’re watching a movie, hosting a slumber party, or just enjoying some quiet time, floor pillows can make your space even more inviting. Floor pillows are great to take camping, use for movie nights, or sleep on for a quick nap or during a slumber party.
I personally love tucking mine into the reading nook and like keeping one or two in the living room, as well. But it’s hard to find a budget-friendly, high-quality floor pillow. Thankfully, it’s not as hard as you might think to make your own cozy cushions for the floor!
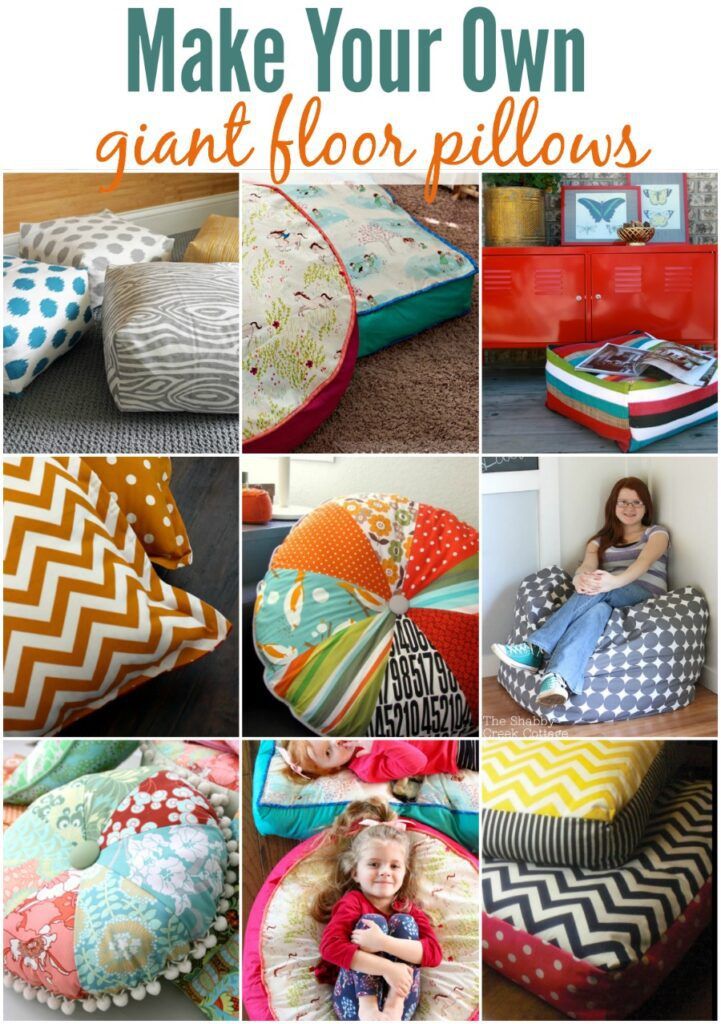
Here are seven awesome options, including a no-sew and one-hour technique. Happy pillow-making!
Click the links below to jump to instructions:
What is the best material for a floor pillow?
Consider these factors when making (or purchasing) a floor pillow:
Fabric
The fabric you use will impact how the pillow feels. Choose fabrics that breathe well, like cotton, polyester, or linen. Other, more luxurious fabrics like velvet or faux fur, provide texture and comfort.
You can make a floor pillow with old sheets, scraps of fabric, or even a yard of fabric. Just be sure to buy enough fabric to make a bigger floor pillow.
Filling
You want a soft, plush filling that will be comfortable for you to sit or sleep on. If you maximum comfort while kneeling or sitting for a long time, choose a dense filling that will support your joints and body.
Size and shape
Choose the size and shape that will work best in your space. Traditionally, floor pillows are 36-inch squares, but you can find or make them in a variety of shapes and sizes. The fabric requirement for floor pillows is typically three-quarters of a yard, but you can double this for a larger floor pillow.
Suggested Read: Renovation for Your Relaxation
1. DIY oversized floor pillow
Make a square oversized floor pouf with this easy sewing tutorial. This is certainly the perfect way to reuse old blankets and pillows, and it takes about an hour to make. Every family member may ask you for one!
Source: Reasons To Skip The Housework
Supplies
- 2 1/4 yards fabric, more or less
- Scissors
- Yard stick
- Marking pen
- Sewing machine
- Filling
- Needle
- Thread
Instructions
- Measure and draw six 24″ x 24″ squares on the fabric. Cut out the squares.
- On your sewing machine, sew four squares end-to-end with a 1/4″ seam allowance.
- Sew the outermost short edges together, forming a loop of fabric.
- Starting 1/4″ in from the corner, sew the one of the last two pieces onto the loop’s opening. With a 1/4″ seam allowance, sew around all four sides. Stop when you’re 1/4″ from the end.
- Leaving the needle in the fabric, lift the sewing machine foot. Rotate the fabric, aligning it with the next side of the cube.
- Lower the sewing machine foot. Sew the final corner, sealing this side of the cube.
- Repeat this process with the last square, leaving several inches open at the final corner.
- Using the open corner, stuff the pillow cube with your choice of filling. You can use pillows, comforters, cotton or polyfiber filling, sheets, blankets, and scrap fabric. Line it with quilt batting for a smoother cushion.
- Hand-sew the opening.
Suggested Read: 10 Simple Sewing Projects Anyone Can Do
2. DIY colorful round floor pillow

This large DIY pillow is an easy sewing project for beginners and people with basic sewing skills. Depending on the fabric you use, these can make great accent pieces as well as a comfortable floor seating.
Source: Reasonstoskipthehousework
Supplies
- 1 yard home decor weight fabric
- 1-2 large bags Polyfill
- 4 yards piping trim
- Sewing machine
- Sewing foot
- Zipper foot
- Scissors
- Pins
Instructions
- Measure and cut out two 22″ circles from the fabric. These are your front and back panels.
- Measure and cut out two 5″ by 35″ strips from the fabric. This is the side of the pillow.
- Sew the side pieces together, making one 70″ strip.
- Pin the piping trim to both sides of the 70″ strip. Sew the piping trim onto the side piece.
- Pin the strip onto the front panel so the patterns face each other.
- Put the zipper foot on your sewing machine, and sew the side panel to the front panel.
- Pin the side strip and back panel together with a small seam allowance.
- Sew the side piece and back panel together, leaving the ends of the side piece open.
- Trim the overlapping ends of the side piece so the piping lays flat.
- Turn the pillow inside out so that the pattern is now on the outside.
- Stuff the pillow with Polyfill.
- Close the side seam with fabric glue or hand-sewing.
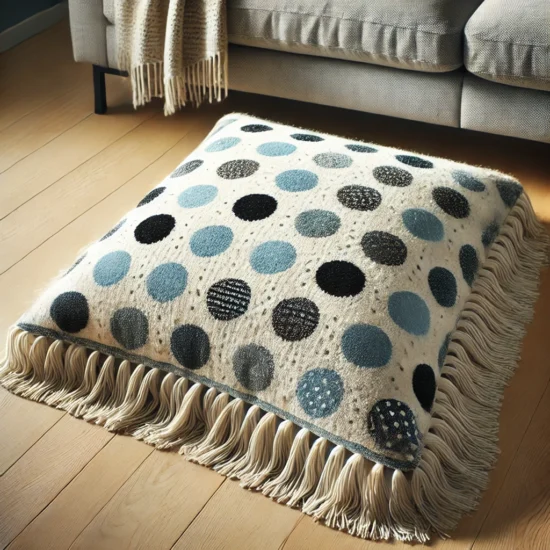
3. Quilted floor cushion
These look harder to make than they are – and they’re just the perfect size! Also, these are some of the best for parties and sleepovers. You may want to clean wood floors with a dust mop so these cushions won’t get too dirty.
Source: reasonstoskipthehousework
Supplies
- 1 yard fabric
- Fabric pencil
- Pins
- Scissors
- 1 kilogram polyfill
- Straight mattress needle
- Polyester thread
- Ruler
- Tape measure
Instructions
- Measure, mark, and cut two 17 1/2″ by 17 1/2″ squares. These are the front and back.
- Measure, mark, and cut a 78″ by 4″ gusset. You can also cut this as two 58 1/2″ by 19 1/2″ pieces. This forms the sides of the pillow.
- Baste or pin the pieces together if desired.
- If you cut out multiple pieces for the gusset, sew them together with a 1/4″ seam allowance.
- Press the gusset seams open.
- Measure and mark each corner of the front and back panels at 1/4″. Use the ruler to draw intersecting lines at each 1/4″ mark.
- Lay the front panel pattern-side down onto the gusset, which is pattern-side up. Line the edges up, and sew from one 1/4″ intersecting mark to the other.
- Use scissors to make a small cut at the 1/4″ seam allowance on the gusset. This allows you to pivot the gusset while sewing it to the front panel.
- Pivot at the gusset, and sew the next side of the front panel.
- Repeat steps 7 to 9 to finish attaching the gusset to the front panel.
- Lay the end of the gusset flat over the beginning of the gusset. Fold the beginning of the gusset at a 45-degree angle.
- On the top gusset layer, draw a vertical line along the 1/4″ seam allowance.
- Sew the gusset ends along this line.
- Trim the extra gusset fabric, leaving a 1/4″ margin.
- Align the back panel to the gusset. The intersecting marks at 1/4″ on the back panel will line up with the small snips you cut into the gusset.
- Sew along the 1/4″ seam allowance, attaching the back panel to the gusset. Leave a 5″ opening at one corner.
- Turn the pillow inside out so the pattern is on the outside.
- Stuff the pillow with polyfill.
- Sew the opening closed with an invisible stitch.
- Measure and mark a 3 by 3 point grid on both sides of the pillow. Each point will be 4″ to 4 1/2″ apart.
- Thread the straight mattress needle with four strands of polyester thread.
- Insert the needle into the pillow about 2″ from the central grid point. Pull the needle up through the grid point mark, leaving 2″ to 3″ of thread protruding from the first needle hole. Make a small knot to lock the stitch. Remove the extra thread with scissors.
- Pierce the needle from the front panel, through the filling, to the back panel to make each tuft. Repeat this stitch at least five time to create each tuft.
- Repeat steps 22 and 23 on the four grid points next to the central grid point.
- Then repeat steps 22 and 23 on the last four grid points.
- Thread the straight mattress needle with four strands of polyester thread again.
- Insert the needle into one of the front panel’s corners, and angle it diagonally at the gusset. Pull the needle through the gusset, and make a small knot to lock the stitch. Snip the excess thread.
- Insert the needle into the gusset in the same place. Angle it diagonally to come through the front panel where you inserted the needle in step 27.
- Repeat steps 27 and 28 until you have quilted the top four edges and bottom four edges.
4. Colorful jumbo floor pillows
Make 36-inch floor pillows with this easy tutorial! If you’ve ever wondered how to make a cozy pillow bed, this easy tutorial shows you how. If you plan to make multiple fabrics for each pillow, buy at least 2 yards of each fabric type. The following instructions show you how to make a 36-inch floor pillow, but you can easily adjust the size.
Source: Brit + Co
Supplies
- 12 yards of fabric
- Polyester fiberfill
- Fabric scissors
- Needle
- Thread
- Sewing machine
Instructions
- Measure and mark two 36″ by 36″ squares on a piece of fabric. Cut out the squares. These are your front and back panels.
- On a different fabric, measure and mark four 36″ by 7″ rectangles. Cut out the rectangles. These are the side panels.
- To check how the panels fit together, arrange the front panel and side panels on a work surface. The side panels will attach to each of the front panel’s sides.
- With the front panel face down, pin the side panels (also face down) to the front panel’s sides.
- Sew the side panels to the front panel, leaving a 1″ seam allowance.
- Sew the bottom panel onto three side panels, leaving one side open.
- Sew the corners together.
- Turn the pillow case inside out.
- Pack the fiberfill into the pillow case.
- Pin the side panel to the back panel, leaving a 1″ seam allowance.
- Hand sew the pillow panels together.
Suggested Read: Quick Home Fixes
5. Durable rug floor pouf
Using $3 IKEA floor mats and your sewing machine, you can make durable square floor pillows just like these! The rugs aren’t always the same size, so your measurements and pieces might be different from the instructions below.
Source: Reasonstoskipthehousework
Supplies
- Three $3 IKEA rugs
- Filler
- Sewing machine
- Zipper (optional)
Instructions
- Measure, mark, and cut out a 23″ by 23″ piece from a rug. The rest of the rug should be about 12″ by 23″.
- Repeat step 1 on a second rug.
- Measure, mark, and cut out two 12″ by 23″ pieces on the third rug.
- Sew a 12″ by 23″ piece onto each side of a 23″ by 23″ piece.
- Sew the second 23″ by 23″ piece to the bottom-most 12″ by 23″ piece.
- Sew the 12″ by 23″ panels’ edges together to form the pillow’s corners.
- Hem edges as needed.
- Sew the bottom 23″ by 23″ piece onto two 12″ by 23″ pieces. Leave one side open to add the filling and the zipper. If you aren’t using a zipper, you can attach the bottom piece to all sides, leaving one side open enough to add filling.
- Turn the pillow right-side out. Pin and sew the zipper on the open edges.
- Stuff the pillow with filler. Hand sew any gaps around the zipper. If you aren’t using a zipper, hand sew the pillow closed.
6. No sew floor pillows
This DIY large floor pillow method is so easy and quick! You only need two pieces of fleece, scissors, and something to measure with! I will most certainly pick this simple tutorial for my next project.
Source: Reasonstoskipthehousework
Supplies
- 1 1/2 yards patterned fleece
- 1 1/2 yards solid color fleece
- Scissors
- Yard stick or measuring tape
- Filling
Instructions
- Lay one fleece piece flat, the correct side of the fabric face down.
- Place the other fleece piece on top of the other, with the correct side of the fabric face up.
- Measure and mark the size of your pillow on the fleece. Add about 10″ to the measurements. For example, for a 40″ by 40″ pillow, measure a 50″ by 50″ square.
- Cut the pillow panels out of the stacked fleece
- Measure, mark, and cut out a 5″ by 5″ square at each corner.
- Use scissors to cut fringe on one side of the fleece pieces. Each fringe will be about 1 1/2″ wide and 5″ long. Use the yard stick or measuring tape to help you keep the fringe evenly cut and no longer than 5″.
- Tie the fringe pieces into knots. Make sure the pillow case is flat on your work surface, pulling it taut as needed.
- Repeat steps 6 and 7 on two more sides until three sides are closed.
- Cut the fringe on the final side. Tie the fringe into knots, leaving 15-20 fringe pieces untied.
- Stuff filling into the pillow through this opening.
- Tie the rest of the fringe into knots.
7. One hour floor cushion
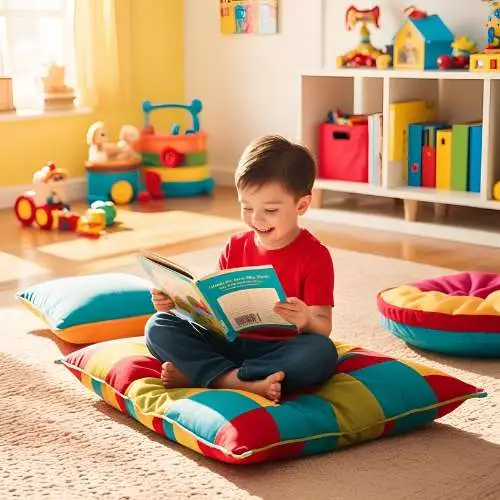
You and your loved ones can use these simple cushions wherever you want, from the bedroom to the backyard! Kids are especially cute and silly when they move these giant floor pillows around.
Source: Reasonstoskipthehousework
Supplies
- 1 yard fabric per fabric color/pattern (4 yards total)
- Filling
- Needle
- Thread
- Sewing machine
- Scissors
- Measuring tape
Instructions
- Measure, mark, and cut one triangle per fabric type. Each triangle should be 1 yard at the base and 1 1/2 yard at the point.
- Place one triangle on top of another triangle so that the right sides touch. Sew the right sides together.
- Repeat step 2, sewing all four triangles together to form a fabric tube.
- Lay the triangle bases of the opening on top of each other. Pin and sew the bases together.
- Repeat with the other side, leaving about 10 inches open.
- Turn the cushion right side out.
- Add filling through the 10″ opening.
- Close the 10″ opening.
Suggested Read: Make Chair Bench
Which DIY floor cushion idea is your favorite?
I hope you were as impressed by these amazing, simple, and fun DIY floor pillows as I am! Which pillow ideas have you tried? Which one is your favorite, and why? I encourage you to share pictures of your new floor pillows!
I hope you remember to take pride in your work, no matter how complex the project is or how quickly you finish. I find that it’s important to appreciate what you’re capable of and to give yourself rest when you need it. Imagine the appreciation you’ll have for yourself while lounging on a comfy floor pillow, made by your own hands!
If you loved these tutorials, go check out these other fun ideas too:
Thanks for the love!
Thanks for including my floor pillows in the round up!
This is a test comment
thank you for your comment
I’m really loving the theme/design of your weblog. Do you ever run into any web
browser compatibility problems? A few of my blog audience have complained about my blog not operating correctly in Explorer but looks great in Firefox.
Do you have any recommendations to help fix this issue?
Definitely something I’ve had issues with in the past when I was doing blog design. Unfortunately, I don’t have the answer. Has something to do with the code, but I’m not sure what to add/remove to fix the incompatibility. I just say google whatever the problem is and that’s usually how I fix most coding errors!
I LOVE these pillows! Do you have a tutorial or pattern available? My kids would go nuts over these.
So glad you love them! Each of the links will take you to the specific tutorial for each pillow!
Love, love, love these! The Quilted Circular Pouf // True Up link says the page is not available. Would love the tutorial for this if you know where I could find it.
Thanks so much!
Tammi
Thanks for sharing all the great ideas! So many to choose from to make a comfortable seating area.
They’re all so much fun! Thanks for stopping by!
Thank you so much for the share!
Thanks for the fun tutorial! 🙂
Awesome ideas
Thanks a lot! I appreciate your feedback!