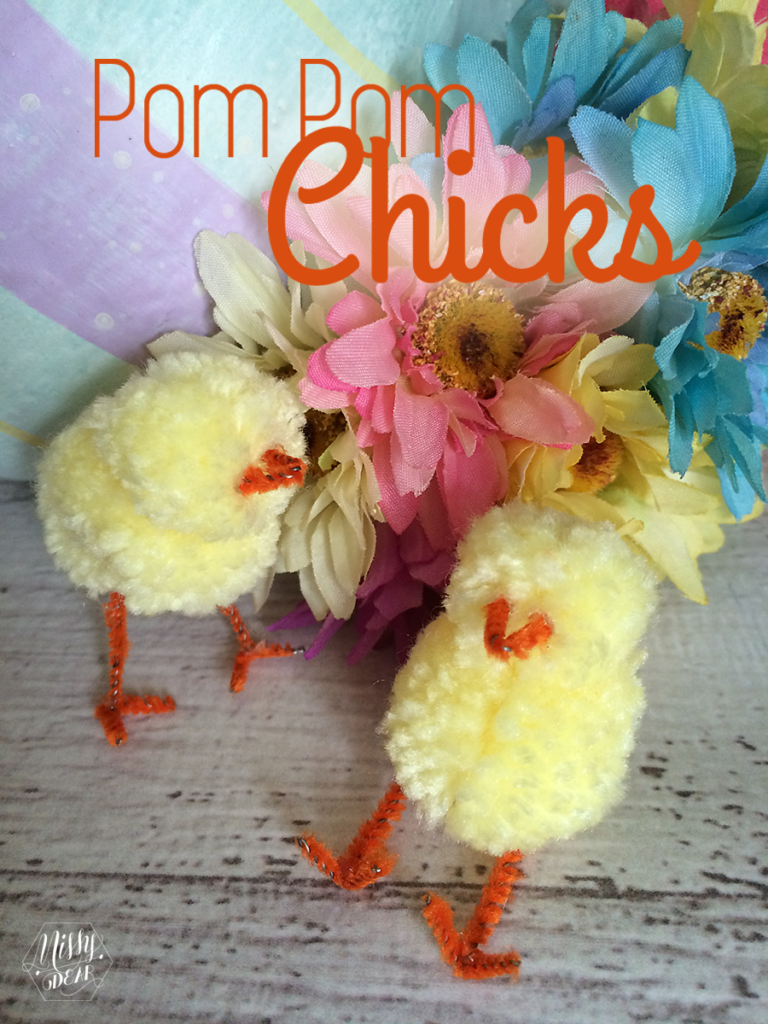
Who’s ready for Spring? I sure am. I’m hoping that by decorating for it, Spring will get the hint and stay a while. And these little chicks are the perfect fun and quick project to get started.
But first, let me introduce myself! My name is Missy and I blog at MissyDear. I’ve been blogging for about 5 years, but about a year ago I handed my first blog over to a friend that’s taking great care of it so I could put all my focus on my family, the MissyDear blog, and my handmade shop. I blog all about the crafts I’m doing, the food I’m eating and the fun I’m having with my family. I’m so excited to be part of the Reasons to Skip the Housework and to get to know you all a little better!
So, let’s get back to the adorable little pom pom chicks shall we? Have you ever made a pom pom? They are so quick and EASY! You may never buy them again.
All you need to get started is:
scissors
yarn
fork
thread (I used DMC floss so it would be a little bit stronger than sewing thread)
pipe cleaner

Now lets get started:
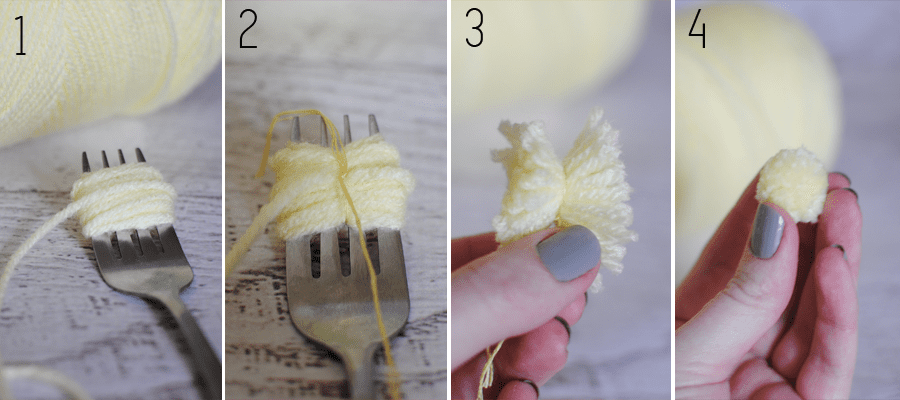
1 – Wind the yarn around the fork. The more you wind, the thicker and bigger your pom pom will be. For the chick you will want a small pom and a larger pom.
2 – Tie a piece of thread around the center of the yarn and pull it as tight as you can get it. The tighter you tie it, the less likely that pieces will fall out of the pom pom after it’s finished.
3 – Now just pull the yarn off the fork and cut the loops all the way around.
4 – To finish it up you give it a little “hair cut.” Trim all the way around until it’s all even and as small as you’d like it. Also “fluff” it a little near the thread you tied it together with to try and diminish the line as much as possible.

Now lets move on to the assembling of the chick:
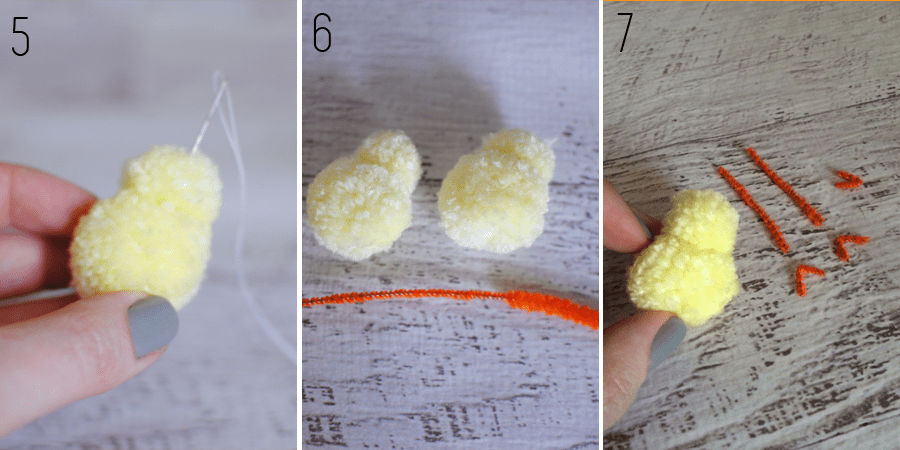
5 – Grab a large and a small pom pom. I sewed them together, but you could just glue them and save yourself time. Either way works just as well.
6 – Next I trimmed down my pipe cleaner so that the chicks little legs would be extra scrawny and cute. You can see in the picture the difference between where I trimmed and where I hadn’t yet.
7 – Finally cut the pipe cleaner into two legs, two sets of toes, and one beak and glue them to the chick. I don’t have a picture of the gluing, but you’r smart people and I’m sure you can figure it out 🙂
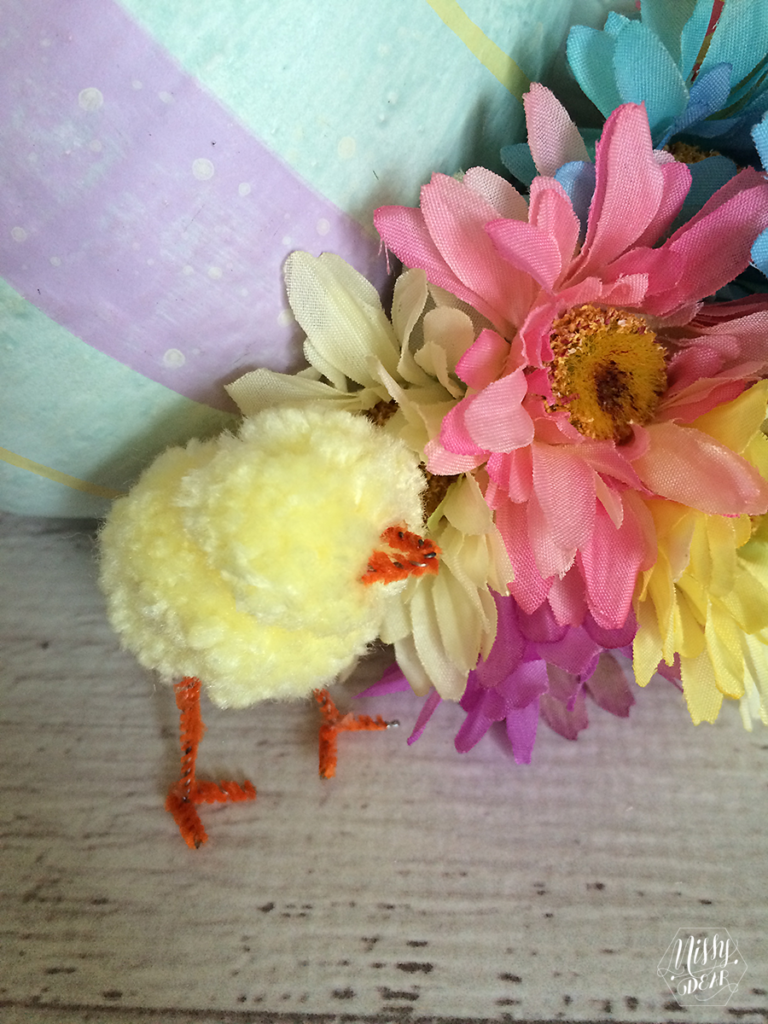
Viola!! You’ve now made yourself the most adorable and fluffy little chick. I’m sure it would look great in a center piece on your table.

Follow along on my blog or social media and make sure you tag me if you make yourself a little chick! I’d love to see it!!

Love these little guys Missy! Thanks for sharing such a great tutorial!
Thanks Melanie!
These are so cute! My kids would love to make these.
Aren’t the darling, Liz? She did a great job! Thanks for commenting friend!
Totally easy enough to do with the kids!
Thanks Liz! I think they’re pretty cute too 🙂
So cute, and seemingly not too difficult. Maybe I can try these with the kids for Easter.