Contents
11. Coffee gift card holder
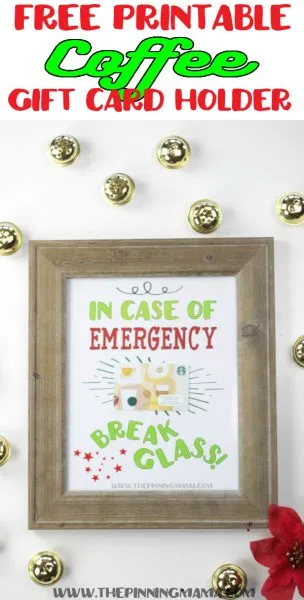
Run to your local dollar store, grab a frame, print out this darling printable (click the source below), and the gift is all done. Also, do not forget about the main piece of this creative gift card holder, the gift card.
Source: The Pinning Mama
Supplies
- “Break Glass in Case of Emergency” gift card holder template
- Double-sided tape
- Frame with glass, 8″ x 10″ or 5″ x 7″
Instructions
- Print the template, and trim to fit the frame.
- Add double-sided tape to the back of the gift card.
- Place the gift card between “emergency” and “break” on the template.
- Add the template with gift card to the frame.
12. DIY gift card envelopes
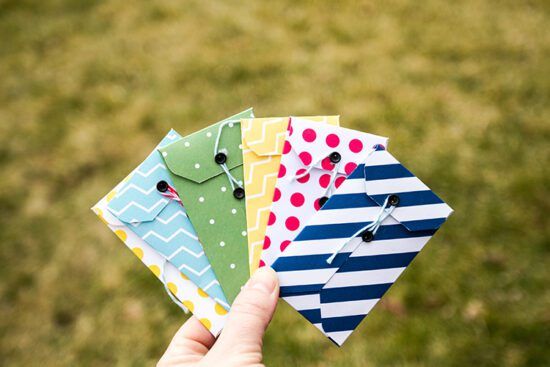
This is such a simple printable template that you use for creating a cute gift card holder. Also, this can turn into an elegant card holder, depending on the scrapbooking paper you use. Use this idea to give something more formal!
Source: Andrea’s Notebook
Supplies
- Scrapbooking paper
- Punch board
- Tape or glue
- Baker’s twine
- Brads
Instructions
- Cut the scrapbooking paper to 5 1/8″ by 5 1/8″.
- Line up the left edge of the paper to number 2 on the punch board. Punch out a wedge.
- Score the paper along scoring line A.
- Turn the paper 90 degrees to the left, lining up the score with the left-side score groove. Punch out a wedge.
- Score the paper along scoring line A.
- Repeat this rotate, punch, and score process with the other two sides of the paper.
- Cut three corners from the square, at 7/8″.
- Fold the large flaps onto each other, placing the flap with the uncut corner on top.
- Mark where the top flap overlaps the bottom flap, and cut off the point.
- Fold up the small bottom flap, and glue or tape the large flaps onto the small bottom flap.
- Add a brad to the top-most flap, and a brad in the center of the envelope. After you add the gift card, wrap baker’s twine around the brads to keep the envelope closed.
13. Date night gift card holder
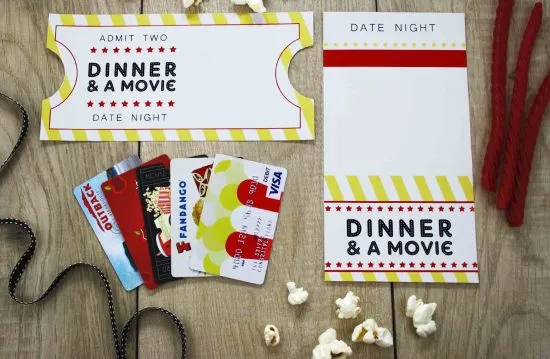
Getting someone multiple gift cards to use on a date night is such a wonderful idea! Not only will this certainly impress your loved ones, but it will certainly make their date nights too. This movie ticket date night is a lovely idea.
Source: Giftcards.com
Supplies
- White card stock
- Paper cutter or scissors
- Double-sided tape
- Downloadable print
Instructions
- Print the gift card holder downloadable print.
- Cut the gift holder out, following the trim marks.
- If you’re using the flat holder, use double-sided tape to attach the gift card.
- If you’re making the folded holder, flip it over.
- Score the card stock at 3-inches and 6 1/4-inches. This should create valley folds right above the yellow stripes and right below the red stripe.
- Fold the card stock along the scoring.
- Use double-sided tape to seal the outer edges of the “Date Night” panel, forming a pocket.
- Use the white space above the gift card pocket to write your note.
14. Monster gift card holder
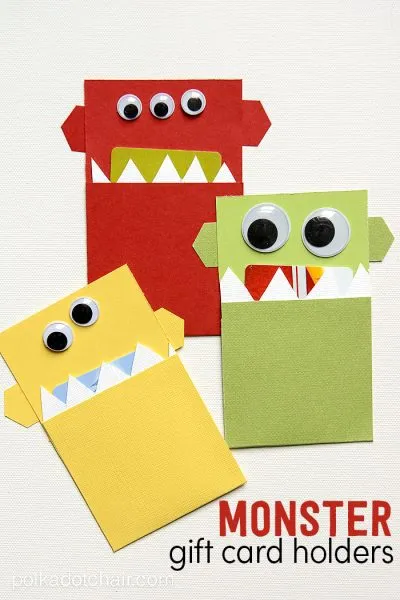
Such an easy-to-make creative gift card holder for someone special! In this way, you can present your gift card using supplies you probably already have in your crafting area.
Source: Polkadot Chair
Supplies
- 3″ x 8″ card stock
- Scrap of white card stock
- Pencil
- Googly eyes
- Double-sided tape
- Shaped paper punch
Instructions
- Score the 3″ x 8″ card stock on the long side at 3″.
- Fold the card stock up at the 3″ score.
- With the pencil, hand-draw zig-zags on the scrap piece of white card stock. These are your monster’s teeth.
- Cut the teeth along the zig-zag, leaving about half an inch of the bottom row uncut.
- Tape the teeth to the folded panel of the card stock using double-sided tape.
- Place double-sided tape on the outsides of the folded panel. Adhere it to the longer panel of the card stock, forming a pocket.
- Use your shaped paper punch to make ears for your monster.
- Add double-sided tape to the ears, and stick them to the back of the card stock.
- Finally, tape googly eyes to the gift card holder.
15. Cut-out shapes
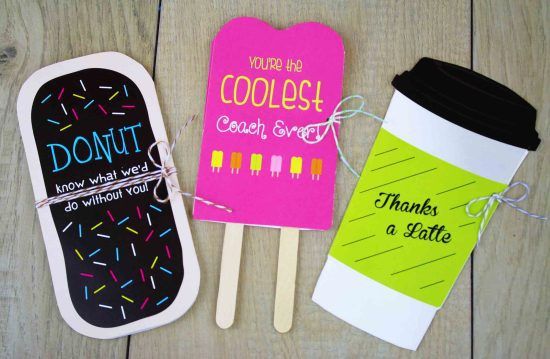
Another printable that you can transform into some cute items that will match the gift card inside of them. Just remember to keep the idea of your gift card, and the result will be amazing!
Source: Giftcards.com
Coffee cup gift card holder supplies
- 8 1/2″ x 11″ white card stock
- Scissors
- Ruler
- Bone folder
- Double-sided tape, glue, or glue stick
- Twine (optional)
Coffee cup gift card holder instructions
- Download the gift card holder.
- Print it on the card stock using the “best quality” and “actual size” settings.
- Cut the holder along the cup outline.
- Turn the holder over.
- Use a ruler and bone folder to score the cup’s midway point.
- Stick the gift card inside the holder with double-sided tape, glue, or a glue stick. You want to use enough to make the gift card stick but not prevent someone from removing the gift card.
- Optionally, tie the holder closed with twine.
Popsicle gift card holder supplies
- 8 1/2″ x 11″ white card stock
- Scissors
- Ruler
- Bone folder
- Double-sided tape, glue, or glue stick
- Popsicle sticks (optional)
Popsicle gift card holder instructions
- Download the gift card holder.
- Print it on the card stock using the “best quality” and “actual size” settings.
- Cut the holder along the popsicle outline.
- Turn the holder over.
- Use a ruler and bone folder to make two scores along the edge of the popsicles.
- Stick the gift card inside the holder with double-sided tape, glue, or a glue stick. You want to use enough to make the gift card stick but not prevent someone from removing the gift card.
- Optionally, cut the popsicle sticks off the gift card holder. Use glue to adhere actual popsicle sticks between the pink panels of the holder.
Donut gift card holder supplies
- 8 1/2″ x 11″ white card stock
- Scissors
- Ruler
- Bone folder
- Double-sided tape, glue, or glue stick
Donut gift card holder instructions
- Download the gift card holder.
- Print it on the card stock using the “best quality” and “actual size” settings.
- Cut the holder along the donut outline.
- Turn the holder over.
- Use a ruler and bone folder to make two scores at the rounded corners.
- Stick the gift card inside the holder with double-sided tape, glue, or a glue stick. You want to use enough to make the gift card stick but not prevent someone from removing the gift card.
16. Shirts gift card holders
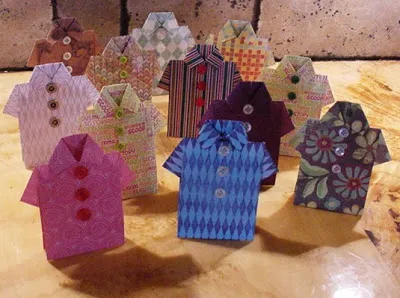
The options are endless with all the different scrapbooking papers out there. Also, you just need a pair of scissors, some paper, and a lot of patience and skill. You will want to follow the step-by-step process with pictures at the source below.
Source: LKC Designs
Supplies
- Scrapbooking paper
- Scissors
- Glue
Instructions
- Trim scrapbooking paper to 6″ by 12″ with the scissors.
- Fold the paper in half, and turn over.
- Unfold the paper, then fold the outer edges in toward the valley fold made in step 2.
- Fold down the top corners, forming the sleeves of the shirt.
- Turn over, and fold up the bottom of the paper about 3/4″.
- Turn over again, and fold the bottom corners toward each other, forming the collar.
- Fold the paper in half, and hook the collar over the front of the shirt. Turn over.
- Fold the bottom of the shirt up about an inch.
- Unfold the shirt so that the collar and the sleeves are at either end.
- Redo the middle three folds into two valley folds with a mountain fold in the center. This will allow the holder to stand upright.
- Place a gift card and note into the back of the shirt, between the sleeves.
17. Gift card holders for teachers and substitutes
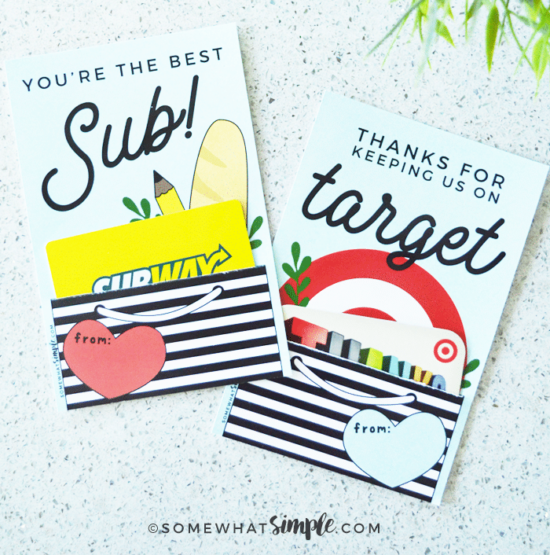
These printable gift card holders are quick and easy to make. All you need to do is print, cut, and add the gift card!
Source: Somewhat Simple
Supplies
- Paper cutter or scissors
- Tape
- Pen
Instructions
- Print the gift card holder.
- Cut a slit along the top of the striped bag.
- Slide the gift card into the slit, and use tape on the back attach it to the gift card holder.
18. Gift card bouquet
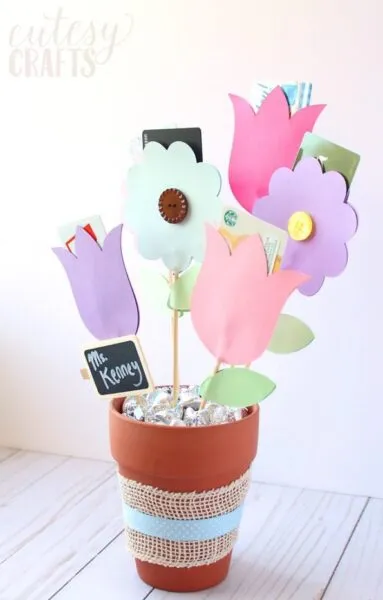
This is such a cute idea for giving multiple gift cards! The gift card bouquet makes a wonderful group gift, like from a bunch of parents to a teacher. You may not know exactly what your kid’s teacher is into, so why not give them options with this multiple gift card holder?
Source: Cutesy Crafts
Supplies
- Flower template
- Flower pot
- Wooden skewers
- Flora foam
- Card stock
- Adhesive
- Hot glue gun
- Glue sticks
- Candy or filler
- Buttons (optional)
- Ribbon (optional)
- Chalkboard tag (optional)
- Paint pen (optional)
Instructions
- Download and print the flower and leaf template.
- Trace twice as many flowers and leaves onto card stock as you are making. Each flower gift card holder uses two card stock flowers. Each leaf uses two card stock leaves.
- Using the hot glue gun, attach a skewer near the end of each flower.
- Add adhesive to the edges of the flower. Don’t add adhesive to the top of the flower.
- Attach a second card stock flower to the adhesive, sandwiching the skewer between two card stock flowers. Add a button if you like.
- Slide a gift card in between the card stock flowers.
- Repeat steps 2 through 6 as needed.
- Place flora foam into the flower pot.
- Add the assembled flowers, sticking the skewers into the flora foam.
- Hot glue one leaf shape to the skewers of your choice. Use adhesive to add a second leaf, sandwiching the skewer between the card stock leaves.
- Cover the foam with candy or filler.
- As desired, decorate the pot with ribbon and a chalkboard tag with the teacher’s name.
19. Easy paper tote bag treat holder
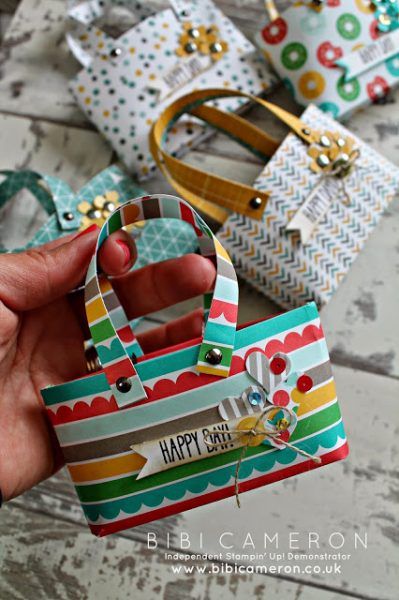
These little tote bags are so cute! This paper crafting project requires some skill and patience, but I believe in you!
Source: Bibi Cameron
Supplies
- 6″ x 6″ scrapbooking paper
- Paper trimmer
- Bone folder
- Scissors
- Double-sided tape
- Hole punch
- Four brads
Instructions
- Score the right edge of the paper at 1 cm.
- Cut a strip 2 cm wide, with the score in the center.
- Repeat steps 1 and 2, and set the scored strips aside. These will become the tote handles.
- Fold the paper rectangle in half, and crease with the bone folder.
- Score the folded paper 1 cm in from the fold and the opening.
- Open the folded paper and create a mountain fold between two valley folds with the three central scores. This forms the tote bottom.
- Fold down the edges at the opening of the tote, along the 1 cm score lines.
- Snip the scores at the bottom of the tote, about 1 cm deep, on both sides.
- Fold in the tabs you’ve just created on the bottom of the tote.
- Turn the tote over, and add double-sided tape on the outsides of the right panel. you want the tape to go all the way to the top and all the way to the bottom.
- Remove the backing, and adhere the edges of the sides of the tote together.
- Add dots of glue to each tab inside the tote, and adhere the tabs to the inside walls of the tote. Let the glue dry.
- Use a hole punch to create holds along the tops of the tote.
- Fold the 2 cm wide strips in half along the score.
- Use the bone folder to crease the strips until they curl.
- Punch holes in the ends of the curled strips.
- Use brads to attach the curled strips as the tote handles.
- Decorate the totes as desired.
20. Tool belt gift card holder
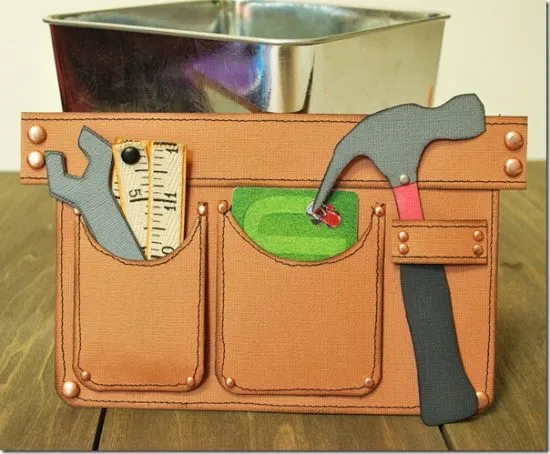
There aren’t any step-by-step instructions available, so we took our best guess at how to make this super cute gift card holder. Feel free to play around with it, and put your personal touch on it!
Source: Examined Life
Supplies
- Brown card stock
- Gray card stock
- Black card stock
- Gray card stock
- Yellow card stock
- Pencil
- Ruler
- Black pen or marker
- Scissors
- Double-sided tape or glue
- 6 large adhesive metal dots
- 13 small adhesive metal dots
- Measuring tape ribbon
- 2 brads
Instructions
- Use a ruler and pencil to measure out and draw a large rectangle on the brown card stock. Cut the shape out with scissors. This will be the back of the tool belt.
- Use a ruler and pencil to measure out and draw two smaller rectangles on the brown card stock. Cut the shapes out with scissors. These will be the pockets of the tool belt. Make sure at least one of these shapes will be wide enough to fit a gift card behind.
- Cut semi-circles out from one end of the smaller rectangles.
- Use a ruler and pencil to measure out and draw one long, wide rectangle and one small rectangle from the brown card stock. Cut the shapes out. The long, wide rectangle will be the top of the belt, and the smaller rectangle will be the hammer loop.
- Using the black pen, draw seams on the brown card stock shapes.
- Use a ruler and pencil to measure out and draw three rectangles, about 4″ long and 1″ wide, on the yellow card stock. Make sure it is wide enough to fit the measuring tape ribbon. Cut the rectangles out.
- Draw a wrench on the gray card stock. Cut the shape out with scissors.
- Draw a hammer on the gray card stock, and use scissors to cut it out.
- Use the gray hammer as a guide for the pieces you’ll need from the red and black card stock. Trace around the handle of the gray hammer on the black card stock. Cut the handle out with scissors.
- Trace around the neck of the hammer on the red card stock. Cut out the neck with scissors.
- Use double-sided tape or glue to attach the black handle and red neck to the gray hammer.
- Use glue or double-sided tape to assemble the belt, making sure to not glue the hammer loop or pockets closed.
- Cut the measuring tape ribbon at 4″, 8″, and 12″. Tape or glue it to the yellow card stock pieces. Use two black brads to connect the pieces.
- Add the adhesive metal dots.
Hey Melanie,
Great product, such a great idea instead of the regular gift card wrappers. Can be used more than once.
love these cute gift card holders!! I wanted to share with everyone if your are looking to save money check out gift card granny! It would be awesome to use the discounted gift cards in these cute holders!
Good afternoon,
How do I obtain instructions for the items in this post? Especially the tote bag?
Please email me
Thank you
Judy Johnson