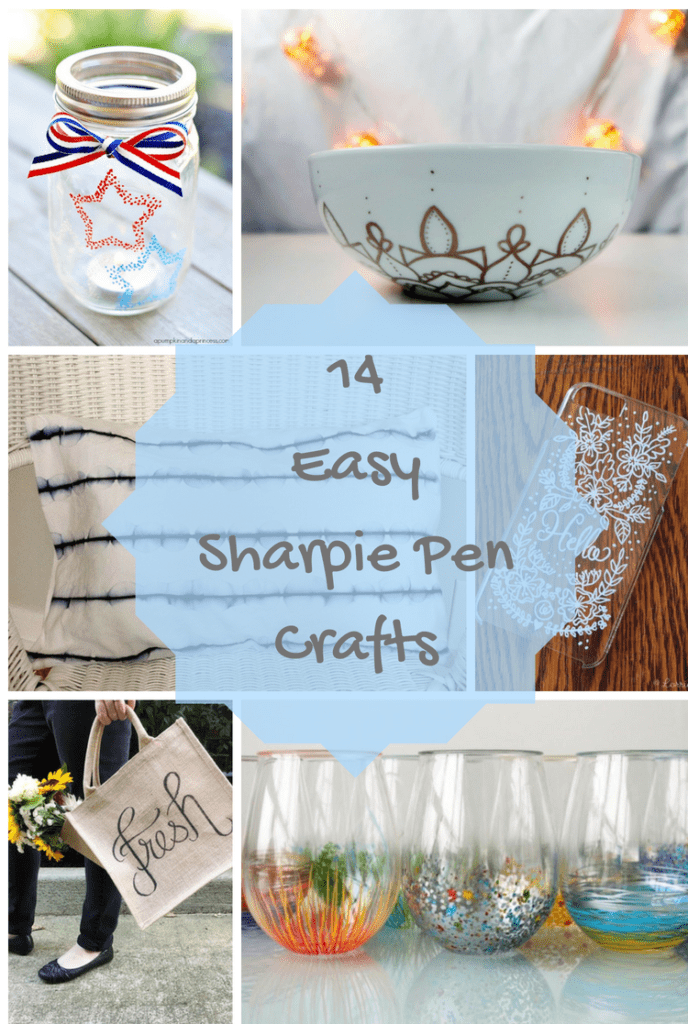
Just about everyone is familiar with Sharpies, those familiar markers that are just so handy to use. There are 5 common Sharpie tips – fine point, ultra fine point, extra fine point, chisel tip, and super permanent marker (a bold tip).
Did you know that you can use Sharpies to make awesome and useful DIYs? There are so many amazing projects out there, you’ll want to start them all at once!
Contents
- DIY Sharpie Pillow
- Sharpie Mandala Bowl
- Personalized Sharpie Phone Case
- How to Make an Easy Hand Lettered Tote
- DIY Minimalist Wrapping Paper
- “Hand-Painted” Silk Scarf
- Confetti Star Mason Jar Lanterns
- Use Dollar Store Vases To Create Outdoor Lighting
- DIY This Gold Quote Planter then Make This Geometric Planter
- Add a Pop of Color to Your Glassware!
- Tile Coasters Using Sharpie Markers and Alcohol Inks
- DIY Canvas Art with Sharpie
- DIY Tank Top & How-to Create a Snakeskin Print with Sharpies
- Personalized Doormat in 10 Minutes!
DIY Sharpie Pillow

Have a little spot on your almost new pillowcase? This is a simple and super cute way to cover it up, or just make a new design! You’ll need rubbing alcohol, sharpie, and a medicine dropper or Q-tip.
All you need to do is draw on your pillowcase. The author made straight lines with a ruler, but you can make anything you’d like. Then you drop the rubbing alcohol on the lines to make these faded designs in a pattern.
You don’t need to stick to pillowcases. You can do this to tshirts, kitchen towels, curtains…anything fabric!
Sharpie Mandala Bowl

Among other things, mandalas are used in both Hinduism and Buddhism as a form of meditation. They are having a bit of a moment in Western culture as adults have rediscovered coloring as a way to achieve calmness and a peaceful mind. Of course, mandalas are far, far more than “coloring” and often represent things like the universe or deities. Whenever doing a DIY inspired by another culture, it’s a good idea to take some time to learn about its meaning and the cultures they originated from.
Usually, with DIY projects, people like to finish quickly and efficiently. With this project, it’s important to set aside as much time as needed. The more time you spend on your mandala, the better it will be.
All you need for this project is a bowl, a copper-colored sharpie, and clear varnish. You could make this with different colored bowls (like black) or with multiple colors!
Personalized Sharpie Phone Case

Personalized phone cases are expensive to order online. Make a unique gift for someone by ordering an extremely inexpensive plain phone case and decorating it with a Sharpie!
If you’re not feeling confident in your lettering abilities, you can buy stencils online at places like Amazon. You can also practice first by taking an online class in lettering or buying a guide to lettering like this one. Lettering is a fun and useful skill to learn because you can decorate just about anything with just a sharpie to make it look personalized and expensive!
How to Make an Easy Hand Lettered Tote

Speaking of lettering, this tote bag project is another great example of how to make a simple lettered project look like you bought it at a fancy store.
The tote bag is made of jute burlap – you can find several kinds online on Amazon or you can often buy them at craft stores like Michaels.
Be sure to place cardboard inside the tote, otherwise, the sharpie color will bleed through to the other side of the bag. What’s nice about jute burlap is that you can write your design in pencil and even erase and fix it before tracing over it with Sharpie.
DIY Minimalist Wrapping Paper

You might think this is a silly way to make nice wrapping paper, but stores like Papyrus sell wrapping paper that looks like it was hand drawn.
Wrapping paper actually used to be handmade and decorated for most of human history, and we think it just looks more thoughtful than the storebought kind! This project uses paper bags from the grocery store and plain twine. It is decorated in repetetive abstract designs in black Sharpie.
“Hand-Painted” Silk Scarf

This is a super fun way to make a beautiful hand-designed silk scarf for yourself or a gift. The author bought a plain scarf at DharmaTrading and drew a simple flower pattern on it. The nice thing about this project is that there’s no reason to draw well! You can just doodle flowers or even an abstract pattern and it’ll soften and fade out after you apply the rubbing alcohol.
Once the initial softening and fading is done with rubbing alcohol, you can go back with your sharpies and add some sharper detailing over it to make it more complex and interesting to look at.
Confetti Star Mason Jar Lanterns

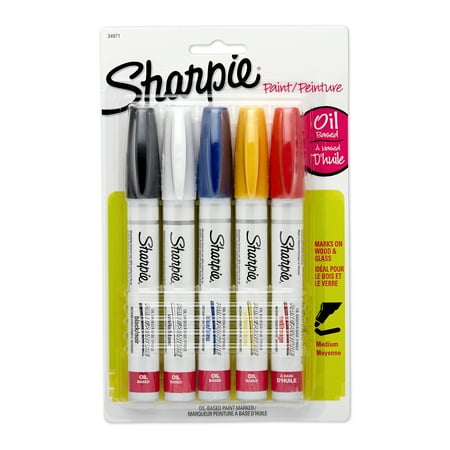
This project uses Sharpie paint markers to create gorgeous star patterns on the outside of mason jars. The paint markers are great because they provide opaque and rich color but dry almost instantly. They’re a much better option for kids than paintbrushes because they cause far less mess.
To do this project, you need some paper stars as a kind of stencil (the author uses a star punch from the scrapbooking section of the craft store.) Instead of tracing around them, use paint markers to make little dots in an even pattern around the stars. Once the paint has dried, you can tie a ribbon around the mouth of the jar or come up with other ways to decorate.
Place a flameless led candle inside at the end to make beautiful lanterns for the garden or backyard!
Use Dollar Store Vases To Create Outdoor Lighting

The little solar stake lights that people use to illuminate their walkway at night are an awesome recent invention, but they aren’t very interesting in terms of decoration. This project is so cool, because it uses dollar store vases and the tops of the solar light to make decorative outdoor lighting!
On the dollar store vases, the author used Sharpies to create a sort of abstract flower pattern, but you could do any design you wanted! Then she took the tops off of the solar stakes and put them on the vases instead. Voila! A chic, fun way to illuminate and decorate your walkway or stairs at night!
DIY This Gold Quote Planter then Make This Geometric Planter

This is an amazing way to make expensive looking planters for cheap! Succulents in planters with a little quote or decoration can be so expensive, but it’s really trendy right now and everyone wants to have one.
Simply take a plain clay planter and spray paint it to make a nice white (or other color) finish that looks like ceramic. Be sure to paint, dry, and paint again at least 3 times to make a really nice exterior.
You can use tape to make guidelines to write your quotes on the outsides using Sharpie paint pens. This one looks like copper, but any color would work! You could also free hand an abstract design on the outside.
Plant your succulents and enjoy!
Add a Pop of Color to Your Glassware!

This project needs exactly two items:
1. Stemless acrylic wine glasses (hot tip: place like Walmart and Target often have these cheap online!)
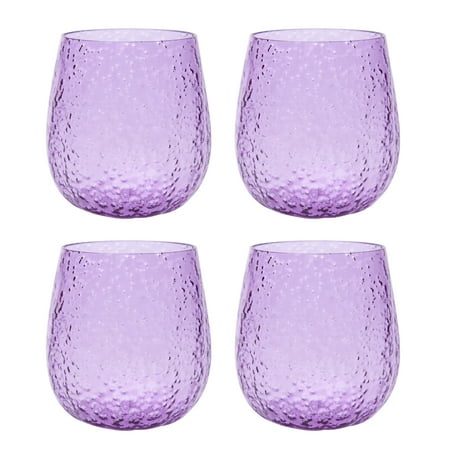
2. Sharpie paint pens
Just make dots starting at the base of the glass and move up, saturating the glass with dots, about an inch. Change paint colors and add a few accent dots and you have a super cute glass!
The stripe glasses are just as easy. Slowly draw paint lines around the glass from the base with one of your colors. Then stop and use a second color and so on. That’s it!
Finally, for the firework starburst style, you start at the bottom of the glass and draw lines upwards about a third of the way to the top of the glass. Change colors again and quickly have an elegant and colorful wine glass for your next party.
Tile Coasters Using Sharpie Markers and Alcohol Inks

This is an easy project that makes a cute gift or use it to serve drinks on your back patio in the summer! Start with plain ceramic tiles. Use sharpie markers and rubbing alcohol – draw just about anything with your various sharpie then use a dropper to drop the alcohol on top to make a marbled pattern. The words are vinyl stickers, or you could use a black Sharpie and your lettering skills, or just leave them plain. Seal and finish the tiles with a clear spray paint. Finally, add cork to the back of each tile with a hot glue gun, so the tile doesn’t scrape up the table or countertop.
DIY Canvas Art with Sharpie

They sell canvas pop art at Target, IKEA, and Pier One, but there’s absolutely no reason for you not to make your own at a fraction of the cost! Purchase a plain painting canvas at an art store or online. Then create a design with regular Sharpies.
Create a pattern with one color on the background like the silver dots or you could do diagonal lines, tiny dots, or an abstract pattern. Then print out a shape you like, like the stag head in this example. Carefully trace it in pencil and go over it with a Sharpie marker. You may need to go twice to get good coverage!
DIY Tank Top & How-to Create a Snakeskin Print with Sharpies

This DIY is going to change your life! No more splashing out financially on tank-tops that cost extra for cute patterns or neat quotes or images. Yes, Sharpie makes special markers just for fabrics that resist fading in the wash.
In this tutorial, the author actually makes the tank top too, out of a plain white t-shirt. Wow!
She placed lace on top of the fabric and lightly ran the Sharpie over it to make a surprisingly cool snakeskin design. She made a few of the spots darker, just like real snake skin, then used the yellow marker to add a few spots here and there. So cool, so easy!
Of course, you can use your stained markers on any plain tank top or t-shirt to draw a pattern, draw a shape like the stag head on the canvas DIY above, or write out a neat quote.
Personalized Doormat in 10 Minutes!

Yes, you can make this doormat. Personalized doormats are expensive and you also need to wait at least a week for shipping. Best of all, you use a stencil, so no need for any special artistic skills!
Simply buy a plain doormat (or the author ordered one with a greek border in this project). Then use 6″ stencils to write a last name, house number, “welcome”…anything you want. Use a heavy black Sharpie to color in the letters or numbers and you have your very own personalized doormat! From deterrents, repellents, killer sprays, to even traps and poisons, we cover a variety of pest control methods. In addition, we write about various natural ways of repelling and deterring pests, such as using regular household and kitchen items to your benefit. The average homeowner spends between $250-300 a year on pest control products (whether on DIY products or on exterminators), and we believe you can cut this cost significantly simply by being better informed about pests and pest control in general. #pesthit #how to get rid of pests #reviews #pesthit.com #pest control
Wow, who knew there were so many projects you can make with a Sharpie. If you can draw on it, you can DIY it!
Last update on 2026-06-17 at 08:24 / Affiliate links / Images from Amazon Product Advertising API
How do these hold up? I’ve heard mixed reviews on the permanent staying power! Thanks!
Ashley,
I’ve heard the same thing- and recently read somewhere that if you bake them hotter (450) and leave in the oven until totally cool- you might have better results. I’m going to try it out and will share results on the blog!
i did this EXACT process…and i went to wash the mugs to see if it worked and the sharpie takes VERY little effort and will wash off in the 1st try..i wish someone would come up with a way to ACTUALLY make this stick
SO cute! These would be fun to do in the colored Sharpies too!
I am so disappointed. My Sharpie wiped right off!!