Making a princess doll cake isn’t as hard as you’d think it is to make. It’s definitely a time consuming process, but anyone can make a princess doll cake. It’s just a matter of layering and trimming! To make your Princess Doll Cake you’re going to need:
(affiliate links below : Basically, buys me a cup of coffee if you’re going to buy it anyway!)
6 inches of cakes, various sizes (Wilton 9″ cake pans)
1 medium bowl cake (Glass Mixing Bowl)
frosting (small tubs or a large decorator icing tub)
frosting tips (#48 is the one I used for the top of the skirt)
When I say you’ll need 6 inches of cakes – basically, you’ll need a combination of that. I chose to do 4 cakes using 9″ x 1.5″ pans. I also used a medium glass bowl to bake one cake. FIVE cakes in total, unless you use a 2″ pan.
Bake all of your cakes and cool completely. YES, you’ll actually bake one entire cake in your glass bowl. Make sure the bowl you use will fit on top of the other cakes, and if it is a tiny bit wider or skinnier, you can just trim with your knife. Find a piece of cardboard to cover with wax paper. I put down no slip shelf liner under the cardboard so she wouldn’t slip around when I moved her.
Place your first cake on the wax paper. Use a serrated knife to carefully cut off the top of the cake, making it a flat top.
Then, add a thin layer of frosting. Top with another cake and continue to trim off the top of the cake and frost until you get to the last (bowl) level.
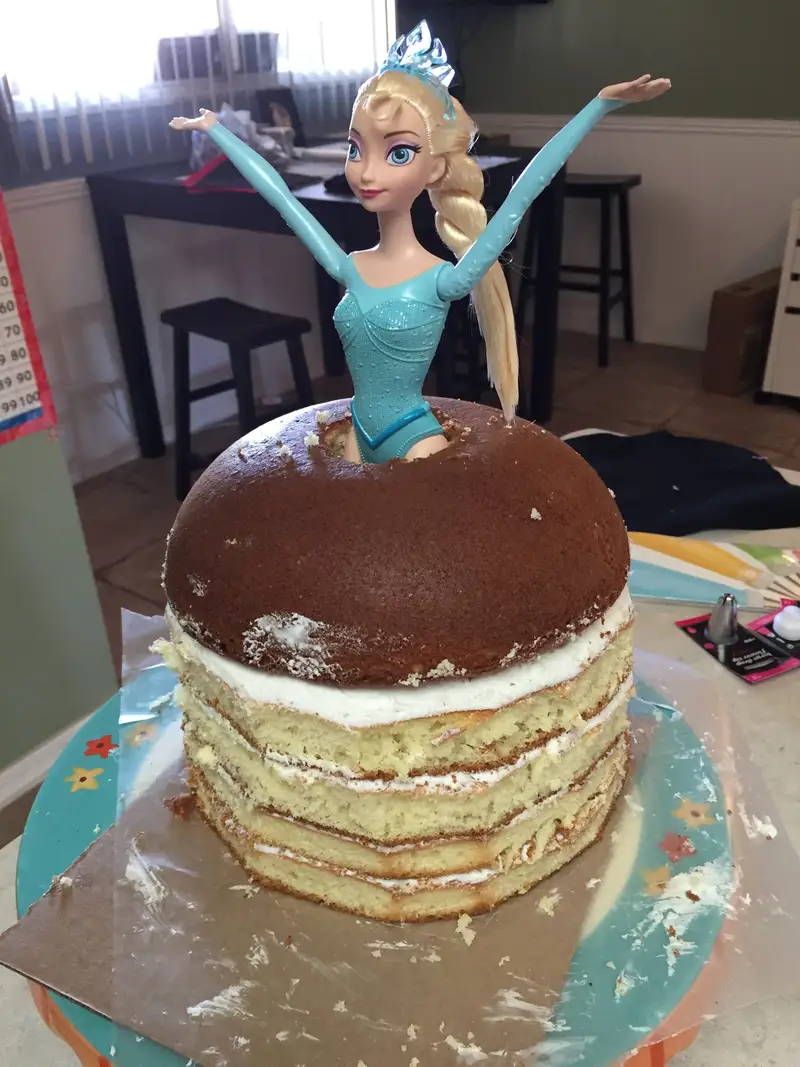
Place the bowl cake on top of the last layer of frosting. 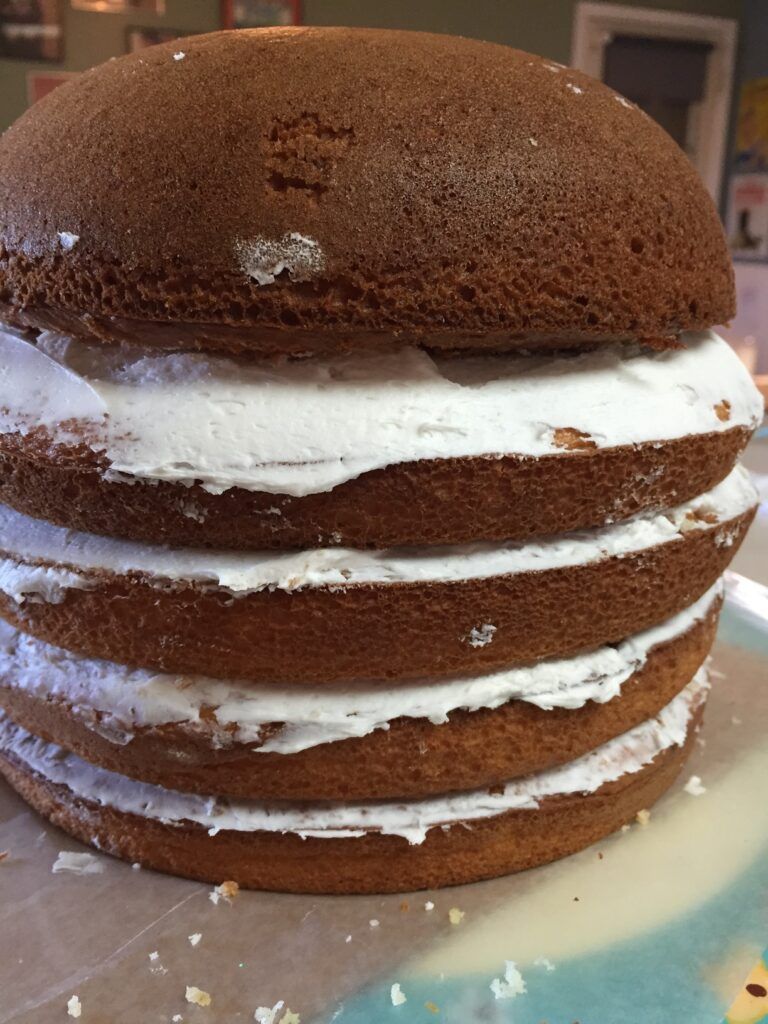
With a serrated knife, trim off any excess cake that isn’t even with the edge of the bowl cake. I didn’t have to do as much trimming as I’d thought I would have to!
You’re going to frost the cake first with a thin layer of white frosting.
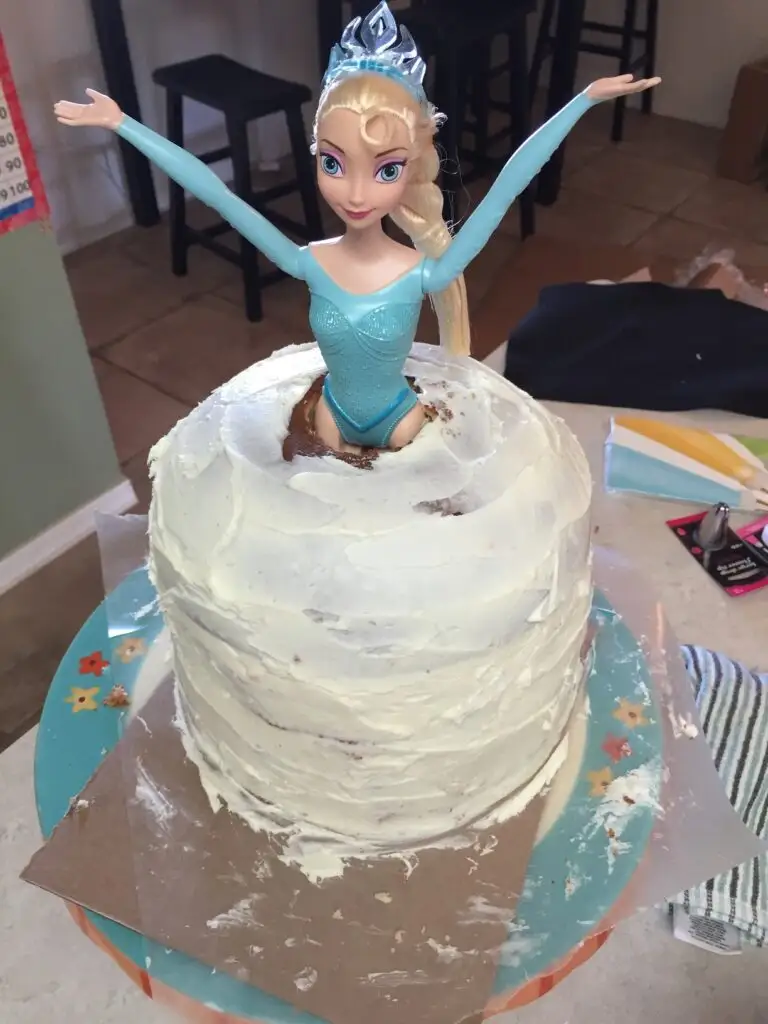
No need to color this layer. It’s the “crumb layer” because it won’t be pretty and that’s ok!
Spin the cake stand around as you frost the entire cake with this thin layer.
Next, color your frosting whatever color you want. Frost the cake top to bottom with generous amounts of your colored frosting.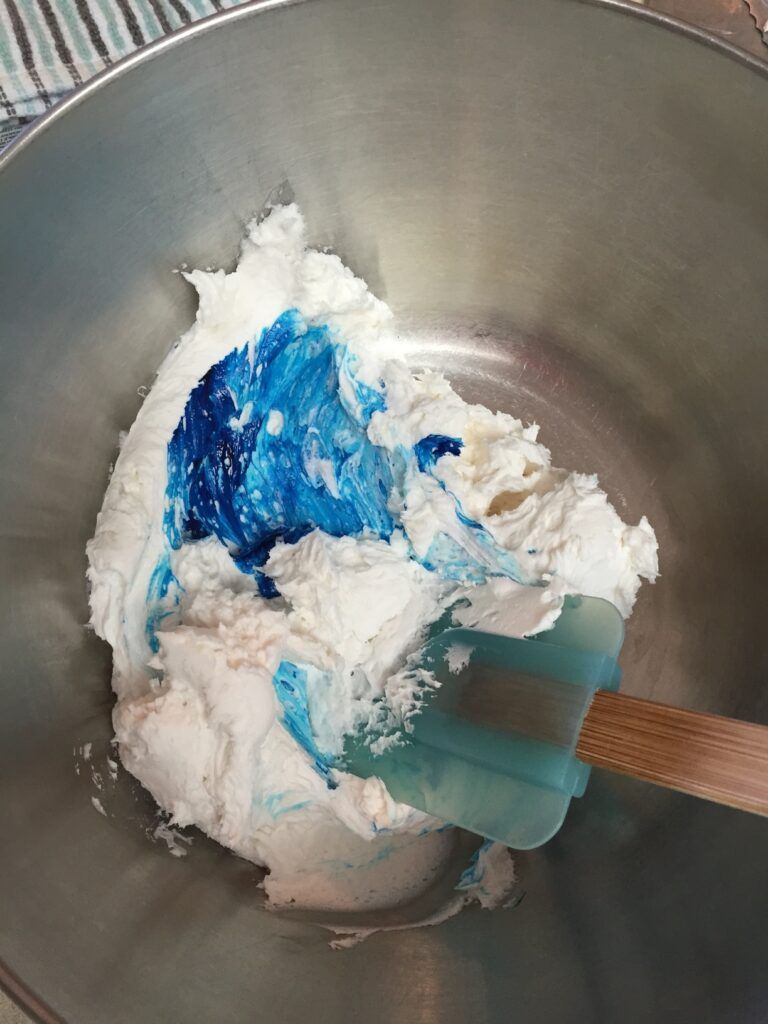
To fill in the gap between the doll and the cake at the waistline, you’ll use frosting in a bag with a wide tip.
Take a peek at the video below to see what I did!
Use a frosting bag with different tips to make various decorations on the dress.
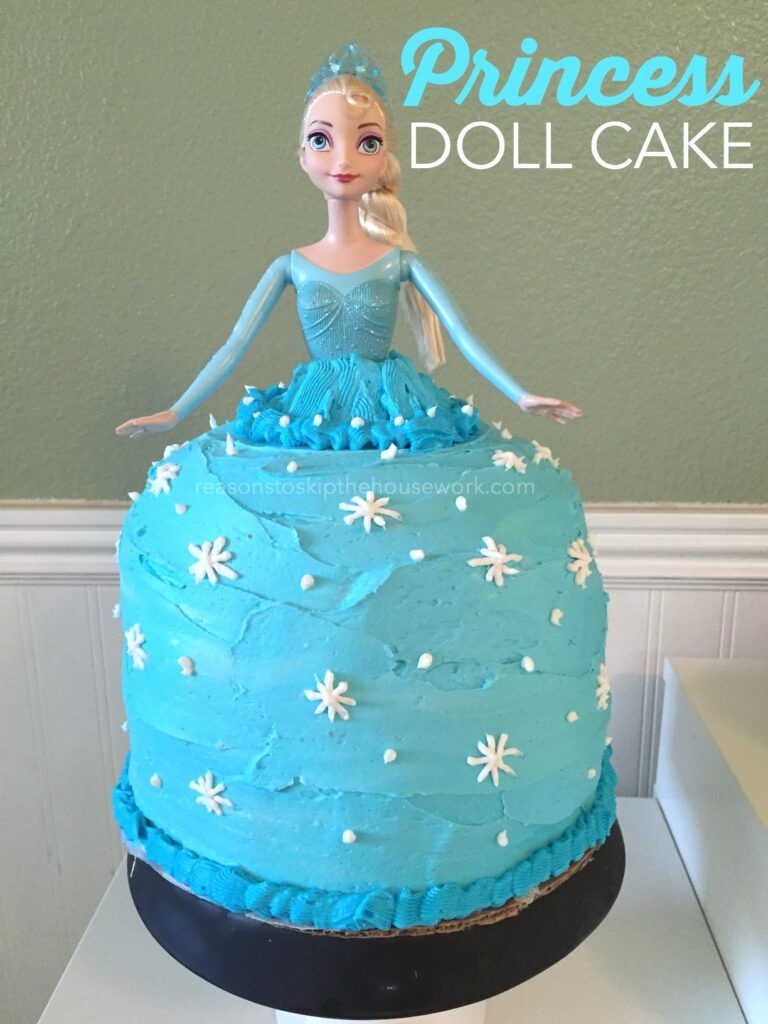
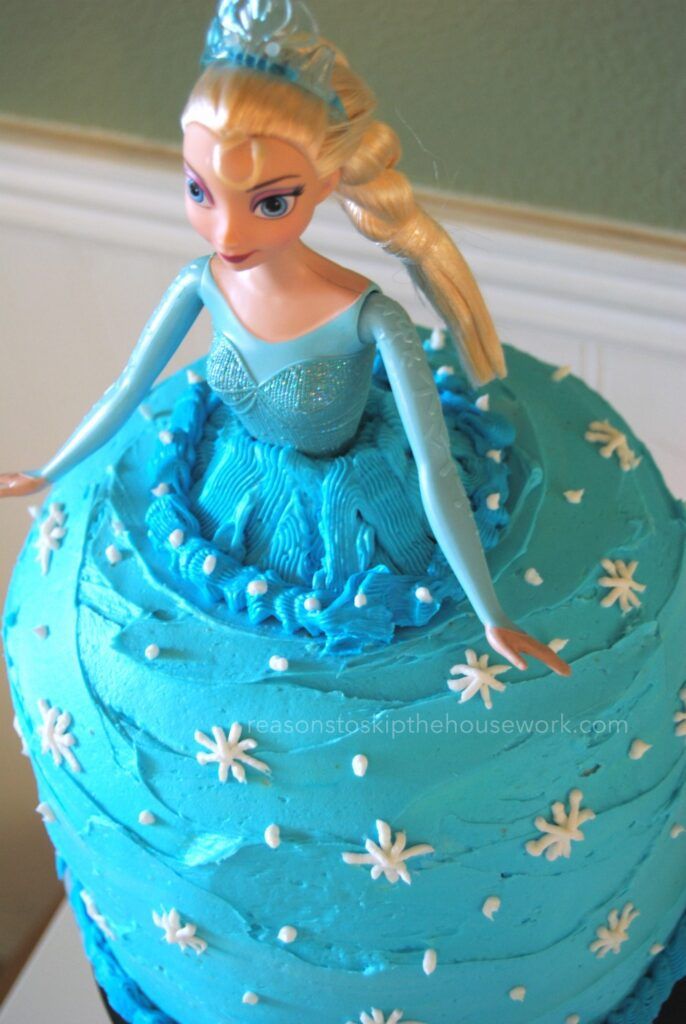 Your Princess Doll Cake is now ready for the party! It’s really not a hard process, just time consuming.
My daughter and I loved your Elsa birthday cake. I love making birthday cakes … I remember making an ice cream version of the princess cake, it was great fun! Thanks for sharing 🙂
so happy to hear this! It was a blast to make and so fun to see how much she liked it! Ice cream in the middle sounds amazing!