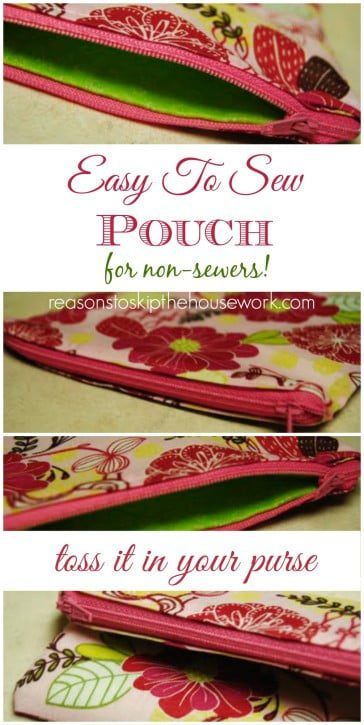
When I stumbled upon this tutorial over at See Kate Sew, it looked easy enough—even for a complete sewing newbie like me. And guess what? It actually was! If I can make this Easy Zipper Pouch, you definitely can too!
Not only is this pouch a super simple project, but it also makes for a thoughtful handmade gift. I originally made one for my mom, but now I think I’ll whip up a few more to have on hand—because you never know when you’ll need a last-minute gift (or a cute way to organize your stuff).
So, if you’re ready to tackle a beginner-friendly sewing project, let’s dive in!
Contents
What You’ll Need 🧵
To make your Easy Zipper Pouch, grab these materials:
- Four fabric pieces (each measuring 6 1/2″ tall by 8″ wide):
- 1 front piece
- 1 back piece
- 2 lining pieces
- One 8” zipper
- Pins (lots of them if you’re like me)
- An iron (because neat edges make everything look pro)
- A sewing machine (or superhuman patience for hand-sewing)
Optional: If you want to get fancy, you can add a label before you start. Kate did it in her version, but I skipped that part—keeping things as easy as possible.
Step-by-Step Instructions ✂️
Step 1: Attach the Zipper
Start by laying your zipper face down on the front fabric piece. Then, sandwich it by placing one of your lining pieces on top. This means your front and lining pieces should be right sides together, with the zipper in between.
If you’re a beginner like me, pin the heck outta that thing! The more pins, the better—trust me.
Now, sew a straight stitch ¼” from the edge.
Step 2: Press and Topstitch
Once you’ve sewn the zipper in place, open up the fabric and press the edge smooth with an iron.
To give it a polished look (and prevent the fabric from getting caught in the zipper), topstitch close to the edge of the zipper.
Now, repeat the same process with the back piece and second lining piece—attaching them to the other side of the zipper.
Press the edge with the iron again, and topstitch along the zipper like before.
Step 3: Sew the Sides Together
At this point, you should have a zipper in the center, with your front and back fabric pieces on one side and your lining pieces on the other.
VERY IMPORTANT: Open the zipper before moving forward. Otherwise, turning it inside out later will be a nightmare!
Next, pin the front and back pieces right sides together and the lining pieces right sides together.
Tip: The ends of the zipper should be pinned toward the lining pieces. This helps it lay flat inside the pouch.
(I got so caught up in the excitement that I forgot to take pictures at this step—oops! But trust me, it’s coming together!)
Step 4: Sew It Up!
Sew around the edges with a ½” seam allowance, but leave a small gap at the bottom of the lining. This will allow you to turn the pouch right-side out.
Step 5: The Big Reveal
Carefully turn your pouch right-side out through the gap you left in the lining. Use your fingers (or a blunt tool like a chopstick) to push out the corners neatly.
Now, sew the opening in the lining closed with a straight stitch.
Finally, stuff the lining down into the pouch—and voilà! You’ve just made an adorable zipper pouch perfect for lip balm, money, keys, or anything else you need to stash away.
Final Thoughts: It’s Easier Than It Looks!
I can’t believe I actually made this myself—and if I can do it, so can you! This Easy Zipper Pouch is great for beginners, a fun way to use up fabric scraps, and a perfect handmade gift for just about anyone.
Looking for another fun and easy craft project? Check out this Personalized Canvas Bags—because sometimes, no sewing is even better than easy sewing! 🎃✨
Now go grab some fabric and get stitching! Happy sewing!
What an incredibly easy and fun tutorial! I'm not a sewer, but I think this is a great beginner project to start with 🙂
Your tutorial is very well done! Even inspires me to make those. I bet my granddaughters would love them, and I could use a new one too!
You write a wonderful tutorial! Thank you so much! This will be a great project to use up some of my stash!
Hi! I'm visiting from Born 2 Impress Blog Hop! I'm so glad to have found you. I'm your newest follower. 🙂
Mandy
You make that look so easy! And what FUN fabric choices! 🙂
Thanks so much for linking up to the very first Fun-day Friday!
~Bec 🙂
Excellent tutorial!I am your new GFC, FB and Twitter follower from friendly Friday 🙂 You are welcome Thank you!
Thank you for teaching me how to do this! I have owned a sewing machine for 10 years now and have made nothing but pillows and drapes. I need visuals to learn and this was perfect! I can't believe how simple!!
Jen
These came out GREAT! I have these on my list for my next sewing project (from See Kate Sew's tutorial as well, lol) and I can't wait. I'm glad to see yours came out so great, bec/ I have a fear of sewing with zippers!!! Great job
love it:)
I need to make one of these! Come and join my linky party
How cute is this… I am making two of them for my girls. Cute, cute, cute!
That is so adorable! Thanks for linking this up to our Wicked Awesome Wednesday blog party.
What a cute little pouch and a fun tutorial too! Thanks so much for sharing it — especially how to get that zipper in!
Great tutorial, thanks for linking it up! I loooove the fabrics you used <3
loved your nice tutorial for the pouch lovely colors of fabric also!
KAT
Super cute. I love the fabric choices 🙂
Nice job and a good tutorial! I like pouches but I am always having trouble with zippers. With this tutorial I might give it a try. Thank you
I’m so glad the tutorial worked for you! I know that I certainly couldn’t have done the zipper without a tutorial. I’m horrible with my sewing machine!
Very clear instructions with pictures, will try these thank you. GB
Thanks a lot for the feedback, Jenny! Means a lot!