Valentine’s Day is a favorite holiday for sweet treats. We’ve rounded up 30 lovely and delectable recipes to make for the special people in your life.

The sweetest Valentine’s Day treats to make for your loved ones
Whether you’re attending a gathering or a special night for two, these treats promise to make your heart beat faster. We’ve included gluten-free and vegan recipes. Follow these recipes step by step and satisfy that sweet tooth this Valentine’s Day.
Use the links below to jump to recipe:
Contents
- The sweetest Valentine’s Day treats to make for your loved ones
- 1. Chocolate dipped strawberry cupcakes
- 2. Smarties mini parfaits
- 3. Strawberry lemonade cake bites
- 4. Oreo truffle Valentine’s hearts
- 5. Gluten free salted butterscotch truffles
- 6. Strawberry cheesecake parfait
- 7. Strawberry brownies
- 8. Gluten free red velvet waffles
- 9. Easy strawberry white chocolate chip cookies
- 10. Heart-shaped sugar cookies (paleo)
- 11. Cherry heart pies
- 12. Raspberry sherbet party punch
- 13. Valentine’s Day M&M’s cookies
- 14. Strawberries and cream cupcakes
- 15. Chocolate-covered pretzels
- 16. Strawberry lemon rice crispies (gluten free)
- 17. Chocolate kiss cookies
- 18. Strawberry brownie dessert kebab
- 19. Chocolate lava cake
- 20. Chocolate peanut butter Valentine’s hearts
- 21. Apple tart (vegan and gluten free)
- 22. Chocolate chip cookie dough Valentine’s hearts
- 23. Valentine’s heart macarons
- 24. Heart-shaped churros
- 25. Cabernet chocolate truffles
- 26. Red velvet cookie pops
- 27. Easy no-bake creme brulee
- 28. Cherry chocolate chip pie
- 29. Cupid’s cloud
- What are your favorite Valentine’s Day recipes?
1. Chocolate dipped strawberry cupcakes
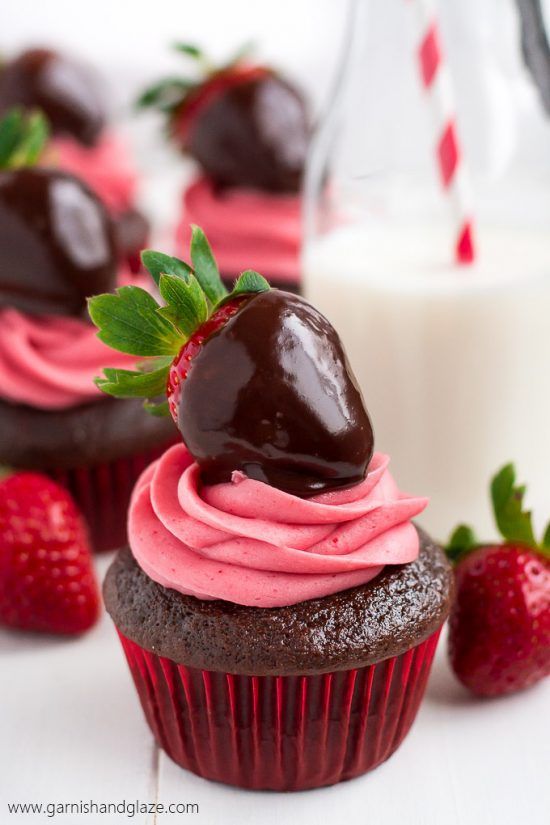
Chocolate cupcakes topped with chocolate covered strawberries are sure to win over people of all ages this Valentine’s Day. Grab some strawberries, plenty of butter and sugar, and lots of chocolate, and get ready to make hearts melt with this delectable treat!
Prep time: 25 min
Cook time: 15 min
Total time: 40 min
Servings: 15
Source: Garnish and Glaze
Cupcake ingredients
- 1 1/2 cups flour
- 1/2 cup granulated sugar
- 1/2 cup brown sugar
- 3/4 teaspoon baking soda
- 1/4 teaspoon salt
- 4 tablespoons butter
- 2 ounces semi-sweet baking chocolate, chopped
- 1/4 cup cocoa powder
- 1/2 cup boiling water
- 1/2 cup buttermilk
- 1/3 cup sour cream
- 2 eggs
- 1 teaspoon vanilla
Frosting ingredients
- 1/2 cup butter, softened
- 4 ounces cream cheese, softened
- 1 1.2 ounce package freeze dried strawberries
- 2 1/2 to 3 cups powdered sugar
- 1 teaspoon vanilla
- 1-3 teaspoons heavy whipping cream, or milk
Ganache ingredients
- 4 ounces (about 2/3 cup) semi-sweet chocolate
- 1/2 cup whipping cream
Garnish
- 15 strawberries
Cupcake instructions
- Preheat your oven to 350 degrees Fahrenheit and prepare a muffin tin by lining it with 15 cupcake liners.
- In a bowl, combine flour, sugars, baking soda, and salt. Set this dry mixture aside.
- In another bowl, place butter, chocolate, and cocoa. Pour boiling water over the ingredients, cover the bowl with plastic wrap, and let it sit for two minutes. Afterward, mix the contents until smooth. Add in buttermilk, sour cream, eggs, and vanilla, stirring until well combined.
- Now, whisk the liquid ingredients into the previously set aside dry mixture until you achieve a smooth batter.
- Pour 1/4 cup of the batter into each cupcake liner. Bake for 15-18 minutes or until a toothpick inserted into the center comes out clean.
- Allow the cupcakes to cool in the tin for 5 minutes before transferring them to a cooling rack.
Frosting instructions
- Start by putting freeze-dried berries into a blender and blend until you have a fine powder. Sift the powdered berries into a bowl to eliminate any larger pieces that may not have blended thoroughly.
- In an electric mixer, cream together butter, cream cheese, and strawberry powder until the mixture becomes smooth. Gradually incorporate the powdered sugar, ensuring it blends well. Add vanilla, and then slowly add milk, one teaspoon at a time, until you achieve the desired thickness.
Ganache instructions
- In a bowl, place the chocolate and pour hot whipping cream over it. Cover the bowl and allow it to sit for two minutes. Stir the mixture until it becomes smooth. Let the ganache cool for approximately 5 minutes before dipping the strawberries in it.
Assembly instructions
- After the cupcakes cool, use a piping bag to apply the frosting. Then dip each strawberry into the ganache before promptly pressing them into the frosting of each cupcake.
- Serve the cupcakes within 2 hours, or store them in the fridge. Let the cupcakes come to room temperature before serving.
2. Smarties mini parfaits

This Valentine’s Day, serve up some nostalgic Americana with a Smarties mini parfait. This dessert combines strawberries, yogurt, whipped cream, and Smarties candy. Plus you get to smash up the candy with a hammer or mallet!
Servings: 8-10
Source: bubblynature from Sprinkle Some Fun
Ingredients and supplies
- 7 rolls of Smarties Love Hearts
- 1 cup sweetened vanilla yogurt
- Whipped cream
- Red or pink food coloring
- 8-10 plastic shooters cups
- 6 strawberries, chopped
- Coffee grinder
- Hammer or mallet
- Quart or gallon-sized food storage bag
- Piping bag/coupler and medium-sized decorators tip (optional)
Instructions
- Empty 6 rolls of Smarties into the food storage bag. Use the hammer or mallet to smash them into small pieces. Set aside enough Smarties pieces to top each parfait later.
- Put the broken Smarties bits into the coffee grinder, and grind until you have a fine powder.
- Combine powdered Smarties, yogurt, and food coloring in a bowl. Mix thoroughly.
- Transfer the yogurt mix to a piping bag, and pipe about 1/4 inch into each plastic cup. Add a layer of strawberries to each cup, then top with a layer of whipped cream. Repeat until each up is full.
- Sprinkle the top with the Smarties bits you set aside in step 1. Add a dollop of whipped cream and a whole Smarties Love Heart.
3. Strawberry lemonade cake bites
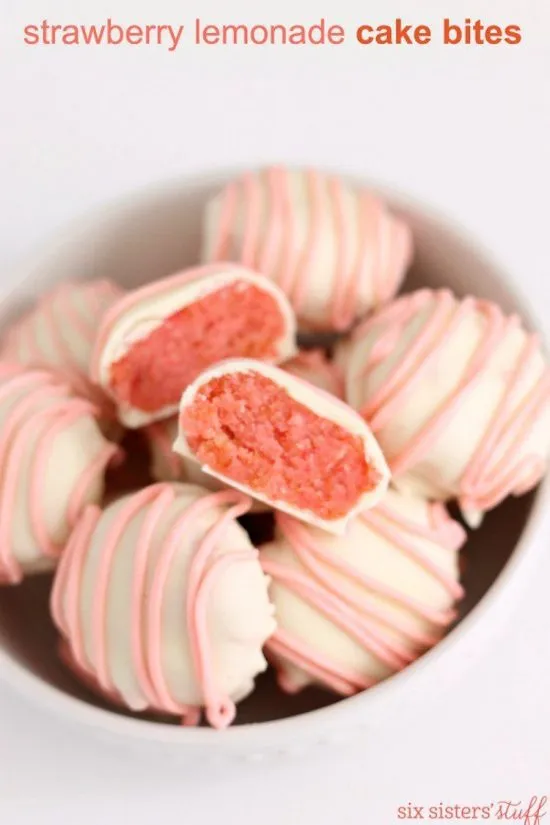
These strawberry lemonade cake bites are the perfect combination of sweet with a touch of sour. This Valentine’s Day treat takes about 30 minutes to set before you can share with the ones you love.
Prep time: 45 min
Cook time: 30 min
Total time: 1 hr 15 min
Servings: 50
Source: Six Sisters’ Stuff
Ingredients
- 1 (15.25 ounce) strawberry cake mix
- Cake mix ingredients (typically eggs, oil, and water)
- 16 ounces lemon frosting
- 1 pound white chocolate candy coating or almond bark
- pink candy melts
Instructions
- Bake the cake following the cake package instructions. Once the cake has completely cooled, crumble the entire cake into a bowl. Use your hands for a thorough crumble.
- Gradually stir in the container of frosting, adding about 1/2 cup at a time. Continue until you achieve a consistent mixture that holds together when rolled into a ball.
- Shape the mashed cake and frosting into 1/2 to 3/4-inch balls. Flatten the balls into discs.
- Line a large baking sheet with wax paper. Arrange the bites on the baking sheet, and refrigerate for about 30 minutes to set.
- Follow the package instructions to melt the white chocolate candy coating. Use a skewer to dip each cake bite into the melted coating, ensuring even coverage. Place the coated bites back on the wax paper, and allow them to set.
- Melt the candy melts following the package’s instructions. Then spoon the melted candy into a piping bag. You can also spoon it into resealable sandwich bag and snip a tiny corner off the bag for your tip. Pipe a thin line of melted candy onto each bite.
4. Oreo truffle Valentine’s hearts
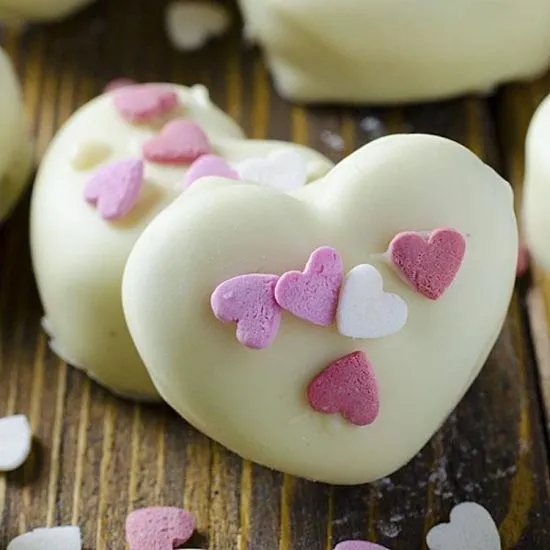
This easy, no-bake treat is great for lovers of Oreos and white chocolate. The recipe uses cookie cutters, so there’s no need to make a bunch of dough balls. I loved making (and eating) these truffles!
Prep time: 30 min
Total time: 30 min
Servings: 16-20 truffles
Source: Vera Z. at Oh My Goodness Chocolate Desserts
Ingredients
- 24 Oreo cookies
- 5 oz cream cheese, softened
- 12–14 oz high quality white chocolate
- Heart-shaped sprinkles (optional)
Instructions
- Line trays or baking sheets with parchment paper or baking paper.
- Pulverize the Oreos, filling and all, into fine crumbs.
- Mix the Oreo crumbs with the softened cream cheese , using your hands, the back of a spoon, or an electric mixer with paddle attachment.
- Combine all ingredients until well mixed, then transfer the mixture onto a sheet of baking paper. Spread it evenly to a thickness of approximately 1/2 inch (adjust based on the size of your cookie cutter).
- Place the tray in the freezer for at least 45 minutes, or until the mixture is hard enough to cut.
- Use a heart-shaped cookie cutter to cut out the truffles. Then return them to the freezer for an additional 20-30 minutes, or until frozen.
- Prepare another tray lined with baking paper.
- When the truffles are ready to cover in chocolate, take a few frozen hearts out of the freezer at a time to prevent softening.
- Using a fork, dip each frozen heart into melted chocolate.
- Tap off any excess chocolate again, and transfer the dipped hearts onto the prepared baking paper.
- If you prefer not to double-dip the hearts in chocolate, top the hearts with sprinkles at this stage, and skip to step 13.
- If you’re double-dipping, place the chocolate-covered hearts in the freezer for a few minutes to let them firm up. Once firm, repeat the dipping process. and top with sprinkles.
- Work in small batches, ensuring the hearts remain frozen when placed into the melted chocolate. Store the truffles in an airtight container in the refrigerator. For a longer shelf life, store them in the freezer.
5. Gluten free salted butterscotch truffles
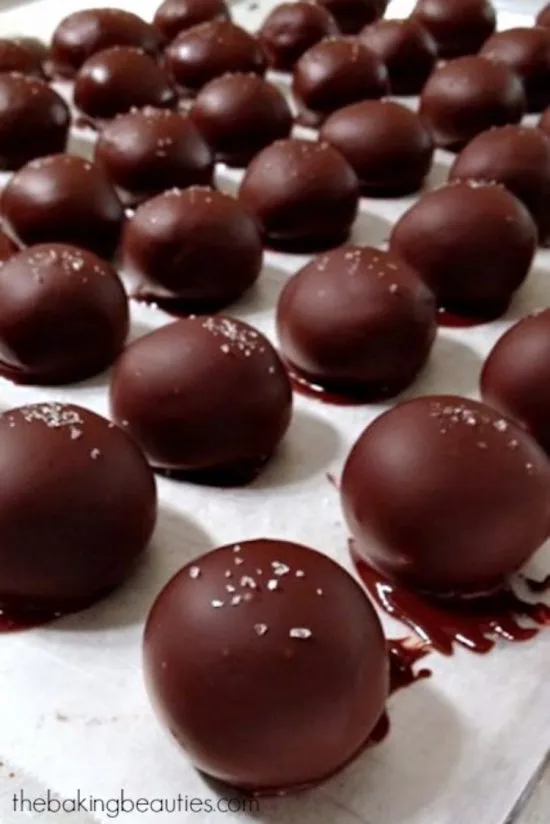
Silky butterscotch covered in semi-sweet chocolate and a dash of sea salt makes a lovely treat for anyone this Valentine’s Day. It’s easy to make and gluten-free – you’ll be melting hearts as much as you’re melting the chocolate!
Prep time: 35 min
Chill time: 2 hr
Total time: 2 hr 35 min
Servings: 45 truffles
Source: Jeanine Friesen from Faithfully Gluten Free
Ingredients
- 8 oz cream cheese, softened
- 2 cups confectioners’ sugar
- 2 cups gluten-free butterscotch chips, melted
- 1 teaspoon vanilla extract
- 2 cup gluten-free milk or semi-sweet chocolate chips
- 2 teaspoon shortening
- 1/2 teaspoon sea salt
Instructions
- Combine cream cheese and confectioners’ sugar, beating until smooth.
- Melt the butterscotch chips using a double boiler or microwave. When using the microwave, heat in 30-second intervals at 50% power. Stir after heating. Repeat heating and stirring until only a few small lumps remain.
- Remove from heat, and stir until no lumps remain.
- To make the filling, beat the melted butterscotch chips and vanilla into the cream cheese mixture. Then cover the bowl and refrigerate.
- After chilling the filling for at least one hour, line a baking sheet with parchment or wax paper. Then shape the filling into 1-tablespoon balls and place onto the lined baking sheet. Let the filling set on the baking sheet in the freezer for about 30 minutes.
- After the filling hardens, roll the truffles into smooth balls using your hands. Freeze the truffle balls while you prepare the chocolate coating.
- Combine the shortening with the milk (or semisweet chocolate chips) using a double boiler.
- Take half of the truffles out of the freezer when the chocolate is totally melted and smooth. Dip one truffle into the melted chocolate, and stir with a fork until fully covered in chocolate.
- Use the fork to lift the coated truffle out of the chocolate, taking care not to pierce it. Tap the fork on the edge of the bowl to remove excess chocolate.
- Place the coated truffle on another wax paper-lined baking sheet, using a wooden skewer to push the truffle off the fork.
- Sprinkle the top with a small pinch of sea salt.
- Repeat the process until you have dipped all the truffles and placed them on the baking sheet. You will want to work quickly so the truffles don’t soften too much.
- Freeze the truffles on the baking sheet for 5 minutes so the chocolate can set, then transfer them to an airtight container. Refrigerate for up to two weeks.
6. Strawberry cheesecake parfait
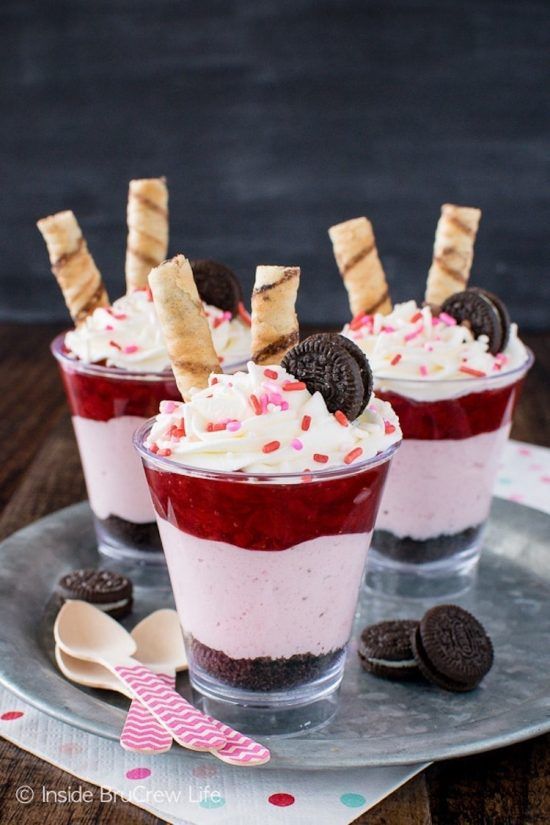
This easy, no-bake treat is great to make with kids and enjoy with loved ones of all ages, even on the go! The recipe is light on granulated sugar but big on smiles.
Prep time: 30 minutes
Total time: 30 minutes
Servings: Eight 5 oz cups
Source: Inside Bru Crew Life
Ingredients
- 8 Oreo cookies
- 8 oz package cream cheese, softened
- 2 tablespoons granulated sugar
- 1 cup diced strawberries
- 2 tablespoons hot water
- 1 packet unflavored gelatin
- 21 oz can strawberry pie filling
- Whipped cream
- Mini Oreos
- Wafer cookies
- Sprinkles
Instructions
- Crush the cookies, and evenly distribute the crumbs into the bottoms of 8 dessert cups.
- Combine softened cream cheese and sugar until smooth and creamy.
- Puree the strawberries in a food processor. Then add the hot water and gelatin, and pulse until well blended.
- Incorporate the strawberry puree into the cream cheese mixture until creamy. Then gently fold in 1/2 cup of whipped cream.
- Add an equal amount of the strawberry cheesecake mixture to each dessert cup. Use the back of a spoon to evenly spread the mixture.
- Break apart any big berries of the pie filling with a fork. Spoon the berries onto the top of the cheesecake in each dessert cup.
- Using a piping bag with icing tip, pipe the remaining whipped cream onto the parfaits.
- Refrigerate for at least 1 hour to allow the mixture to set. Just before you serve, top with the wafer cookies and sprinkles.
7. Strawberry brownies
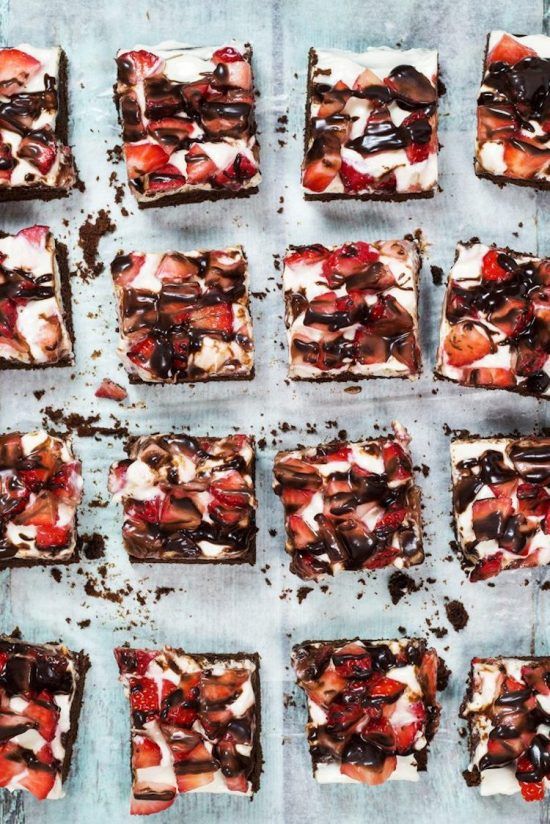
Wow, these are just incredible and fun to make! They were a hit with all ages. The cream cheese, the strawberries, the chocolate drizzle, and of course, the brownie melted all my Valentine’s hearts! You’ll need a large bowl for this recipe!
Prep time: 25 min
Cook time: 30 min
Total time: 55 min
Servings: 16 squares
Source: Yummy Addiction
Brownie ingredients
- 1 1/2 sticks unsalted butter
- 7 oz bittersweet chocolate, broken into small pieces
- 2 large eggs
- 1/3 cup sugar
- 1/4 cup packed dark brown sugar
- 2 teaspoons vanilla extract
- 1/2 cup all-purpose flour
- 1/4 teaspoon baking powder
- 1/4 teaspoon salt
Frosting ingredients
- 8 oz cream cheese, room temperature
- 1/2 cup confectioners’ sugar, sifted
- 1/2 teaspoon vanilla extract
- 2 tablespoons heavy cream
Topping ingredients
- 1 lb strawberries, cut into chunks
- melted bittersweet chocolate, for drizzling
Brownies instructions
- Preheat the oven to 350°F and line a 9 x 9-inch baking pan with parchment paper.
- In a small saucepan over low heat, melt the butter and chocolate, stirring until smooth. Remove from heat and allow it to cool for at least 10 minutes.
- In a large bowl, combine eggs, sugar, and brown sugar, blending until well mixed. Add vanilla extract and the cooled butter-chocolate mixture, mixing until thoroughly combined. Sift in the flour, baking powder, and salt directly into the batter, then stir until the mixture is smooth.
- Spread the batter evenly in the prepared pan, smoothing the top with a spatula. Bake for approximately 25 minutes or until a toothpick inserted comes out clean. Remove from the oven and let it cool before applying the cream cheese mixture.
Frosting instructions
- Beat the cream cheese and confectioners’ sugar together until smooth.
- Then mix in the vanilla extract and cream until thoroughly blended.
Assembly instructions
- Smooth the cream cheese mixture onto the cooled chocolate brownie base.
- Neatly place the strawberry chunks on top and drizzle with melted chocolate.
- Chill before serving, and then cut into squares.
8. Gluten free red velvet waffles
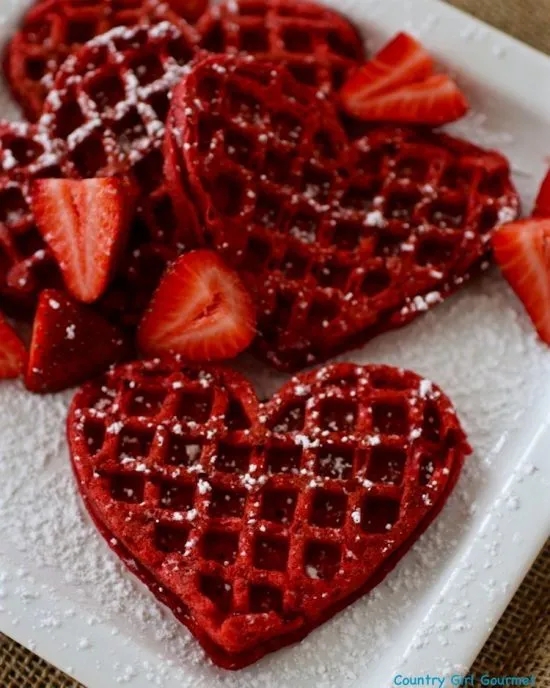
When I saw this recipe for heart-shaped pancakes, I knew I had to make it. Grab your gluten-free, all-purpose flour, and get ready to have breakfast for dessert!
Source: Debbie Hendrix of My Hot Southern Mess
Ingredients
- 2 cups gluten-free all-purpose flour blend
- 3 tablespoons sugar
- 1 tablespoon cocoa powder
- 2 teaspoons baking powder
- 1 teaspoon baking soda
- 1/2 teaspoon xanthan gum
- 1/2 teaspoon Salt
- 2 cups milk
- 2 tablespoons apple cider vinegar
- 1/3 cup cooking oil or melted butter
- 2 eggs
- 1 teaspoon vanilla extract or paste
- 1 to 1 1/2 tablespoons red food coloring
Instructions
- Create a buttermilk substitute by combining milk and vinegar. Let it sit for 5-10 minutes.
- Combine and evenly mix flour, sugar, cocoa powder, xanthan gum, baking powder, baking soda, and salt in a bowl.
- In a separate bowl, whisk the buttermilk substitute and butter together. Then add the eggs.
- Stir the buttermilk substitute mixture into the dry ingredients until the batter is a little lumpy. Mix in the vanilla extract and red food coloring.
- Pour batter into a preheated waffle iron until the batter is about half an inch from the waffle iron’s edge. Cook the batter according to your waffle iron’s instructions.
- Put the waffles on a plate, dust with powdered sugar, and serve!
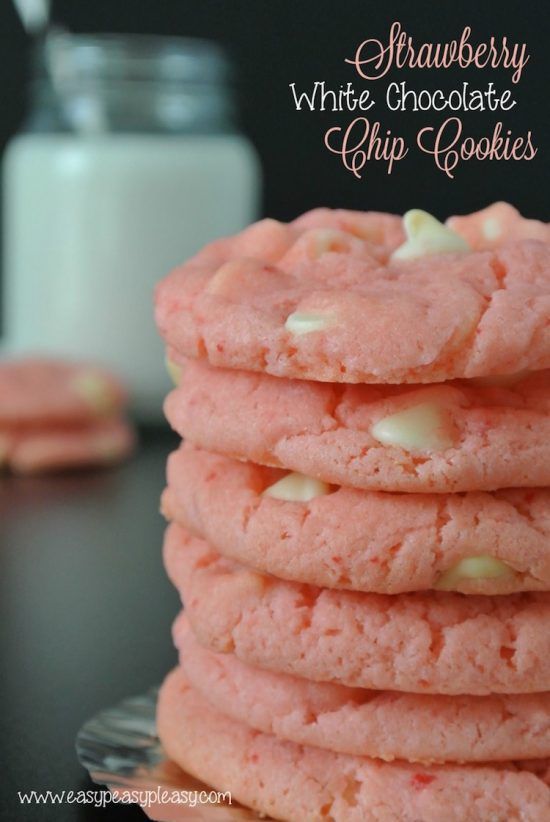
These strawberry white chocolate chip cookies are rich, sweet, and refreshing, and the recipe has just four ingredients! Your beloved may just sneak one of these cookies off the cooling rack.
Cook time: 12 to 14 min
Source: Easy Peasy Pleasy
Ingredients
- 1 box strawberry cake mix
- 1/2 cup vegetable oil
- 2 eggs
- 2 cups white chocolate chips
Instructions
- Preheat your oven to 350 F degrees.
- In a large bowl, combine the cake mix, vegetable oil, and eggs. Mix until well combined.
- Stir in the white chocolate chips, ensuring an even distribution throughout the batter.
- Using a heaping spoonful, drop portions of the dough onto an ungreased cookie sheet.
- Bake in the preheated oven for 12 to 14 minutes or until the edges are golden brown.
- Allow the cookies to rest on the pan for 2 minutes, then transfer them to a wire rack to cool completely.

These cookies are easy and quick to make. They’re full of low-carb ingredients, making it a great snack if you’re on paleo.
Prep time: 10 min
Freeze time: 30 min
Cook time: 5 min
Total time: 45 min
Servings: 32 cookies
Source: Elana’s Pantry
Ingredients
- 1 box of blanched almond flour
- 1/2 teaspoon sea salt
- 1/4 teaspoon baking soda
- 1 pinch nutmeg
- 1/2 cup coconut oil, melted
- 1/4 cup honey or agave nectar
- 1 tablespoon orange zest
Instructions
- Combine almond flour, salt, baking soda, and nutmeg in a large bowl.
- In a small bowl, mix together coconut oil, honey, and orange zest.
- Blend the wet ingredients into the dry ingredients.
- Divide the dough into 2 balls and place onto parchment paper.
- Cover each dough ball with another sheet of parchment paper and roll it out to a thickness of 1/4 an inch. Freeze for 30 minutes, and about 15-20 minutes later, preheat your oven to 350 F degrees.
- Take the baking sheets out and use a heart-shaped cookie cutter on the frozen dough. Place the hearts on a baking sheet
- Bake for 5-7 minutes. Let the cookies cool before you serve.
11. Cherry heart pies
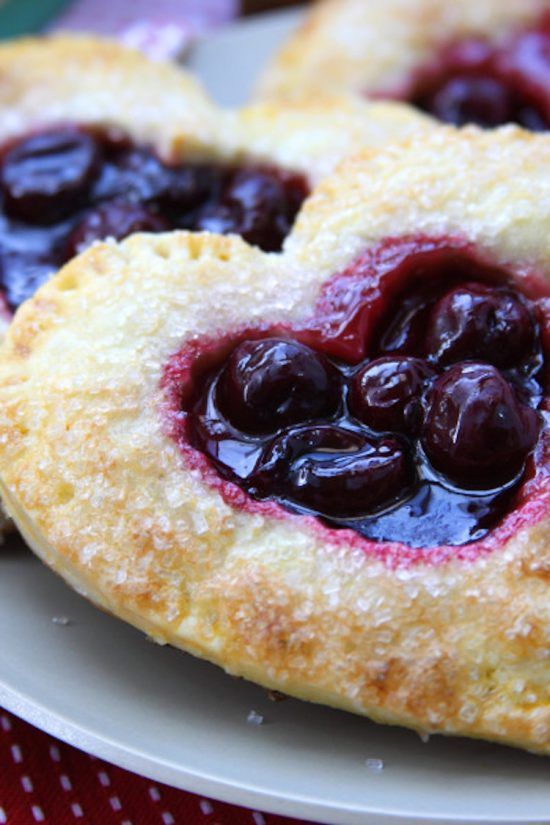
A cherry-filled, heart-shaped twist on the classic apple pie this Valentine’s Day. Enjoy these Cherry Heart filled hand pies.
Prep time: 30 min
Cook time: 15 min
Chill time: 2 hr
Total time: 2 hr 45 min
Servings: 16 individual pies
Source: The Fed Up Foodie
Cherry filling ingredients
- 12 oz pitted cherries
- 1 1/2 cups lightly sweetened cherry juice
- 3/4 cup granulated sugar
- 2 tablespoons arrow root powder or corn starch
Pie crust
Make two separate batches for the top layer.
- 1/2 lb (2 sticks, or 8 oz) cold unsalted butter
- 2 3/4 cup all-purpose flour
- 1 teaspoons sea salt
- 1/2 cup ice water
- 1 tablespoons granulated sugar
Assembly ingredients
- 1 egg
- 6 tablespoons sparkling sugar
Cherry filling instructions
- Make sure to strain jarred cherries through a fine mesh colander to collect the juice. Set the cherries aside. Chilling the cherries in the fridge for a few hours or overnight will help prevent the cherries from leaking out of the pie crust.
- Combine arrow root powder and 2 tablespoons of cherry juice into a small bowl. Mix well into a slurry.
- Add sugar and remaining cherry juice into a medium-sized saucepan, and stir until sugar begins to dissolve. Add the cherry juice slurry, and cook over medium heat for about 3 to 4 minutes. Whisk continuously until it thickens.
- Let the mixture cool slightly before stirring in the cherries.
Pie crust instructions
- Cut the cold butter into small chunks and refrigerate while you prepare the dry ingredients.
- In a food processor fitted with a steel blade, combine the flour, salt, and sugar. Pulse 2 or 3 times to mix.
- Add the diced butter and pulse 8 to 12 times, or until the butter is pea-sized.
- Form the dough into a ball by slowly pouring ice water into the food processor’s feed tube while pulsing the machine.
- Move the dough onto a floured board. Roll it into a ball, wrap the dough in plastic wrap, and refrigerate for at least 1 hour.
Assembly instructions
- While the oven preheats to 400 F degrees, cut the refrigerated dough in half. Use the rolling pin to roll each half into a 1/8 to 1/4 inch-thick circle on a well-floured board. Roll from the center to the edge, turning and flouring the dough, to prevent sticking.
- Using the largest heart-shaped cookie cutter, cut the dough into shapes and place them on cookie sheets lined with parchment paper. Use the smallest cookie cutter to cut a heart in the center of half of the larger hearts. Place the cut pie crust hearts back in the refrigerator for about 15 minutes.
- Place approximately 1 1/2 tablespoons of cherry filling in the center of the uncut hearts. Place the cut hearts over the top of the cherry filling. Use a fork to crimp the crust about 1/4 inch from the edge, closing two sides of the crust together.
- Whisk the egg in a small bowl. Using a brush, wash down the top of each pie with the beaten egg. Sprinkle sparkling sugar on top.
- Bake for 15-17 minutes at 400℉ or until the pies are lightly golden brown.
12. Raspberry sherbet party punch
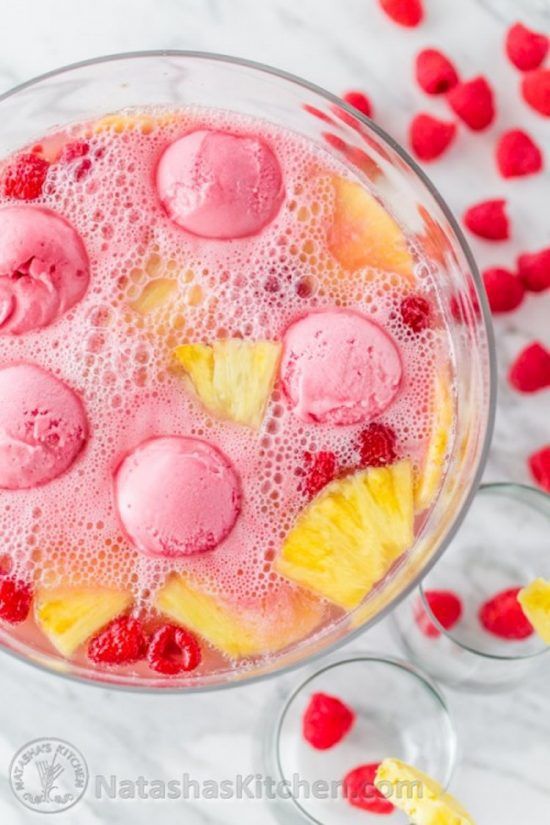
The bubbly punch, vibrant fruit colors, and delicious sherbet make this a fun treat for all ages. The punch contains all store bought ingredients and takes about ten minutes to put together.
Prep time: 10 min
Total time: 10 min
Servings: 18-20 cups
Source: Natasha of Natasha’s Kitchen
Ingredients
- 2 liter bottle lemon-lime soda, chilled
- 2 liter bottle club soda, chilled
- 1 (12 oz) fruit punch can, thawed in the fridge or pink lemonade
- 1 (12 oz) pineapple juice can, thawed in the fridge, or pink lemonade
- 6-8 scoops raspberry sherbet
- Fresh or frozen raspberries and pineapple slices for garnish (optional)
Instructions
- Prepare the ice cream in advance by scooping it onto a baking dish lined with plastic wrap. Freeze the scoops and add them to the punch just before serving to ensure they stay frozen.
- In a punch bowl, mix 2 cans of juice. Pour in the lemon-lime soda and club soda, gently stirring until well-combined. You can adjust the sweetness by adding cold water or ice, but know that the punch becomes sweeter when you add the ice cream.
- Just before serving, top the punch with scoops of sherbet, which will not only add flavor but also keep the punch chilled. Finally, (optionally) garnish the punch with the pineapple slices and raspberries.
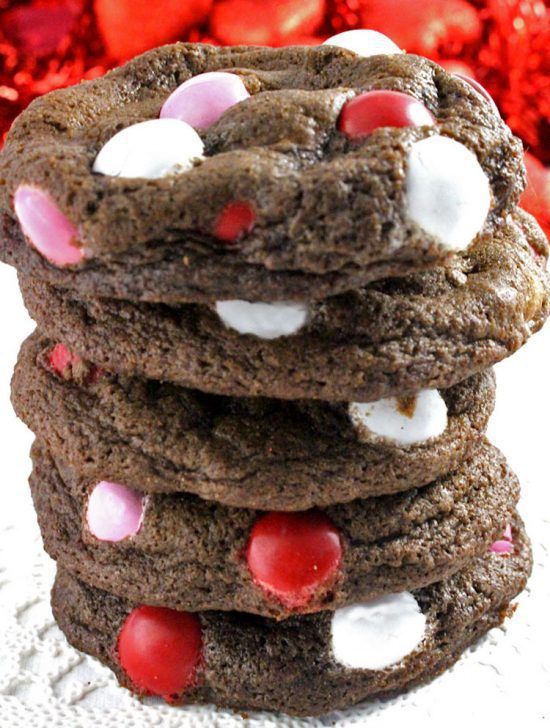
Chocolate cookies Valentine’s M&M’s are quick and easy to make. These homemade baked goods are delicious and festive.
Prep time: 10 min
Cook time: 10 min
Total time: 20 min
Servings: 36 cookies
Source: Two Sisters
Ingredients
- 1 cup salted sweet cream butter, softened
- 3/4 cup granulated sugar
- 2/3 cup brown sugar, packed
- 2 large eggs
- 1 teaspoon vanilla extract
- 2 1/4 cups all-purpose flour
- 2/3 cup unsweetened cocoa powder
- 1 teaspoon baking soda
- 1/4 teaspoon salt
- 1 bag Valentine’s M&M’s mix
Instructions
- In a medium-sized bowl, combine flour, cocoa powder, salt, and baking soda. Mix thoroughly and set aside.
- Cream together butter, white sugar, and brown sugar in a separate bowl. Add eggs and vanilla to the creamed mixture, beating until the texture is light and fluffy.
- Gradually add the dry ingredients to the wet mixture, stirring in one cup at a time. Be cautious not to over-mix, as this can result in tough dry cookies.
- For consistent cookie sizes, measure out 1.8 oz of dough for each cookie using a food scale. Roll the dough into balls and place them on a prepared cookie sheet.
- Press M&M’s onto each dough ball, evenly covering the entire surface.
- Bake the cookies in a preheated oven at 350 F degrees for 9-11 minutes.
- Allow the cookies to cool completely before eating or storing. The cookies will keep for 2-3 days if you store them in an airtight container at room temperature. They will last up to 3 months if stored in the freezer.
14. Strawberries and cream cupcakes
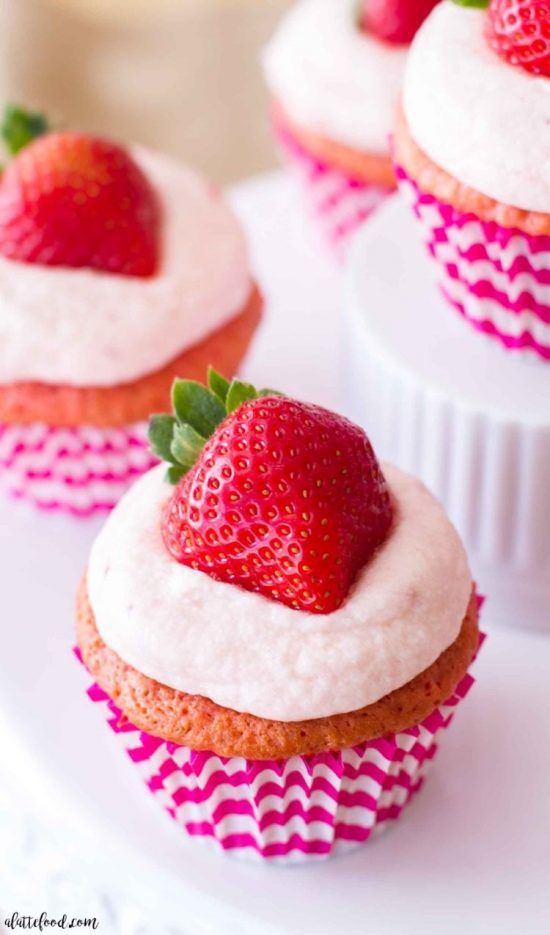
These strawberries and cream cupcakes were just too cute not to make for my friends and my kids. Such a perfect treat for someone special!
Prep time: 45 min
Cook time: 20 min
Total time: 1 h 5 min
Servings: 24 cupcakes
Source: Michelle at A Latte Food
Cupcake ingredients
- 1/2 cup fresh strawberries, finely chopped
- 1 tablespoons lemon juice
- 1 box white cake mix
- 1 3 oz package strawberry gelatin
- 1/3 cup white sugar
- 1/3 cup all purpose flour
- 4 large eggs
- 3/4 cup vegetable oil
- 1/2 cup whole milk
- 1 teaspoon vanilla extract
- 1/4 cup sour cream
Frosting ingredients
- 1 cup butter, softened
- 4-5 cups powdered sugar
- 1 teaspoon vanilla extract
- 2-3 tablespoons heavy cream
- 3/4 cup strawberries, finely chopped
- salt, to taste
Filling ingredients
- 1 cup heavy cream
- 3 tablespoons powdered sugar
- 1/2 teaspoon vanilla extract
Topping ingredients
- 24 strawberries
Cupcake instructions
- Preheat the oven to 350 F degrees and prepare two cupcake tins by lining them with cupcake liners.
- Combine fresh strawberries and lemon juice, then set the mixture aside.
- Sift white cake mix, strawberry gelatin, sugar, and flour together in a large bowl.
- Use a mixer to blend oil into the cake mixture. Add one egg, beat well, and then add the second egg.
- Incorporate milk, vanilla extract, and sour cream, and mix until just combined.
- Gently fold in the lemon juice and strawberries.
- Divide the batter evenly among the cupcake tins and bake 18-20 minutes, or until a toothpick comes out clean. Cool before serving.
Filling instructions
- Using a mixer, beat heavy cream until soft peaks start to form. Add powdered sugar and vanilla extract, continuing to beat until the cream is the consistency of whipped cream.
- Once the cupcakes have cooled, use a sharp knife to cut a half-inch deep hole out of the center of each cupcake. Set the cupcake pieces aside.
- Spoon whipped cream into each hole, filling it almost to the top. You will probably have leftover filling.
- Cover each cupcake hole with the set-aside cupcake pieces.
Frosting instructions
- Beat butter until it becomes light and fluffy. Gradually incorporate powdered sugar, starting with 4 cups and then adding one cup at a time. Beat until combined.
- Mix in vanilla extract and 2 tablespoons heavy cream until thoroughly mixed.
- Introduce strawberries to the mixture and beat until evenly distributed. Your frosting will turn pink as the strawberries break apart.
- If the frosting appears too thin, add the last cup of powdered sugar. If it is too thick, include the final tablespoon of heavy cream. Add a dash of salt to balance the sweetness.
- Spread or pipe the frosting onto cupcakes and, just before serving, crown each one with a fresh strawberry.
15. Chocolate-covered pretzels
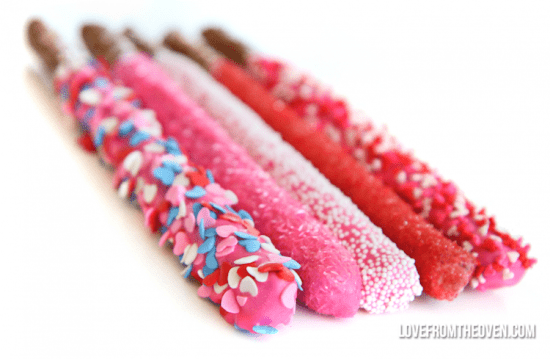
These chocolate-covered pretzels are no-bake and easy to make. There will be plenty of colorful, chocolate-covered, and crunchy goodness to go around with this Valentine’s Day treat.
Source: Christi at Love From the Oven
Ingredients
- 1 bag (16 oz) pretzel rods
- 1 package (16 oz) chocolate candy coating
- Assorted sprinkles
Instructions
- Line two baking sheets with wax or parchment paper.
- Melt the chocolate candy coating according to the instructions on the package.
- Dip each pretzel rod into the melted candy coating, gently tapping the pretzel to remove any excess coating.
- Add sprinkles to each pretzel, and place it them wax paper. Let them sit for about 30 minutes to dry.
- Store the chocolate-covered pretzels in a covered container.
16. Strawberry lemon rice crispies (gluten free)
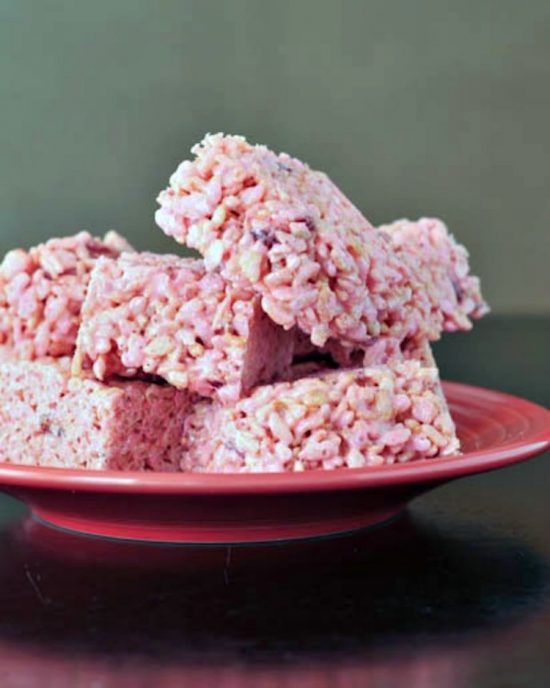
Luscious strawberry and tangy lemon bring life to this vegan and gluten-free twist on the classic Rice Krispies treat. So cute and simple for Valentine’s Day!
Prep time: 10 min
Servings: 12 squares
Source: Spabettie
Ingredients
- 1 (1.2 oz) package freeze dried strawberry pieces, divided
- 2 tablespoons dairy free butter or coconut oil
- 10 oz vegan marshmallows
- juice and zest of 1 fresh lemon
- 5 cups rice crisp cereal
Instructions
- Set half of the freeze-dried strawberries aside.
- Turn the other half of the strawberries into a powder. You can use a blender or food processor, or crush the strawberries in a bag with a rolling pin.
- In a saucepan, melt butter or coconut oil. Add marshmallows, and stir over medium heat until melted. Then add the strawberry powder, lemon juice, and zest, and remove the pan from heat.
- Add rice puffs and the reserved strawberry pieces to the mixture, stirring until well combined.
- Press the mixture into a baking dish. Use a 9×9 square dish for tall rice crispies.
- Let the rice crispies set for about 30 minutes before cutting them into 4×3 squares.
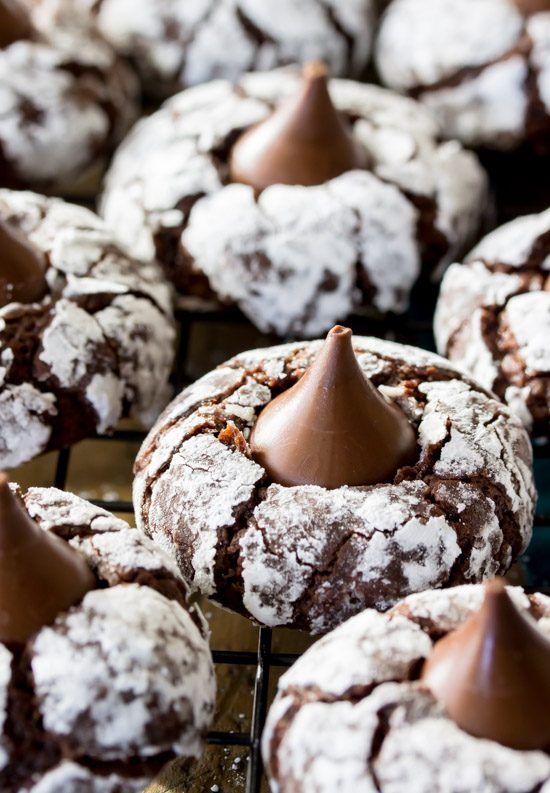
These chocolate kiss cookies are so deliciously rich and simple to make. They require four hours of chill time, so you will want to plan ahead for these treats.
Prep time: 10 min
Cook time: 12 min
Chill time: 4 h
Total time: 4 h 22 min
Servings: 36 cookies
Source: Rachel Farnsworth of the Stay At Home Chef
Ingredients
- 12 tablespoons unsalted butter, softened
- 1 1/2 cups sugar
- 1/2 cup light or dark brown sugar tightly packed
- 4 large eggs
- 2 teaspoons vanilla extract
- 2 1/2 cups all-purpose flour
- 1 cup unsweetened cocoa powder
- 1 tablespoon baking powder
- 3/4 teaspoon salt
- 2 cups powdered sugar for rolling
- 3 dozen milk chocolate kisses, unwrapped
Instructions
- In the bowl of a stand mixer or a large bowl using a hand mixer, cream together the butter and sugar. Add eggs one at a time, thoroughly mixing after. Then add the vanilla extract.
- In a separate bowl, whisk together the flour, cocoa powder, baking powder, and salt. Gradually add the dry ingredients to the wet ingredients, and mix together.
- Cover the bowl with plastic wrap, and refrigerate the dough for at least 4 hours.
- Once chilled, preheat the oven to 350 F degrees and line a baking sheet with parchment paper.
- Roll the dough into 1 1/2 tablespoon-sized balls, and coat them thoroughly in powdered sugar. Place the dough balls on the lined baking sheet.
- Bake for 10-12 minutes. Be careful not to over-bake.
- One to two minutes before taking the cookies out of the oven, gently press a chocolate kiss into the center of each cookie. Put the cookies back into the oven, and allow the chocolate kiss to melt a little.
- Remove from the oven, and let the cookies cool on the baking sheet.
18. Strawberry brownie dessert kebab
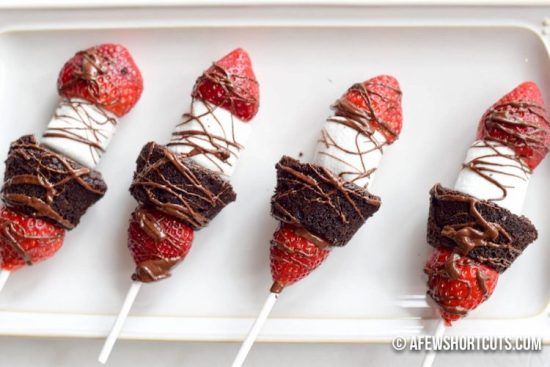
Mini brownies, marshmallows, and strawberries drizzled with decadent chocolate – oh my! This Valentine’s Day kebab is easy to make, and being on sticks means they’re easy to eat, even on the go.
Source: A Few Shortcuts
Ingredients
- Strawberries whole, washed, and stemmed
- Large marshmallows
- Brownie bites
- Semisweet chocolate chips
- Lollipop sticks or skewers
Instructions
- Skewer a strawberry, marshmallow, brownie bite, and another strawberry. Repeat until you have the desired amount of kebabs.
- To melt the chocolate chips, put them in a microwave-safe bowl, and heat for 30-second intervals at 50% power. Stir after each interval, and repeat heating and stirring until you have fully melted the chocolate.
- Place the kebabs on a parchment or wax-lined baking sheet or platter. Then drizzle the melted chocolate over the kebabs. Let the chocolate set before serving.
19. Chocolate lava cake
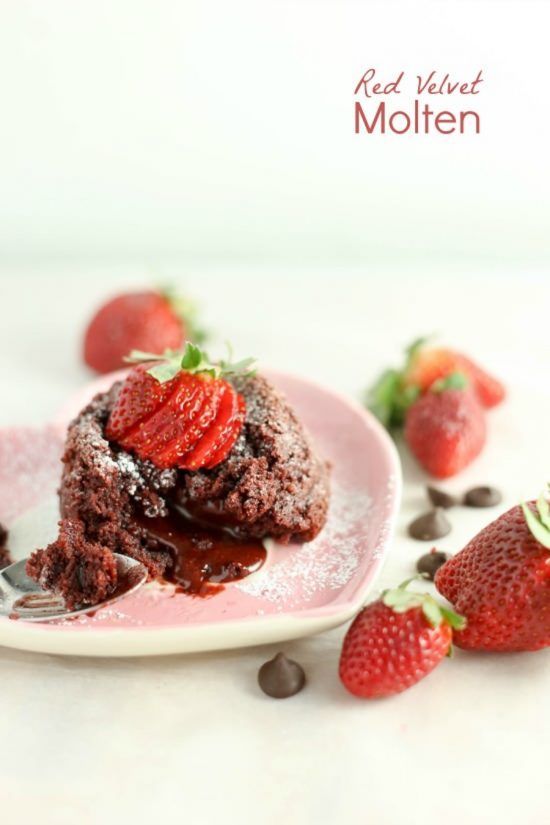
This gooey, fluffy cake takes just seven ingredients and about half an hour to make. Cut that time down to just 10 minutes on Valentine’s Day by making the batter on February 13th.
Prep time: 15 min
Cook time: 10 min
Total time: 25 min
Servings: 6 cakes
Source: Tessa Arias of Handle the Heat
Ingredients
- 10 tablespoons unsalted butter, enough to grease ramekins
- 1/2 cup granulated sugar, enough to grease ramekins
- 8 ounces semisweet chocolate, chopped
- 4 large eggs
- 4 large egg yolks
- 1 teaspoon vanilla extract
- 1/2 cup all-purpose flour
- 1/2 teaspoon salt
- Fresh raspberries or strawberries
- Powdered sugar, for garnish
Instructions
- Preheat the oven to 425 F degrees. Generously grease six 6 oz ramekins with butter, and coat the insides with granulated sugar, tapping out any excess.
- Use a double boiler or microwave to melt the chocolate. For the microwave method, put the butter and chocolate in a microwave-safe bowl, heat on high for 1 minute, and stir. Continue heating in 30-second intervals and stirring until fully melted and smooth. Allow the mixture to cool.
- In a medium bowl, combine the eggs, egg yolks, vanilla, and 1/2 cup of granulated sugar. Whisk the ingredients together for about 90 seconds, or until the batter has thickened and is pale.
- Gently fold the melted, cooled chocolate and butter mixture into the egg, vanilla, and sugar. Then stir in the flour and salt gently.
- Divide the batter among the prepared ramekins. You can cover and refrigerate the batter for up to one day.
- Bake for 10 to 12 minutes. If baking straight from the fridge, add an extra minute of baking time. You want the cake’s edges to be firm, its top set, and its center gooey.
- Run a knife around the edges to loosen and let cool for 1 minute. Turn the ramekins upside-down onto dessert plates. Let them to sit for about 30 seconds, or you can serve directly from the ramekin.
- Serve with fresh berries and powdered sugar, and whipped cream.
20. Chocolate peanut butter Valentine’s hearts

Win your special one or little one’s heart with chocolate peanut butter Valentine’s hearts! Easy to make and oh so special when homemade!
Prep time: 30 min
Servings: 20 hearts
Source: Vera Z. from Oh My Goodness Chocolate Desserts
Ingredients
- 1 cup creamy peanut butter, room temperature
- 1/4 cup unsalted butter, melted
- 2 tablespoons brown sugar
- 2 teaspoons vanilla extract
- 1/4 teaspoon salt
- 2 cups powdered sugar
- 10–12 oz. chocolate or candy coating, chopped into small pieces
Instructions
- Line an 8 x 8-inch dish with parchment paper, leaving an overhang on the sides for easy lifting. Set aside.
- In a mixing bowl, combine peanut butter, melted butter, brown sugar, vanilla, and salt, stirring until the sugar dissolves. Then gradually mix in the powdered sugar.
- Press the mixture into the prepared dish until you have a 1/2 inch-thick layer. Use a spatula or your palms to smooth the top.
- Place the dish in the freezer until the peanut butter mixture is firm enough to cut. While it firms, line a tray with parchment paper.
- Using a 1 1/2 to 2 inch-sized heart-shaped cookie cutter, cut out hearts, and place them on the lined tray. Knead any leftover batter together, press it flat with your palms, and cut out as many hearts as you can. Repeat this process until you’ve used as much of the batter as possible.
- Place the tray in the freezer until the hearts are firm.
- Melt the chocolate or candy coating, and line another tray with parchment paper.
- Using a fork, dip each heart into the melted chocolate. Cover each heart complete in chocolate, and then gently tap the fork to remove excess chocolate. Work with a few hearts at a time from the freezer since the peanut butter mixture softens quickly at room temperature.
- Place the chocolate-covered hearts on the parchment paper-lined tray, and refrigerate until the chocolate has set. Store in the fridge or freezer for longer storage.
21. Apple tart (vegan and gluten free)
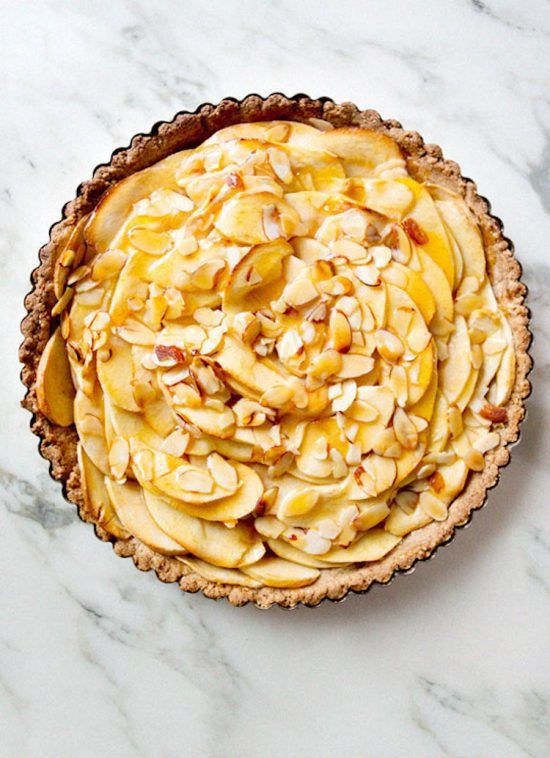
Your vegan and gluten-free friends feel your love and care in every bite when you bake a treat they can eat. This apple tart goes well with any occasion, but baking it for your Valentine makes it extra sweet.
Source: Sarah Yates of A House in the Hills
Crust ingredients
- 2 cups millet flour
- 1 1/2 cups almond flour
- 1/2 teaspoon sea salt
- 1/2 cup coconut oil
- 1/2 cup maple syrup
Filling ingredients
- 4 apples
- 2 tablespoons lemon juice
- 2 tablespoons maple syrup
- 3 tablespoons sliced almonds
Glaze ingredients
- 1/2 cup gluten-free apricot jam or preserves
- 2 tablespoons water
- 1 teaspoon lemon juice
Crust instructions
- Preheat the oven to 350 F degrees.
- Combine millet flour, almond flour, and salt in a food processor.
- Heat coconut oil and maple syrup over a low heat, and stir until combined.
- Add the melted coconut oil and maple syrup to the flour mixture in the food processor. Pulse until combined.
- Spread the dough evenly in a 9.5-inch oiled tart pan, making sure to press up the sides for a crust.
- Poke a fork into the crust several times, and then bake for 15 minutes.
- Remove the tart from the oven and flatten the crust with a fork, pressing down to make it as compact as possible.
Filling instructions
- Peel 4 apples, and then cut them into thin, even slices. Put them in the pan with the cooked crust, arranging to your liking.
- In a small bowl, combine the maple syrup and lemon juice. After mixing, brush over the apples.
- Evenly scatter almonds over the apples.
- Bake for 1 hour or until the apples are soft and slightly browned.
Glaze instructions
- In a small pan, combine apricot jam and water. Heat on low until the jam is thinned.
- Remove the mixture from heat, add lemon juice, and then strain it to eliminate any apricot chunks.
- Brush the glaze over the tart, and serve while the tart is still warm.

Grab the kids, some heart cookie cutters, chocolate chip cookie dough, and melt semisweet chocolate. You can use pre-made cookie dough or follow the step by step recipe below to make your own.
Prep time: 20 min
Cook time:
Total time:
Servings: About 20 hearts
Source: Vera Z. from Oh My Goodness Chocolate Desserts
Filling ingredients
- 1/4 cup unsalted butter, softened
- 1/2 teaspoon pure vanilla extract
- 6 tablespoons light brown sugar, packed
- 2 tablespoons peanut butter
- 1 cup all-purpose flour
- 7 oz sweetened condensed milk
- 1 cup mini chocolate chip morsels
- 10 oz semisweet baking chocolate
- Pink or red food coloring
- 1.5 oz white chocolate for garnish
Instructions
- Beat softened butter and brown sugar together until fully combined. Add vanilla and peanut butter, beating until the mixture becomes fluffy.
- Incorporate flour and sweetened condensed milk into the mixture, beating until well combined.
- Gently fold in the mini chocolate chip morsels.
- Press the mixture into an 8 x 8 inch baking dish lined with parchment paper, and then place in the fridge to chill.
- Remove the chilled dough from the baking dish by pulling up the parchment paper. Use a heart-shaped cookie cutter to cut out the truffles and place them on a tray lined with parchment paper. Set them in the freezer while melting chocolate.
- With a fork, dip each truffle into melted chocolate one at a time. Tap the fork against the side of the bowl to remove excess chocolate. Place the coated truffles back on the parchment paper, and refrigerate until firm.
- Melt white chocolate, and stir in a few drops of food coloring. Then transfer the dyed chocolate into a sandwich bag, snip a corner off the bag with scissors, and pipe onto the truffles.
23. Valentine’s heart macarons
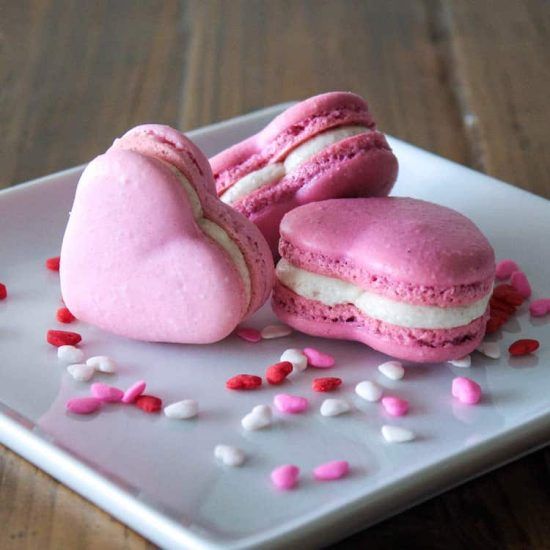
Macarons are my ultimate favorite dessert, so I love to make these for my loved ones on Valentine’s Day. I add a festive twist by making the cookies pink and heart-shaped.
Prep time: 2 hr 20 min
Cook time: 15 min
Total time: 2 hr 35 min
Servings: 10 macarons
Source: Olivia of Liv for Cake
Cookie ingredients
- 60 grams egg whites, room temperature
- 65 grams granulated sugar
- 75 grams almond flour
- 55 grams powdered sugar
- Fuchsia color gel
Cinnamon buttercream ingredients
- 6 cups powdered sugar, sifted
- 2 cups unsalted butter, room temperature
- 2 teaspoons vanilla extract or flavoring of your choice
- 4 tablespoons heavy whipping cream, room temperature
- 1/2 teaspoon ground cinnamon
Cookie instructions
- Line a baking sheet with a silicone baking mat or parchment paper, using a heart template underneath the mat.
- In a food processor, combine almond powder and powdered sugar. Process until the mixture just begins to clump. Sift the mixture well, discarding any clumps that don’t fall through. Set aside.
- Whip the egg whites until they reach the consistency of loose foam. Gradually add the sugar, and continue whipping to a stiff meringue.
- Fold the dry mixture into the meringue, and add the color gel.
- Then fold the batter until it has a smooth, shiny consistency with some movement. When lifted with a spatula, it should pour in a steady stream and settle into the remaining batter. Take care not to over-mix.
- Transfer the batter into a piping bag fitted with the 2A tip.
- Pipe the macarons onto the prepared baking sheet or mat. Then smack the baking sheet on the counter until there are little to no air bubbles left in the macarons.
- Allow the macarons to dry at room temperature for about 1 hour, or until they are dry to the touch.
- While the macarons are drying, make the cinnamon buttercream.
Cinnamon buttercream instructions
- Set up a stand mixer with a whisk attachment.
- Whisk the butter until it becomes creamy.
- Change the speed to low, and add the powdered sugar 1/2 to 1 cup at a time. Whip the powdered sugar in. Then increase the speed to medium, and beat for 3 minutes.
- Add vanilla extract, cinnamon, and 2 tablespoons of cream to the bowl, and whip on medium for 1 minute.
- Add more cream as necessary until you have the desired consistency (I used all 4 tablespoons).
- Continue whipping until the buttercream is smooth and silky.
Assembly instructions
- When the macarons are dry, bake at 300 F degrees until they slightly stick to the pans. The baking time can vary between 10-20 minutes.
- Let the macarons cool completely. If they still stick to the pan, they need to bake more.
- Pipe buttercream onto one macaron, and then sandwich it with an unfrosted macaron. Press them together.
24. Heart-shaped churros
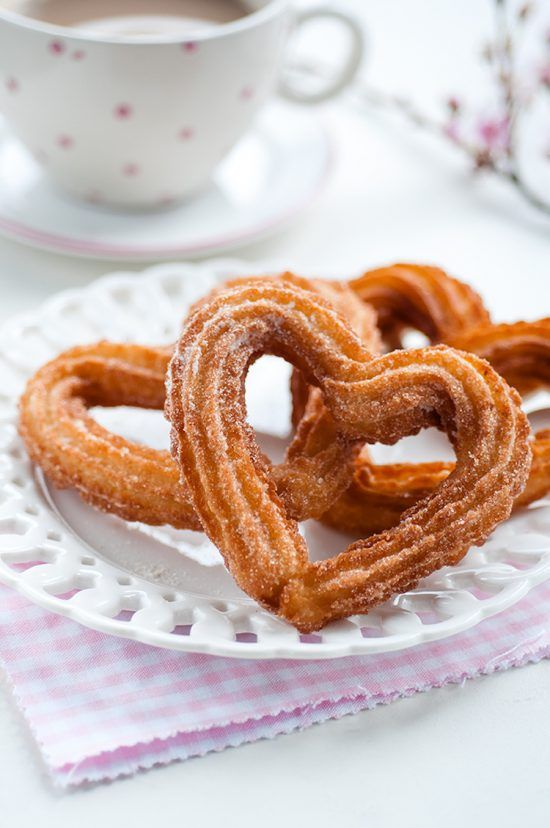
Cinnamon, sugar, and hearts go hand-in-hand on Valentine’s Day. Everyone will enjoy heart-shaped churros, and go ahead and melt some semisweet chocolate to dip these delights into!
Prep time: 15 minutes
Cook time: 6 minutes
Total time: 21 minutes
Servings: 4
Source: Lucy Parissi of Supergolden Bakes
Churro ingredients
- 1 cup water
- 3 tablespoons sugar
- 1/2 teaspoon salt
- 1/2 teaspoon vanilla extract
- 1 cup plain all purpose flour, sifted
- 2 tablespoon butter or vegetable oil
- 2 quarts sunflower oil, vegetable oil, or canola oil
Cinnamon sugar ingredients
- 1/2 cup granulated sugar
- 1-2 tsp ground cinnamon
Chocolate sauce ingredients
- 3.5 oz dark or milk chocolate, chopped
- 1/2 cup double or whipping cream
- Pinch chili powder (optional)
Instructions
- On a large plate, mix the cinnamon and sugar. Set aside, then line a tray with baking paper.
- In a saucepan, heat water, sugar, salt, vanilla, and butter over medium heat until boiling.
- Quickly turn off the heat, and add all the flour. Stir with a wooden spoon until the dough becomes a ball. Allow it to cool for a few minutes before you fill the piping bag.
- Fit a large piping bag with a large closed star tip. While the dough is still warm and pliable, spoon it into the piping bag, and pipe 4 hearts onto the baking paper. If you make a mistake, you can put the dough back in the bag and try again.
- Heat your 2 quarts of sunflower, vegetable, or canola oil in a large, deep pot. Attach a candy thermometer to the pot if you have one. The oil is ready for frying at 375 F degrees. Without a thermometer, you can tell the oil is ready when a small cube of bread browns within a minute.
- Use a wooden spoon to lower the hearts into the oil. You can fry 2 at a time and maintain the oil temperature. Fry each side for about 2-3 minutes or until golden, using a chopstick to flip the churro.
- Place the churros on kitchen towels to drain any excess oil, and then roll them in the cinnamon sugar.
- Heat the double or whipping cream until just boiling. Immediately pour it over the chopped chocolate.
- Let the cream and chocolate stand for a couple of minutes. Then stir until the chocolate fully melts
- Stir in the chili powder.
- Serve the churros, dipping in the chocolate sauce as desired.
25. Cabernet chocolate truffles
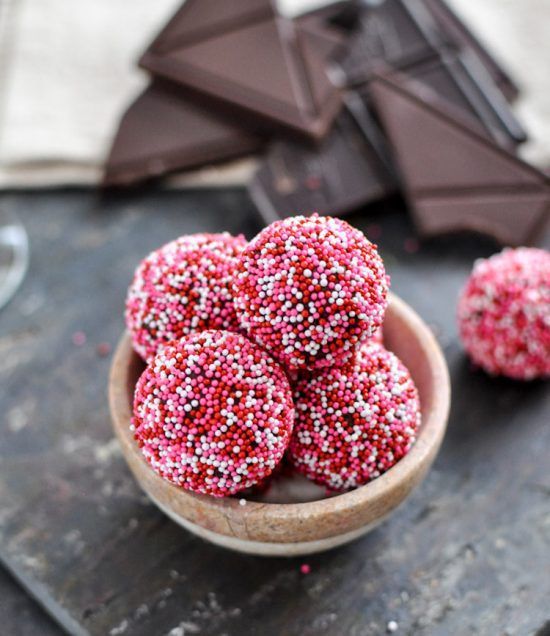
Made for that some special after all the little ones have gone to bed, with a decadent mix of dark chocolate and milk chocolate. Some Cabernet Sauvignon blended in makes this a rich treat.
Total time: 2 hr 30 min
Servings: 30 truffles
Source: Jessica at How Sweet Eats
Ingredients
- 3/4 cup heavy cream
- 5 ounces milk chocolate, chopped
- 5 ounces dark chocolate, chopped
- 3 tablespoons of your favorite Cabernet Sauvignon
- sprinkles or cocoa powder for rolling
Instructions
- Put the chopped chocolate into a large bowl.
- Heat the heavy cream in a saucepan over medium heat until it boils. Immediately remove it from the heat, and pour it over the chocolate.
- Add the wine to the melted chocolate, and allow it to sit for 3 minutes before whisking until smooth.
- Press plastic wrap over the bowl, pressing down so it sticks to the chocolate. Refrigerate for at least two hours.
- Scoop the chocolate with a small melon baller or spoon, and roll it into balls, placing them onto wax paper.
- Roll the truffles in cocoa or sprinkles, then refrigerate for about 30 minutes before serving. Refrigerate when not serving.
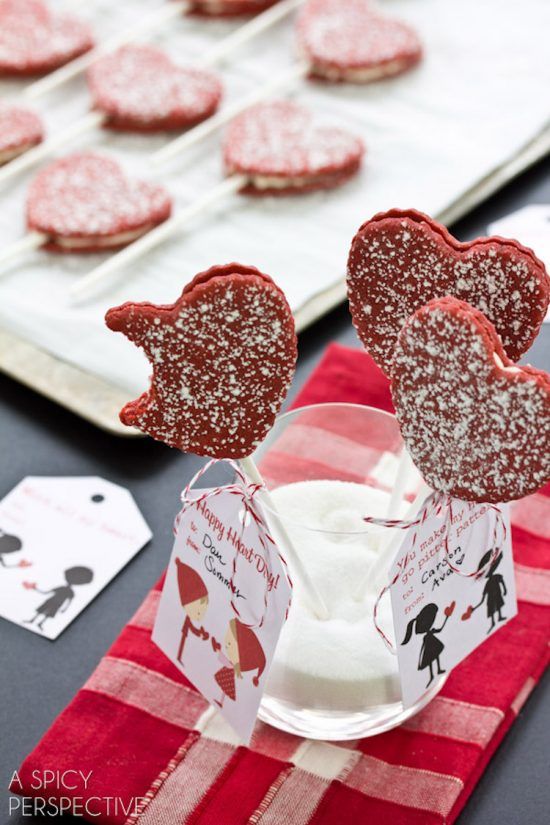
I love vanilla and the color red, so these red velvet cookie pops are fun for me to make, share, and eat. Spread lots of love with these yummy cookie pops!
Prep time: 30 min
Cook time: 6 min
Chill time: 1 hr
Total time: 1 hr 36 min
Servings: 16 cookie pops
Source: A Spicy Perspective
Red velvet cookie ingredients
- 1/2 cup unsalted butter, softened
- 1/2 cup granulated sugar
- 1 large egg
- 1 teaspoon vanilla extract
- 1/2 teaspoon rice vinegar
- 1/4 teaspoon salt
- 2 teaspoon unsweetened cocoa powder
- 1 1/4 cups all-purpose flour, plus extra for rolling
- 1/4-1/2 teaspoon red food coloring gel
Cream cheese frosting ingredients
- 4 ounces cream cheese
- 1 teaspoon vanilla extract
- Pinch salt
- 1 1/2 cups powdered sugar, plus extra for sprinkling
- 16-17 lollipop sticks
Instructions
- In an electric mixer, cream together butter and sugar for about 3-5 minutes, or until very light and fluffy.
- Add vanilla, vinegar, and egg, and beat until evenly mixed.
- Beat in salt, cocoa powder, and food coloring. For an even coloring, scrape the bowl and beat again.
- Slowly add the flour and beat until just combined.
- Press the dough flat onto plastic wrap, wrap it, and refrigerate for at least one hour.
- Preheat the oven to 375 F degrees, line two cookie sheets with parchment paper, and flour a work surface.
- Roll the dough evenly to 1/8-inch thickness, and use a 2-inch heart cookie cutter to cut out hearts. Leave as little distance as possible between cuts. Use a small spatula to transfer the dough hearts to the lined cookie sheets.
- Gather the leftover dough into a ball, and repeat step 7 until you have 32-34 cookies. Rolling the dough more than twice will create tough cookies.
- Bake for 6-8 minutes. The cookies should be a little soft.
- While the cookies cool on the baking sheets, beat cream cheese, vanilla, and salt together in an electric mixer. Gradually add powdered sugar until the frosting is smooth.
- Transfer the frosting to a piping bag.
- Flip half the cookies over, and pipe a thick V-shaped ribbon in the center of the cookies.
- Press a lollipop stick into the frosting, then sandwich an unfrosted cookie on top. Gently press the cookies together to spread the frosting.
- Allow the frosting to set for about 30 minutes.
- Hold each cookie by the stick, sprinkle with powdered sugar.
27. Easy no-bake creme brulee
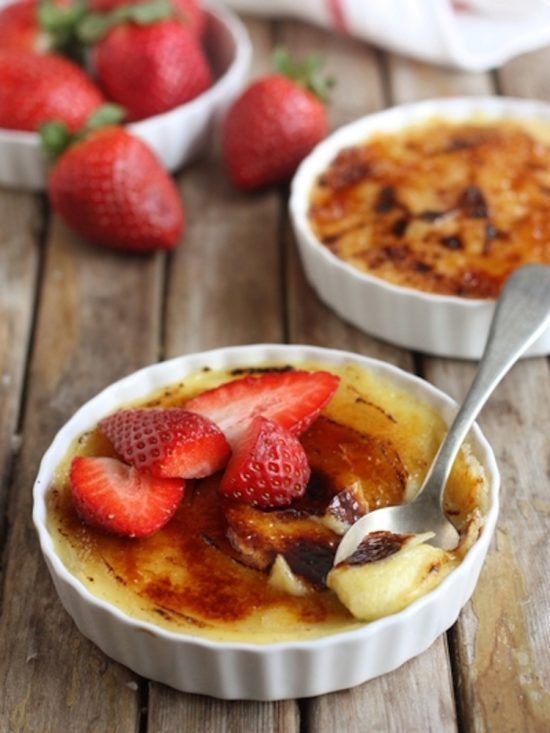
This tasty, easy, no-bake creme brûlée only takes about 15 minutes to make! This recipe calls for a vanilla bean, but you can use vanilla extract instead.
Prep time: 10 min
Cook time: 5 min
Total time: 15 min
Servings: 2
Source: Annalise at Completely Delicious
Ingredients
- 1 cup heavy whipping cream
- 1/2 cup whole milk
- 1/2 cup granulated sugar
- 1 vanilla bean, split lengthwise
- 4 large egg yolks
- 2 tablespoons cornstarch
- Granulated sugar, for brûléeing
Instructions
- Mix the cream, milk, and sugar in a medium saucepan.
- Scrape the vanilla beans from the pod, and add them to the saucepan.
- Turn the burner to medium heat, and stir until the sugar dissolves.
- Heat until bubbles appear on the perimeter of the cream mixture, and it is steaming. Be careful not to let it come to a boil.
- Whisk together the egg yolks and cornstarch in a medium bowl.
- Add the hot cream mixture in a slow, steady stream while whisking constantly.
- Heat the mixture in the saucepan on medium heat. Let it just come to a boil and thicken while stirring constantly with a spatula, making sure to scrape the bottom. The mixture should thicken within 3-5 minutes.
- Continue to stir for another minute after the mixture thickens, and then pour it through a mesh strainer to remove any lumps.
- Spoon the custard into 2 ramekins, and put them uncovered in the fridge. Let them set for at least 2 hours.
- When you’re ready to serve, sprinkle the ramekins with a generous amount of granulated sugar. Use a kitchen torch or your oven’s broiler to melt and caramelize the sugar. Serve immediately.
28. Cherry chocolate chip pie
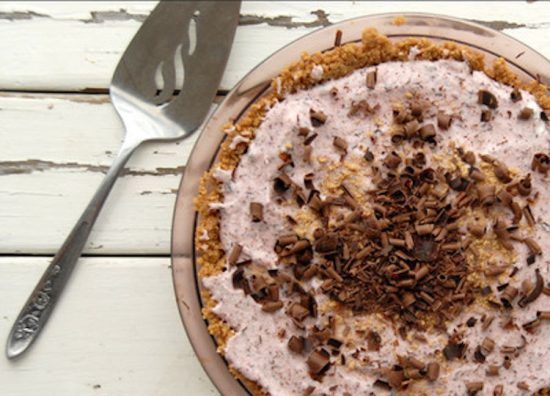
Cherries, chocolate, and pie all together in this dreamy recipe for all Valentine’s Day celebrators!
Prep time: 20 min
Cook time: 10 min
Total time: 1 h 30 min
Servings: 8-10 slices
Source: Boulder Locavore
Ingredients
- 24 marshmallows
- 1/2 cup milk
- 1 cup heavy whipping cream
- 1/2 teaspoon vanilla extract
- 1 (3.2 oz) bar cherry chocolate bar
- 1 1/2 cups graham cracker crumbs
- 7 tablespoons unsalted butter melted
- Red or pink food coloring (optional)
Pie instructions
- Grease a 9-inch pie pan with butter.
- Combine the graham cracker crumbs and melted butter in a standing mixer with paddle attachment.
- Move the dough to the pie pan, and pressing with your fingers, form a crust.
- Let the crust set in the freezer for 10-15 minutes.
- While the crust sets, grate 2/5 of the chocolate bar, and finely cut another 2/5 of the bar. Mix the grated and fine pieces of chocolate in a bowl. Set aside.
- Combine the marshmallows and milk in a double boiler, and stir often to fully melt the marshmallows. Set aside.
- Whip the heavy whipping cream, vanilla, and food coloring together, using a whisk attachment with an electric mixer. Fold into the marshmallow mixture (it’s normal for the milk and marshmallow to separate).
- Using a spatula, fold the grated and cut chocolate into the pie filling, and then evenly smooth out the filling.
- Use a vegetable peeler to shave off chocolate curls with the last 1/5 chocolate bar. Drag the peeler down the long edge of chocolate. Then garnish the pie with the curls.
- Put the pie in the freezer. Once it’s frozen, it’s ready to serve.
29. Cupid’s cloud
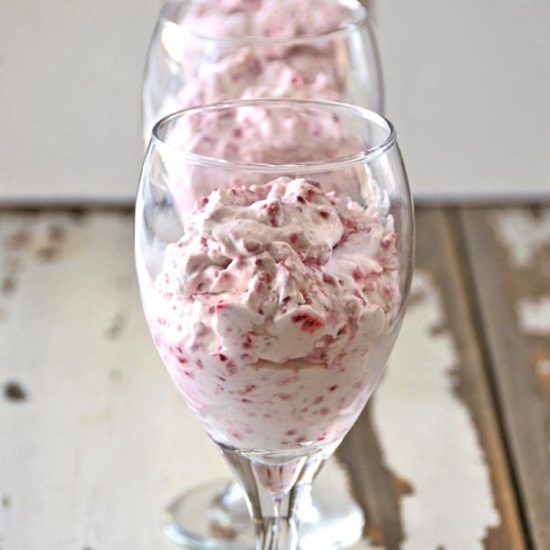
A simple combination of whip cream and raspberries makes for a simple and exciting recipe. Whip this up for all your loved ones!
Prep time: 15 min
Total time: 15 min
Servings: 6
Source: Jo-Anna Rooney of A Pretty Life
Ingredients
- 1 cup whipping cream
- 1 tablespoon sugar
- 1/2 teaspoon vanilla
- 2 cups frozen raspberries
- 1/2 cup sugar
Instructions
- Whip the whipping cream, 1 tablespoon sugar, and vanilla together with a mixer, and then set aside.
- Blend the raspberries and 1/2 cup sugar together in a food processor.
- With a spatula, fold the blended raspberries into the whipping cream.
- Spoon the mixture into 4 or 5 dessert cups or glasses.
- Cover and refrigerate until you’re ready to serve.
What are your favorite Valentine’s Day recipes?
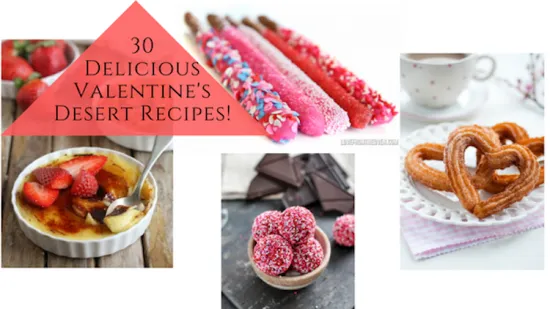
I really enjoyed gathering these recipes for you, and I can’t wait to find out what you made and loved. Let us know which recipes you wowed your loved ones with this Valentine’s Day. We’d love to hear your feedback and see photos of your delicious creations!
Last update on 2025-06-29 at 07:41 / Affiliate links / Images from Amazon Product Advertising API


