HI guys! It’s Amy from My 3 Monsters and I am thrilled to be here today sharing a fun Father’s Day gift idea that you and your kiddos can whip up in an afternoon. Can you believe Father’s Day is this weekend?! {I mean, really, where has the first half of this year gone?} No need to panic if you don’t have a gift ready for dad yet — there’s still plenty of time to make this cheeky grill apron before his big day.
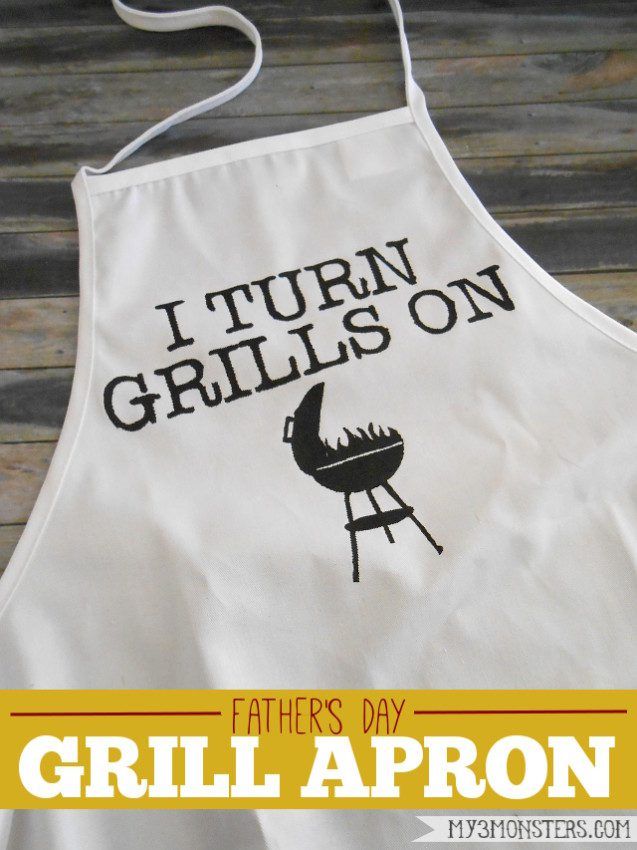
One of the things I love most about the men in my life — my dad, my husband, and my father-in-law — is their sense of humor. Each is very unique, ranging from dry to silly, but they keep us all in stitches when we get together, for sure. Another thing they all have in common is a mastery of outdoor cooking. I know, I know, it’s an ancient male stereotype, but they really are good at grilling. My dad’s teriyaki steak is to-die-for, no joke. What better opportunity to combine two of the things I appreciate about them into one silly {but useful!} gift?!
Father’s Day Grill Apron
You will need:
- an apron {I found a 3-pack of these white aprons at Hobby Lobby for about $10 — use a coupon and they end up being $2 each!}
- freezer paper
- X-acto knife
- an iron
- black fabric paint
- sponge brush
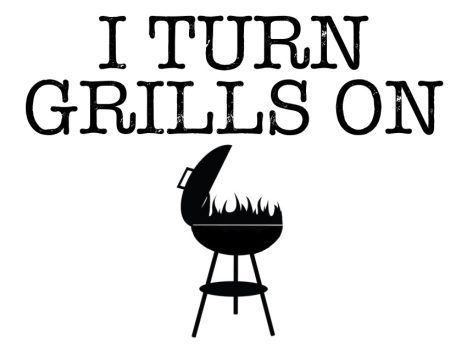
After purchasing the aprons, I recommend washing and drying them to soften the fabric and help them take the paint smoother. You don’t have to do this, but I think you will be happier with the results if you do. Next, print out your design. You can click on the image below and save it to your computer or make up your own. My boys misread the the text at first and couldn’t figure out why there was a picture of a grill on it. Plus, they were scandalized that I would even consider giving their grandpa anything that talked about girls when he is already married to grandma. Ha ha! Grandpa {and their father, for that matter} is going to LOVE it!
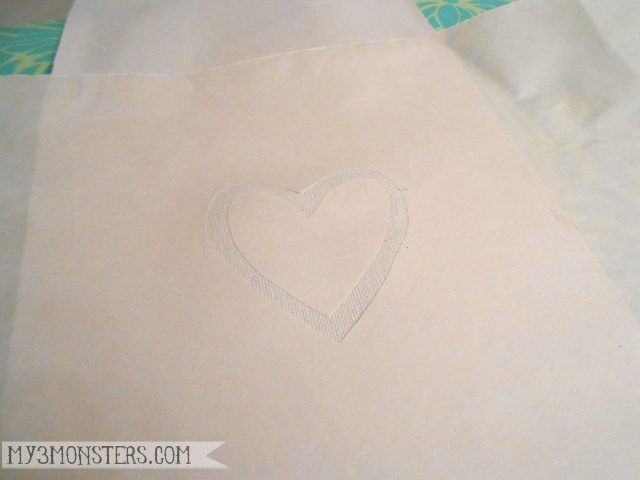
Now you’re going to create a freezer paper stencil to transfer that design to your apron. If you’ve never worked with it before, freezer paper is shiny on one side and papery on the other. It can be ironed onto fabric and peeled off cleanly without leaving any residue. It is perfect for projects like this!
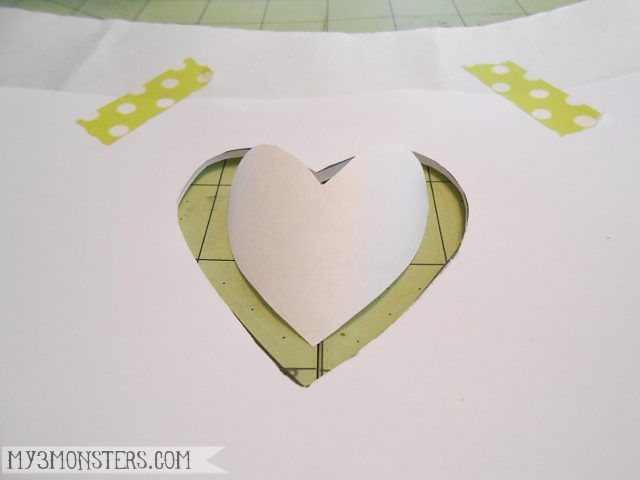
{Sorry! I got too excited about crafting and forgot to take photos until it was too late. The next few photos are of a different design, but you get the idea, right?}
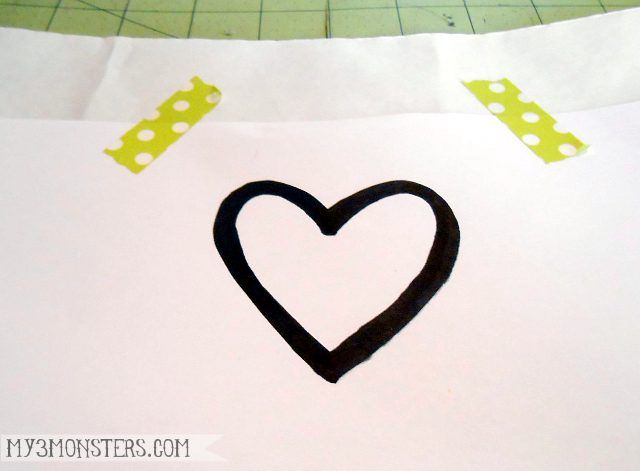
Cut a piece of freezer paper a few inches larger than the design. Place the shiny side down on top of a cutting mat or other surface that is safe to cut on. Tape your pattern on top of the freezer paper, in the center, and use the X-acto knife to carefully cut out all the black parts of the text and image. Be sure to save the white centers of the R’s and the O, and the little pieces between the legs of the grill — you will need those, but you can toss the letters themselves after you cut them out.
Carefully remove the printed pattern from the freezer paper when you are finished cutting out the design. Lay your apron out on an ironing board and iron it to remove any wrinkles. At this point, turn OFF the steam on your iron — you need a clean, dry surface to work with. Situate the freezer paper on top of the apron {shiny side down} where you want the design to appear and use the hot iron to affix it to the apron. The shiny side of the paper bonds with the fabric like magic until you are ready to remove it. Just run the iron carefully over the design, making sure that all the edges are stuck down and there are no bubbles or gaps. Place the centers of the R’s and other loose pieces in place and iron those on as well.
Place another sheet of freezer paper or some newspaper underneath the apron to protect your work surface from any paint bleed-through. With your sponge brush, apply the fabric paint to the freezer paper stencil you just ironed on to your apron. It may take a couple of coats to get good coverage if you are using light paint. I personally find that using darker paint on a light background yields best results, but that has just been my experience.
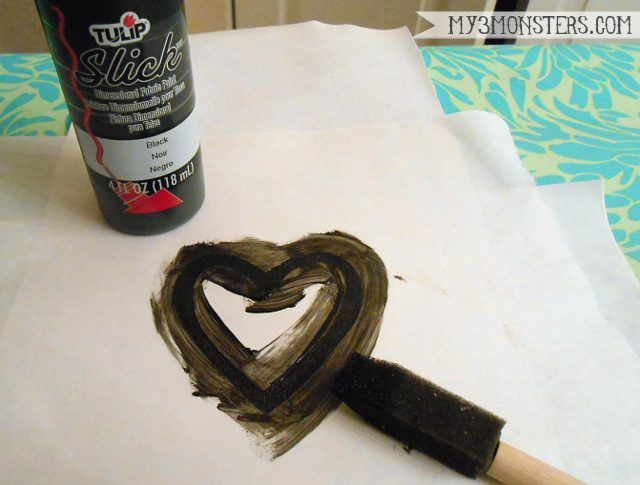
Allow the paint to dry and then carefully peel off the stencil and throw it away. Some brands of paint need to be heat set, so read the directions on your paint to know if you need to do anything special before using or washing your apron.
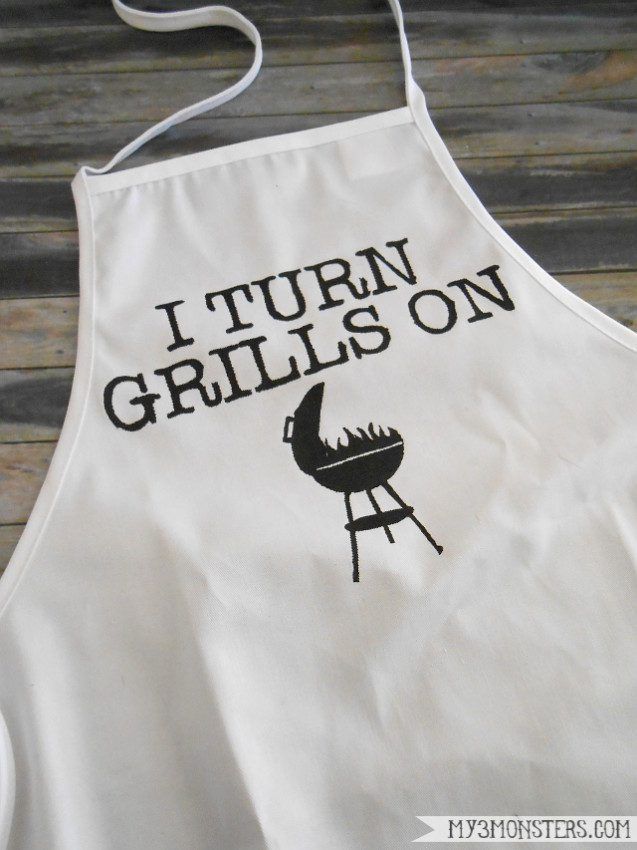
At this point, you’re finished! Fold the apron so the design is showing and tie it with some fun ribbon to give it as a gift.
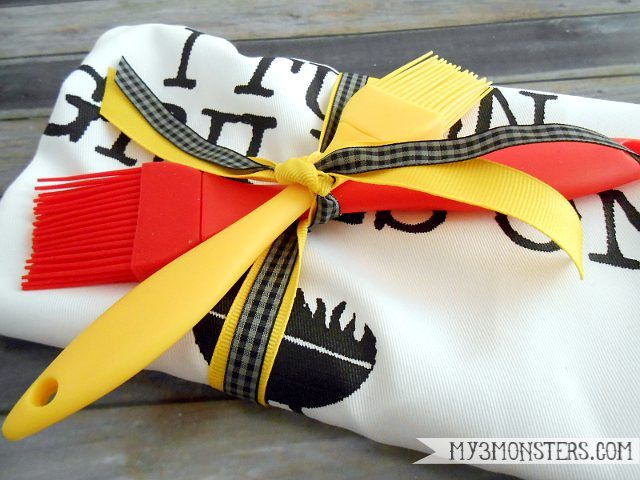
I picked up some silicone basting brushes to add to the top. A bottle of dad’s favorite grilling sauce or a canning jar full of homemade BBQ sauce would round out the gift beautifully. Add a six-pack of your dad’s favorite drink if you want to really spoil him!
If you want some more Father’s Day Inspiration, check these out as well:
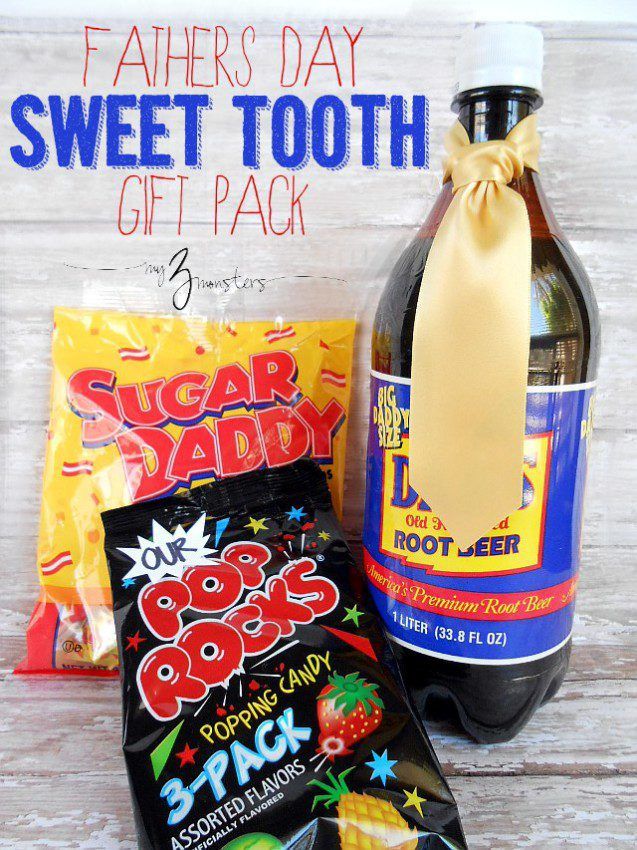
Father’s Day Sweet Tooth Gift Pack

Happy Crafting!
Amy
I just decided that I wanted to make my dad an apron like this last night. You have saved me the trouble of creating my own design! Thank you! I love it!
THIS is soooo cute. I wish my dad grilled so I could make an apron like this for him. Lol. Absolutely adorable, and I just HAD to come over and tell you that…
This is AMAZE-BALLS!!! How creative 🙂