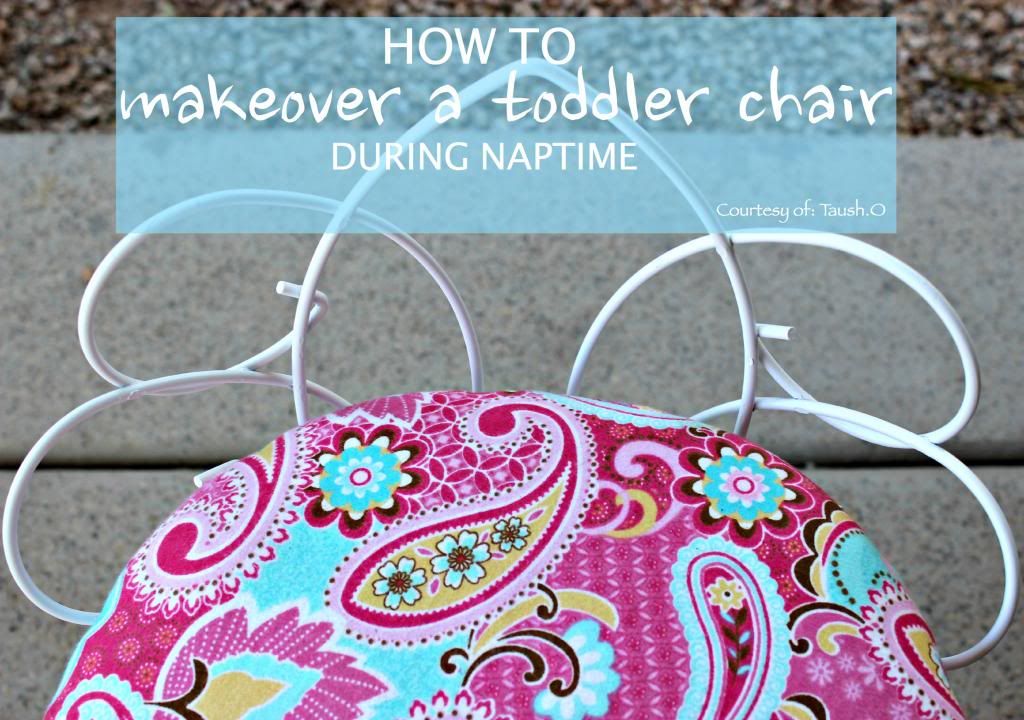
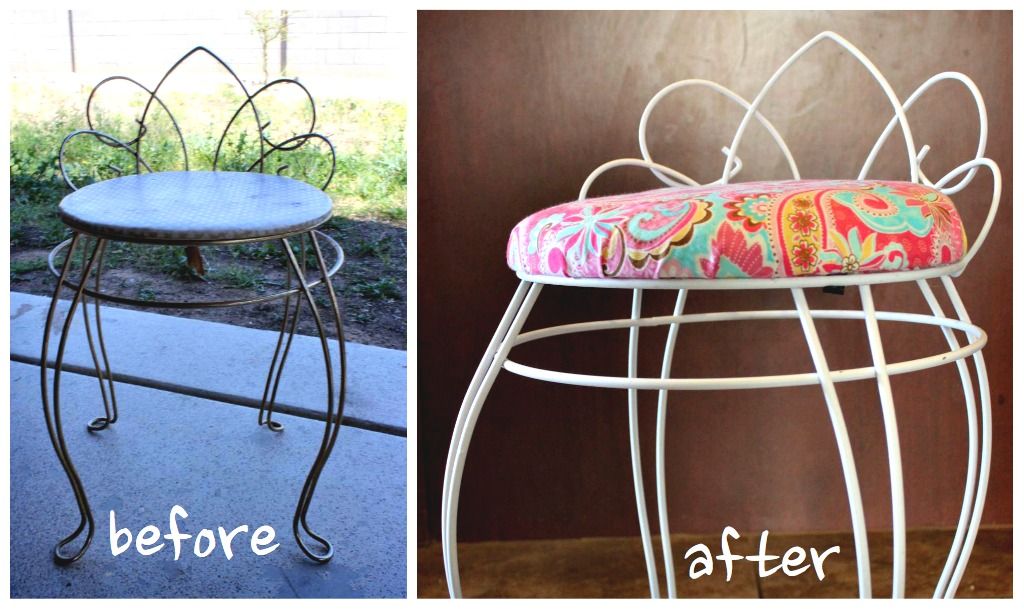
Any naptime that is longer than an hour is a ‘win’ in my book. Laundry, dishes & dinner prep can be done – or skip all that and you can just work on fun projects! I usually go for the latter. I’ve been known to pick up a few curb finds & to scour thrift stores for fun makeover projects – I’m a sucker for a good before/after. I scored this cute little chair at a garage sale last year for $1.00 & finally got around to cleaning it up. It really is so easy & takes very little time – I’ll show you!
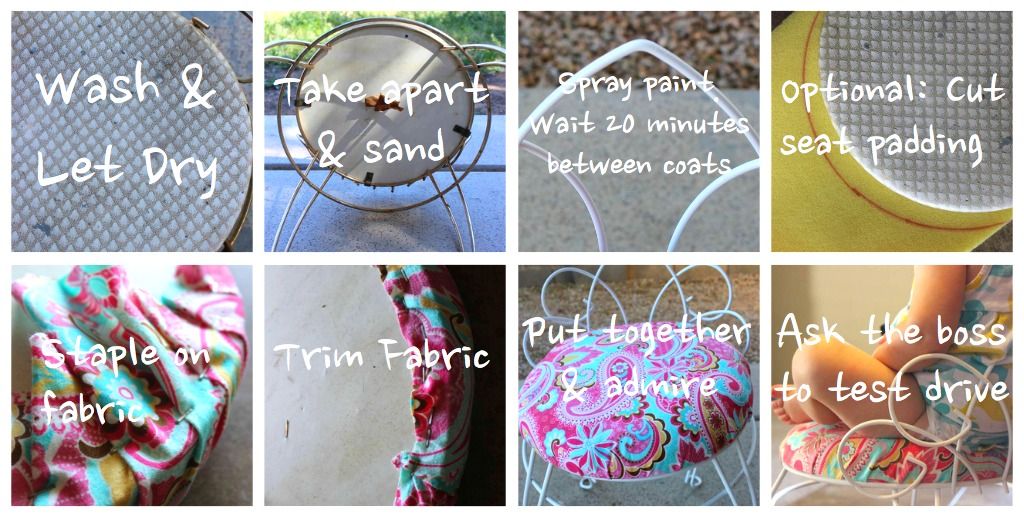
1. Wash & Let Dry. This old chair had paint chipping off of it & lots of dirt & dust. I used a pressure hose in the backyard & sprayed it midmorning so it would be dry by nap time!
2. Take apart what you don’t want spray paint on. I took off the seat so it was just the wire & then gently sanded down the frame to get the edges a little rough & ready to be spray painted.
3. Spray paint a nice even coat. (I used a white matte spray paint with a primer) & let dry for 20 minutes. Add another coat. I also added a clear coat on top of the white to seal it off.
4. During dry time, cover the seat with fabric. I found this adorable fabric at Wal-Mart for 5$ a yard. I purchased 1/2 yard & only used about half of that. I also had a foam mat laying around, so I traced the seat & added that to make it a little cozier. I used a staple gun & it only took about 3 minutes to put the seat together.
5. Put the chair back together & admire (and let completely dry)
6. Ask your super cute boss to test it out for you.
Simple right? My husband keeps asking why I don’t finish any of my other projects. Oops. It’s because I’m too busy hanging out at the Pool, playing dress-up with matching outfits for less than $10, & trying to keep up on my blog. Stop by sometime, we’ve got fun recipes, projects & a few too many pictures.