Hello! I’m Becky, writer of “Rub Some Dirt On It,” a blog about my family and photography. My husband and I lived and loved in California, but then decided to move back to New England, to Vermont of all places, to raise a family. My blog helped ease that transition. Now I am a city mouse, living in the country, writing to keep the rust off what used to be a pretty useful brain and documenting my children as they grow.
DIY DUMP TRUCK
This craft is awesome. It’ll take less than twenty minutes, require stuff you already have at home, and it’s easy. Trust me. Although I’m finding the directions a bit hard to articulate, I hope the photos help!
Materials:
egg carton
markers
glue and/or tape
pipe cleaner
Directions:
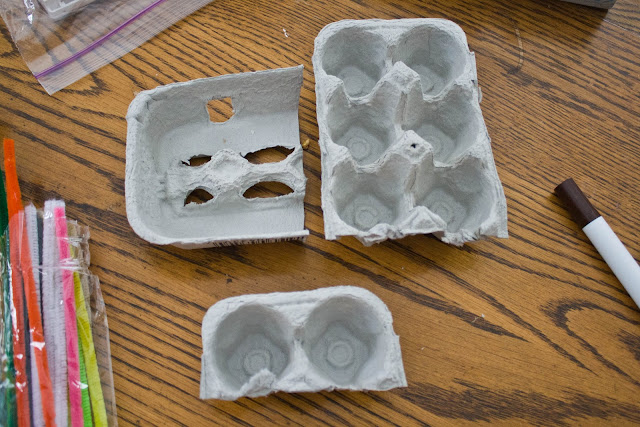
For reference, 1 segment of the carton = two egg compartments. You need only three parts of the egg carton. One third of the top (2 segments). One half of the bottom (3 segments) and one separate segment of the bottom. Did I explain that well? Well, here’s a visual.
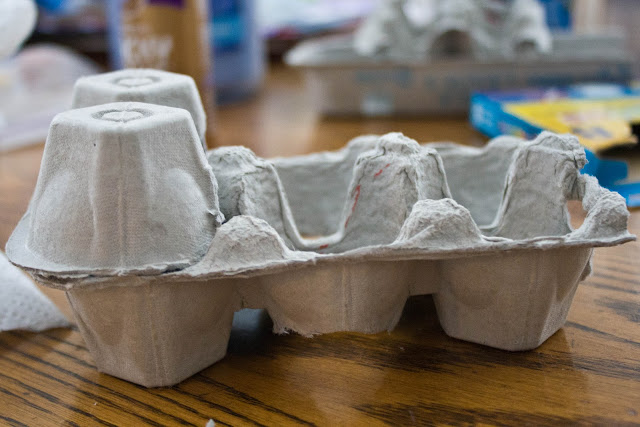
Okay, take the big one, the half of the bottom part of the carton. It should have three segments. Cut out the bottom of the middle segment so it looks like this:

Then take your one segment of the top and glue it to one end of the part you just cut holes into. That is the cab of the dump truck. It’s supposed to look like this, and I think the reason you cut the holes is so it gives the illusion the other four segments are wheels. I should have cut mine more. Also, I used Tacky Glue and Elmer’s Glue and the top was still flying off so I recommend scotch tape as well.
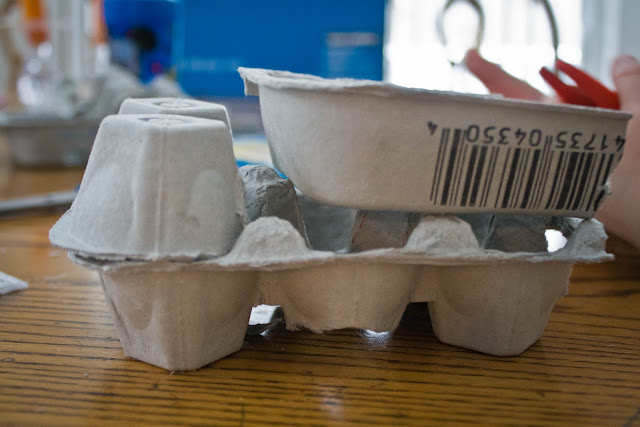
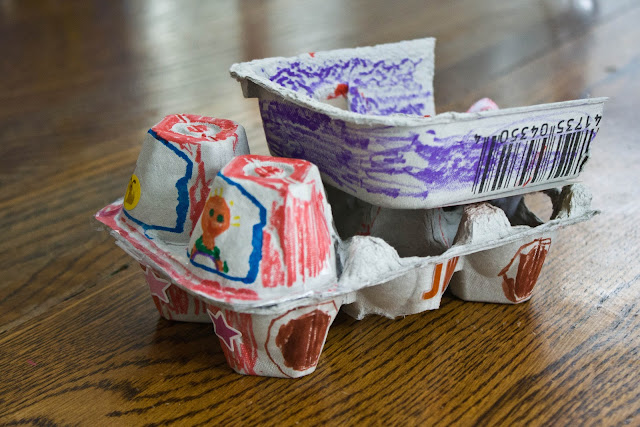
Now is the tricky part for me to explain. Take the part that you have left, flip it upside down and place it on the bed of your truck. That is the dumper part of the dump truck. You can imagine it lifting up and spilling its contents behind it.
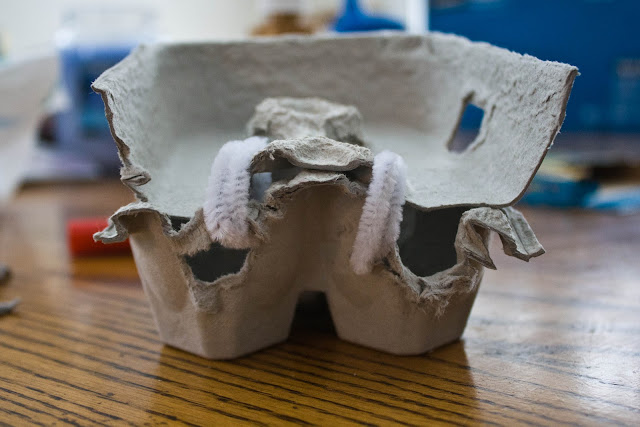
The website where I found this craft didn’t give me many ideas as to how to secure the dumper to the back of the truck. The author was a big fan of imaginative play. Me, too, but I’m also a big fan of not losing the most important part of my new toy. So I just cut four holes and looped white pipe cleaner through so that the dumper slides up and down easily.
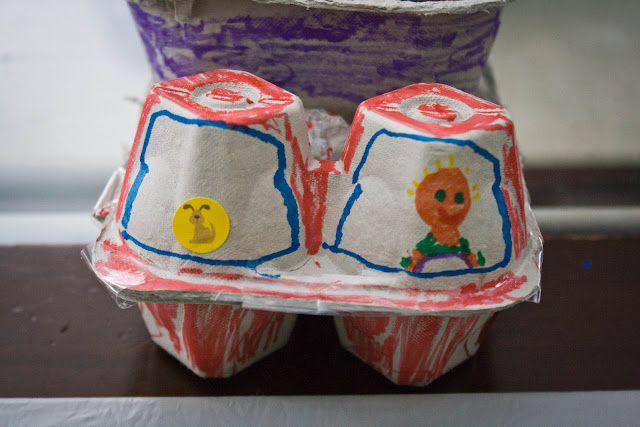
And that’s it! You’re done. A Do-It-Yourself Dump Truck. Now you can decorate. I was warned that washable markers wouldn’t do the trick but I think they were completely satisfactory. We started with the cab and drew Jax and his copilot Baxter (our dog, see him on the sticker?) in the windows. Jax was psyched to get his driver’s license on his first try.
Then we colored and went a little sticker-crazy. I actually stepped away to get Em up from her nap and expected to come back to a markery nightmare, but he was happily painting the truck with his red marker. He’s growing up, I tell ya.
I colored in the four wheels, (wished I had a cool sticker for those)…
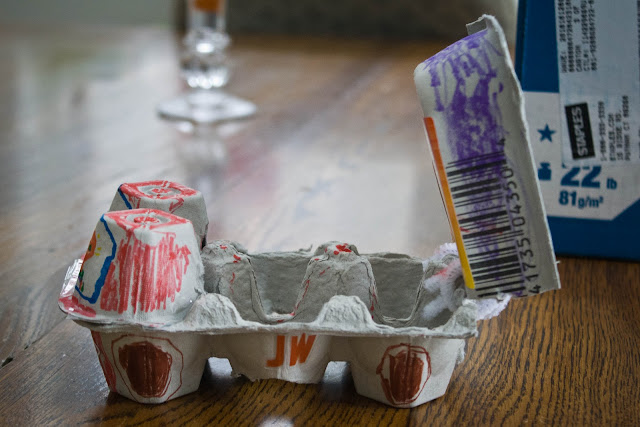
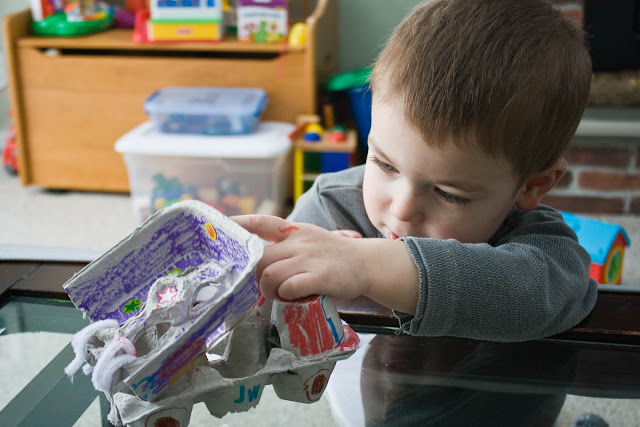
…double checked that the dumper was on securely…
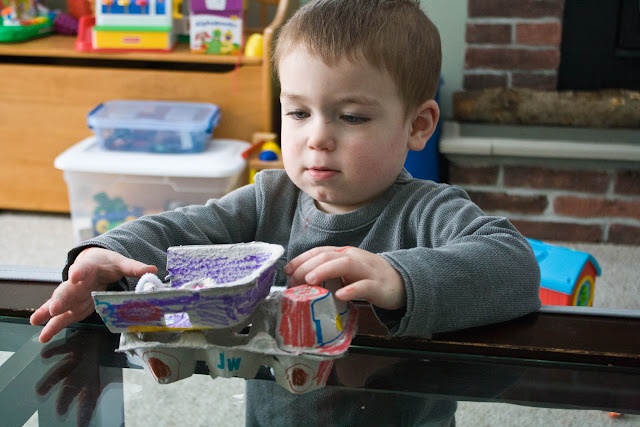
…and baby boy has a cool new truck that cost me nothing that I didn’t already have handy in the house. And it took me about twenty minutes from start to finish! You could always do more in the decorating department, but I figured for our first try at this, we’d keep it simple. He loved it no matter how it looked.
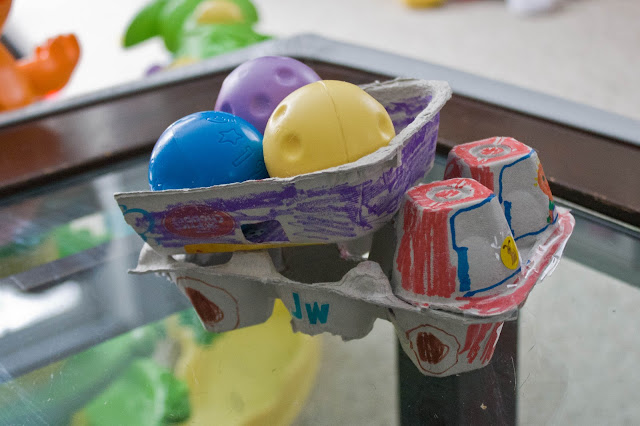
Found the perfect cargo.
And if you’re lucky, your kids will also turn it into a catapult. They’re so creative like that.
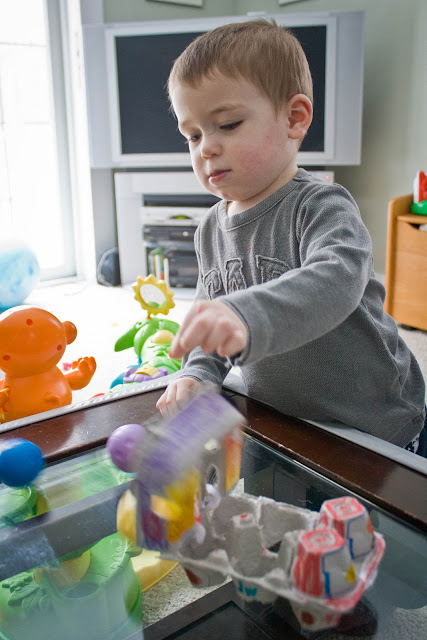
A DIY Catapult and Dump Truck. Not a bad way to spend twenty minutes!
This is so cute, my little one would love this just for the destructive catapult potential! Thanks for sharing Pop over if you like Rea
Wow, thank you for such an amazing post!! 🙂 I feel so lucky to share in this celebration with you!
What a fun craft! I don't have a boy, so we don't get to do many of these fun truck/catapult activities. Maybe we should just do it anyways!!
Love the photos. Really beautiful way to capture your children as they grow. Thank you for sharing!