Hello, everybody! I’m Erica, the blogger behind Dwell Beautiful. I specialize in craft and DIY home decor tutorials, current design trends, interior design advice, and makeovers for those on a budget. I love being able to help others realize their dreams of having a beautiful home without breaking the budget. I’m so thrilled and honored to be guest posting for Melanie here at Reasons to Skip the Housework!
Contents
How to Make a Circle Punch Craft
Today I’m sharing a super easy craft tutorial that utilizes a circle punch and any pretty scrapbook or craft paper that you might have lying around. I love making and sharing craft tutorials that anyone at any skill level can do – you don’t have to be an artist to make beautiful pieces for your home! The following tutorial is super easy and takes less than 45 minutes to do. It’s an easy craft that can be done mindlessly while binge-watching your fave TV show 😉 Let’s get started, shall we?
What You Need to Make a Circle Punch Craft

- Canvas/board of some sort (even a bit of cardboard will do!)
- Scrapbook paper, craft paper, or even paint chips!
- Circle Punch
- Hot glue gun and glue sticks
- Cardboard or stick-on letters that spell out any desired phrase
Circle Punch Craft: Step-By-Step Tutorial with Images
Step 1
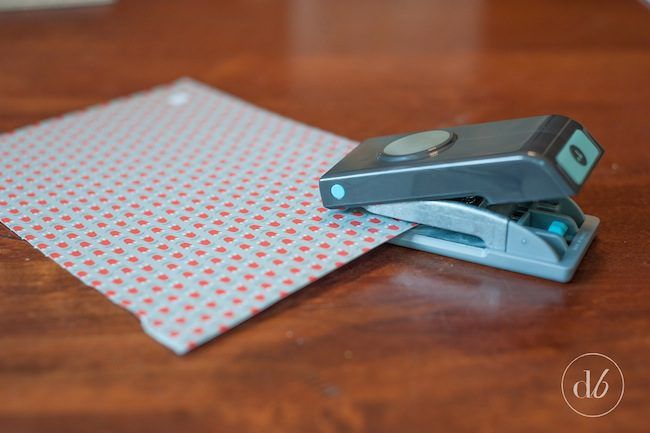
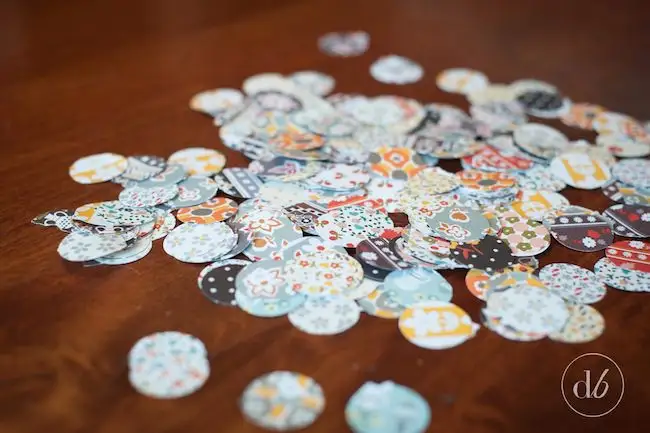
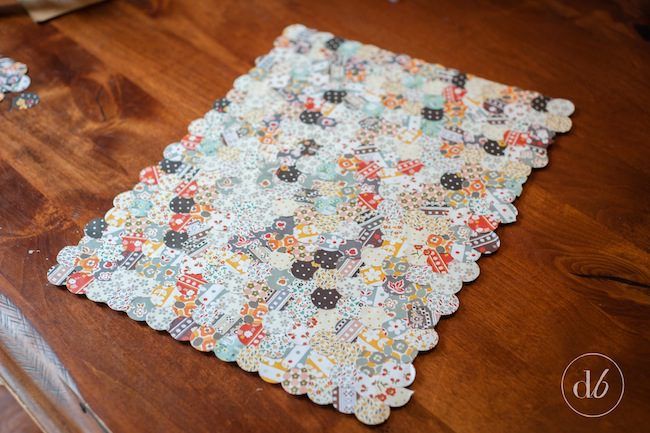
Take your circle punch and punch out as many circles as you think you’ll need to fill your chosen canvas or board. Use different colors or patterns to mix it up! It would be fun to do an ombre effect! It’s totally up to you 🙂
When you’re done, you should have a pretty pile like this:
Step 2
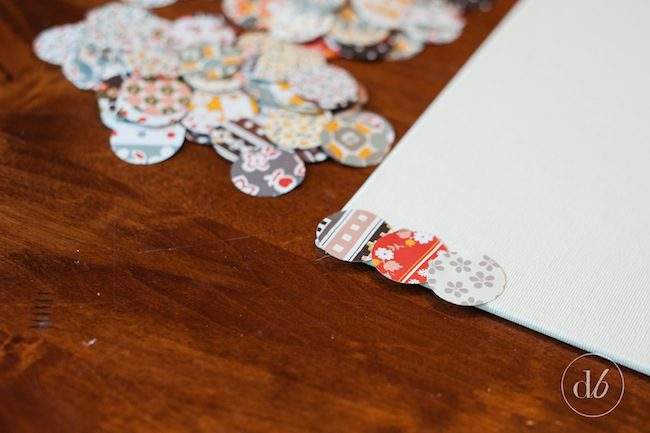
Take your hot glue gun and put a dab on the back of each circle, overlapping them slightly. Start at the bottom and work your way up – making sure your bottom edge of circles overhangs the canvas a little bit (don’t worry, we will be cutting off the excess later!) Continue gluing in an overlapping fish-scale pattern.
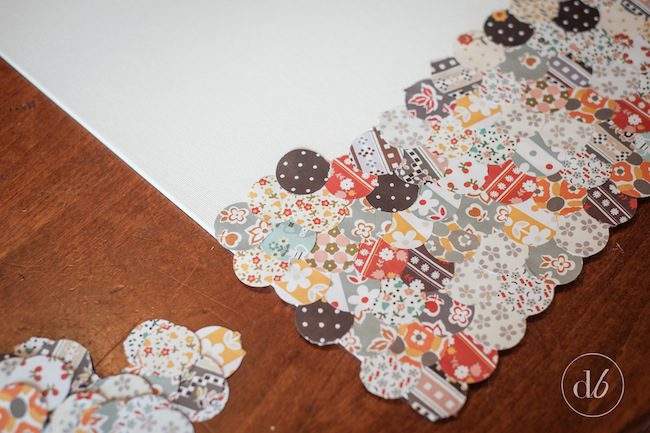
Step 3
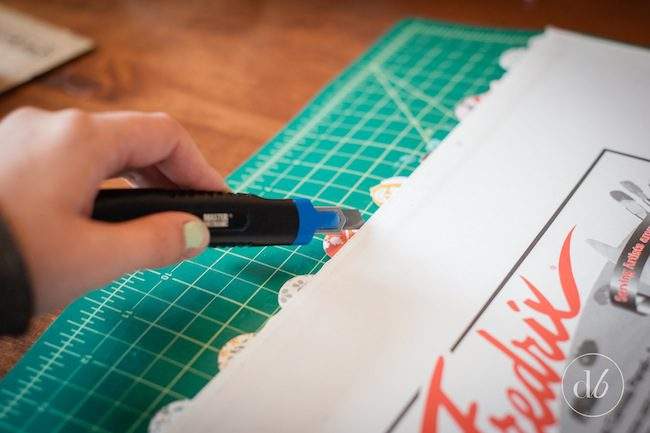
Woohoo! Once you’ve finished gluing down all your circles, flip it over and take a craft knife and cut around the edges of your canvas like so:
Step 4
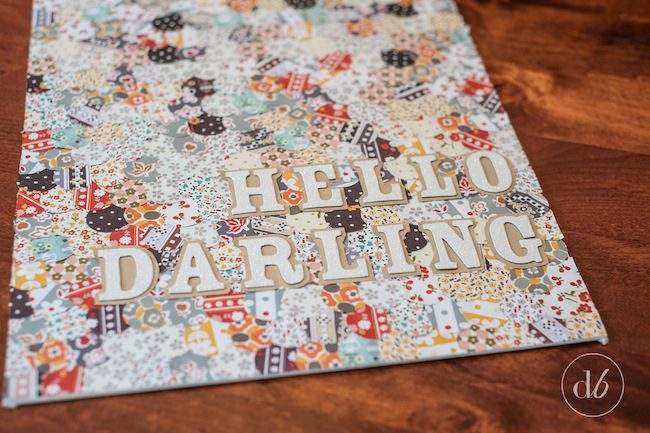
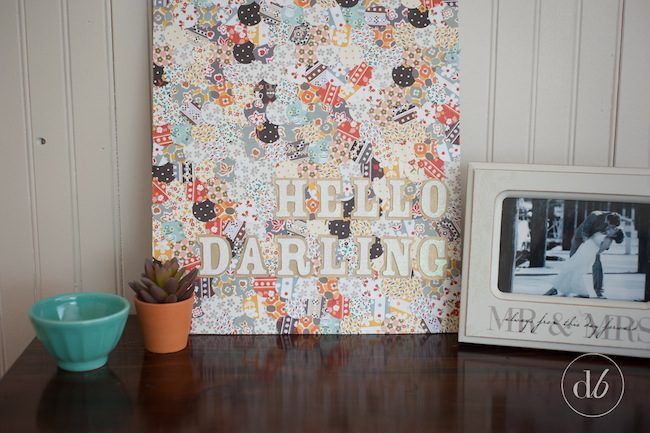
Add your letters! Depending on the color of your letters and the color of your paper, they may or may not be hard to see. Layout your desired phrase and see how it looks and where you want to place it.
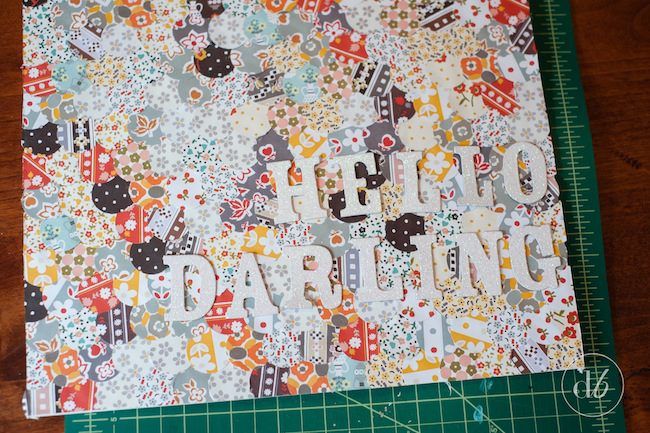
After laying out my letters, I realized that the white blends in too much with my busy background, so I decided to paste the letters first onto some pretty gold paper to make them pop.
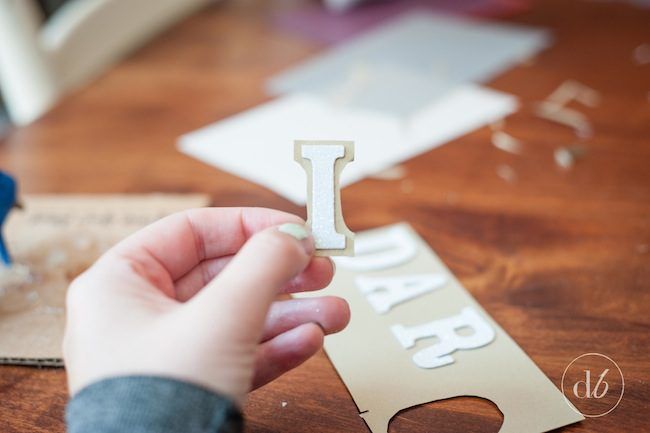
Once you have your letters ready and where you want them, either peel the adhesive backing off and stick them down or use your trusty glue gun!
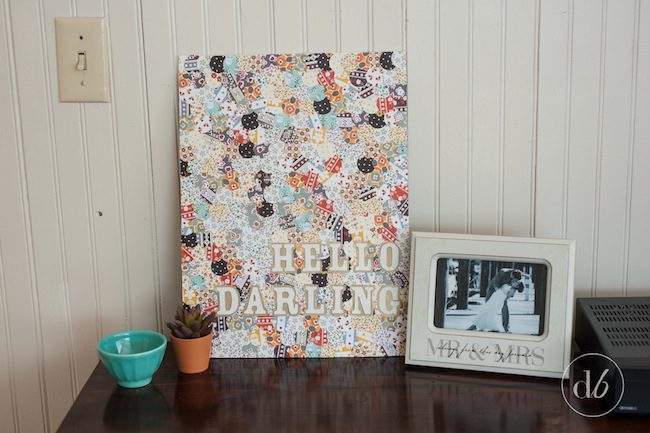
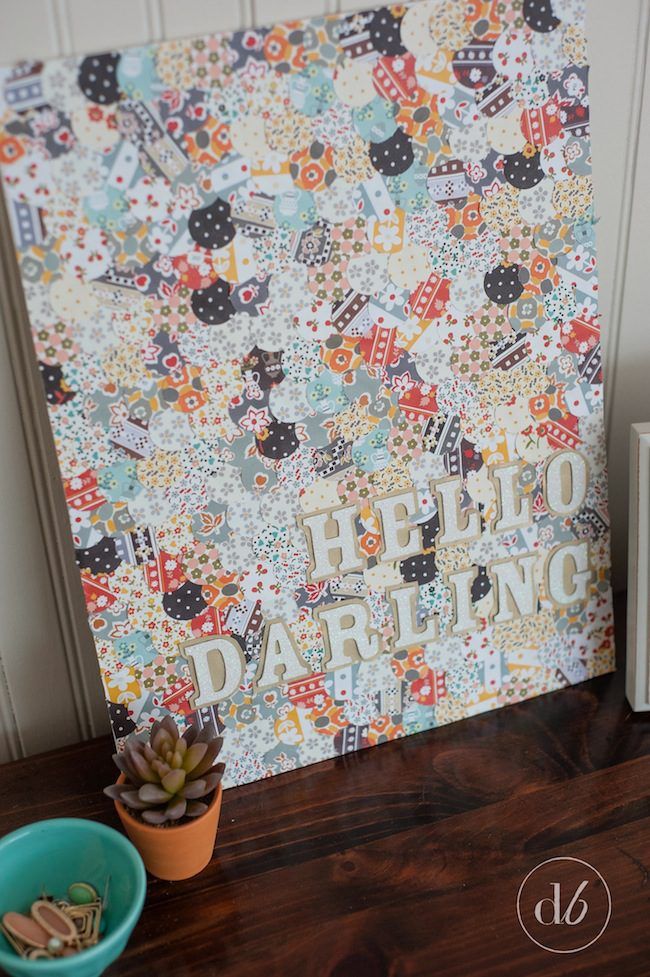
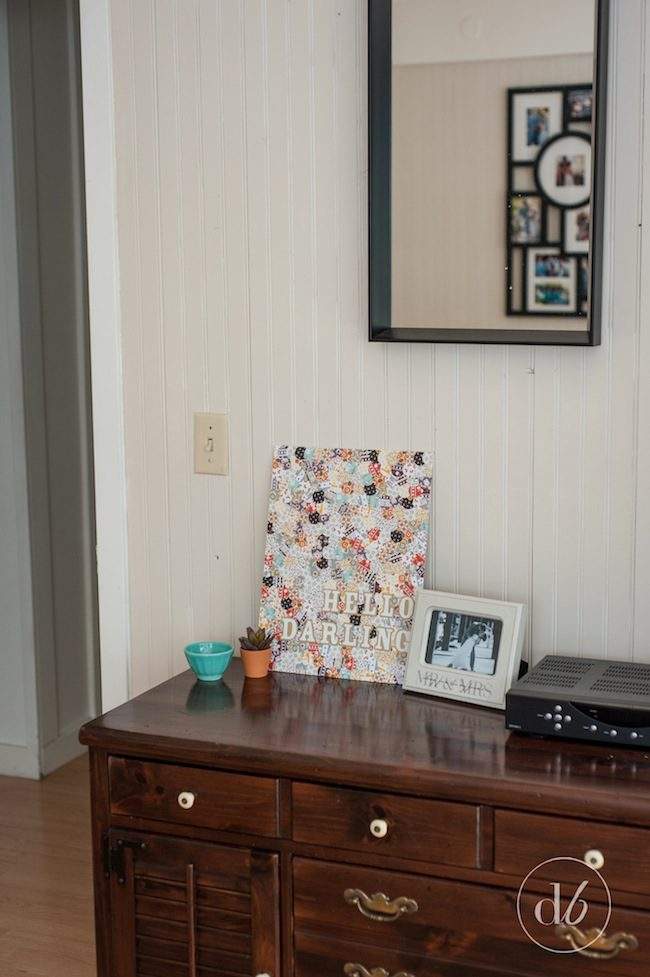
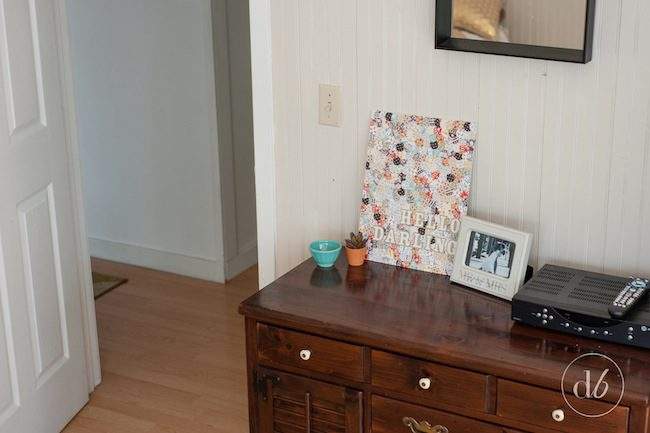
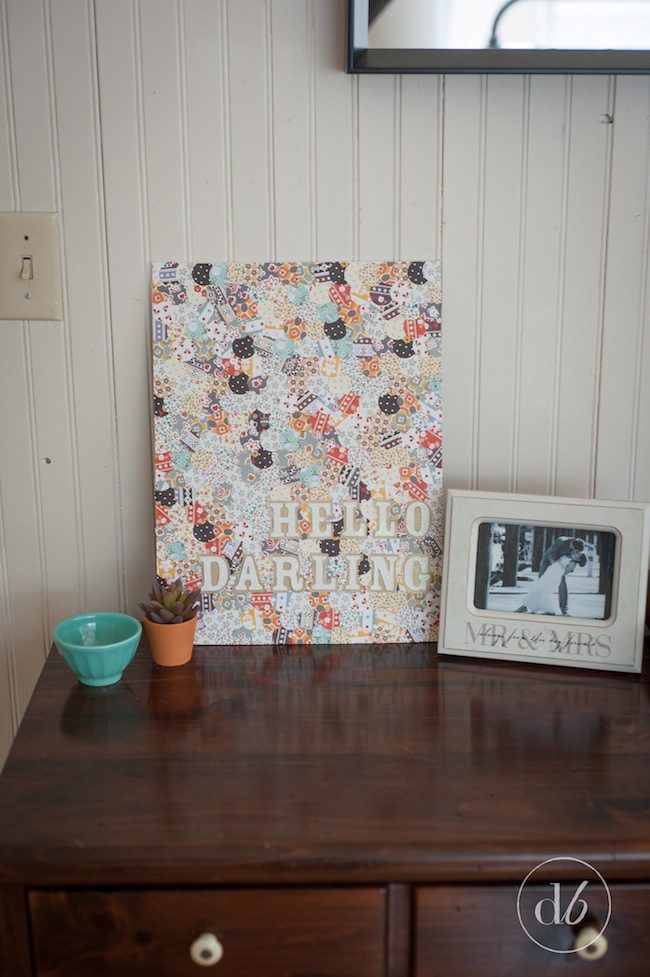
Finally, Your Own Circle Punch Craft!
And there you have it! Your very own circle punch craft turned beautiful art. Decide where to hang or prop your piece (you can even put it in a frame!) and rake in the oohs and ahhs as people admire your craftiness!
Thanks SO much again to Melanie for hosting my guest post this week! She is absolutely fantastic and you should stick around to see all her amazing posts. If you want to find out more about me and my other projects and tutorials, please visit me at Dwell Beautiful!

Thx for this awesome idea! I have 2 circle punches that I bought for a very specific purpose and have been trying to think of another way to make use out of them. 🙂
How fun and creative, Erica! I love the patterns you chose and the gold backed letters really do make them pop! Cute saying, too. 😉
SUPER cute! I love quick and easy projects like this!!!
Erica this is awesome! I love how you can customize it with any type of paper 🙂 So creative!
This is awesome!! I think I will be making this very soon!
You are so creative, Erica! So cute!
This is adorable!
What a great idea! This came out adorable!!!
What a clever idea! This turned out beautifully, Erica. I especially love the papers you chose.