Why debate over Unicorn Birthday Party Ideas? Well, the unicorn is a dazzling mythical creature, beloved by kids and adults alike. Just one look at these beauties, and it should be clear why they have managed to capture and hold the attention of so many. No wonder unicorn-themed birthday parties continue to be so popular!
Also, sticking with a birthday theme has gone beyond cake, balloons, and some tableware. The latest trend is to go all-out with themed decor, games, outfits, food, and party favors. There has never been a better time to go unicorn-crazy than with a birthday party.
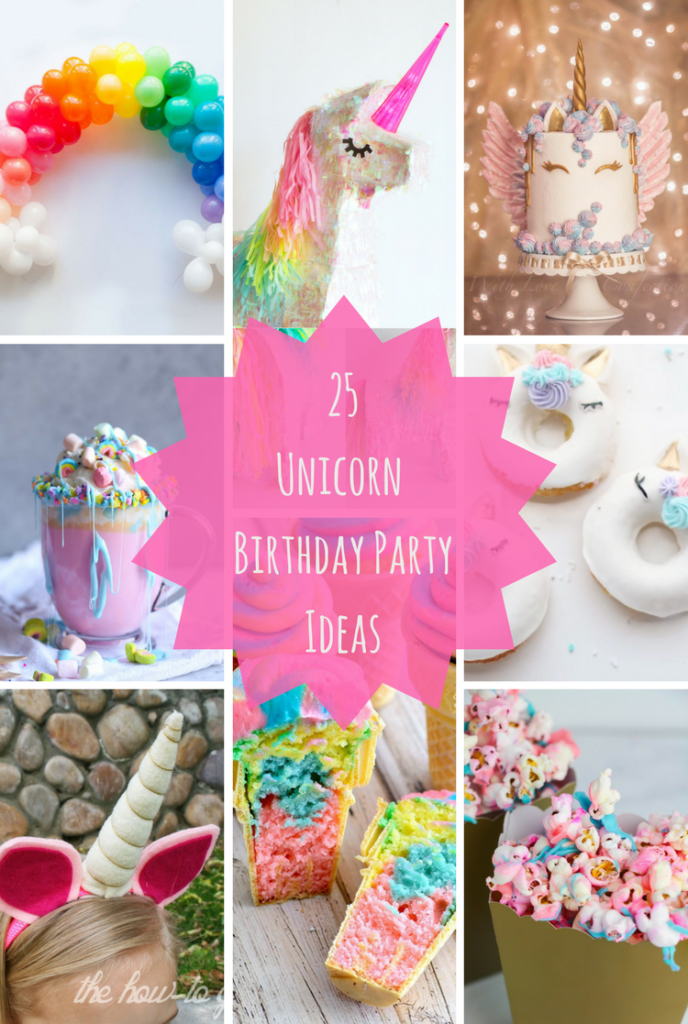
From rainbow-colored party food and unicorn-themed festive drinks, to balloons and headbands. You can do countless things when you host a unicorn-themed birthday party! If this all seems to be a bit too much to narrow down, we have you covered.
Contents
- 27 DIY Unicorn Birthday Party Ideas in 2024
- 1. Customized lanyards and enamel pins
- 2. Unicorn drip cake with meringue wings
- 3. Unicorn stick horse
- 4. Unicorn pull-apart cake
- 5. DIY unicorn gift bag
- 6. DIY rainbow balloon arch
- 7. Unicorn bark milkshake
- 8. Unicorn headband
- 9. Rainbow unicorn cake
- 10. Unicorn horn pretzel
- 11. Unicorn poop cupcake cones
- 12. Unicorn mask invitation
- 13. Unicorn doughnuts
- 14. Unicorn ice cream
- 15. Unicorn photo booth props
- 16. DIY unicorn piñata
- 17. Unicorn popcorn
- 18. Unicorn invitations
- 19. Unicorn bark
- 20. Unicorn hot chocolate
- 21. Simple DIY unicorn horn
- 22. Unicorn marshmallow pops
- 23. Unicorn fudge
- 24. Unicorn party sign
- 25. Unicorn yogurt bites
- 26. Unicorn glassware
- 27. Unicorn Birthday Decorations at Home: Unicorn Confetti
- What Are Your Favorite Unicorn Birthday Party Ideas?
27 DIY Unicorn Birthday Party Ideas in 2024
In the following article, you will find 27 unicorn birthday party ideas. Whether you choose to do a lot of them or only one, this theme is certain to go over well with your guests.
1. Customized lanyards and enamel pins
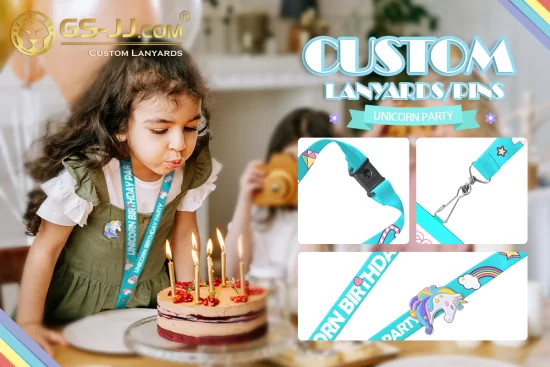
Design and print customized lanyards and enamel pins for special days, pictures, or even your paintings about unicorns. Order custom lanyards and add your kid’s name or photo, or their favorite animal or character!!
In this case, you’ll want unicorn art that will delight your kiddo and guests. Design it yourself, commission an artist, or find a free design online! Your kid, their friends, and your guests will see the love you put into the custom design. Plus, lanyards and pins make great mementos to keep long after the celebration.
Source: GS-JJ
2. Unicorn drip cake with meringue wings

The cake is a super important part of a birthday party (or any party, honestly). What better unicorn party food than a winged unicorn cake?!
It has everything you want for a unicorn theme. The gold horn is tall and glimmering, and the wings have an intricate pattern with a gorgeous color scheme. This fabulous cake design is great for anyone who loves unicorns!
Source: Love and Confection
3. Unicorn stick horse
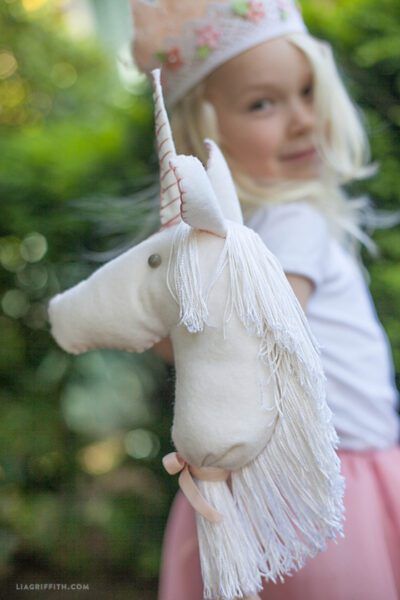
Here is something sure to keep your little party guests entertained and happy. If you’re having an outside party, these unicorn stick horses are a sure way to get the kids playing with one another. Let them gallop on their own or even set up some fun races and give away cool prizes.
Source: Lia Griffith
Supplies
- Detail scissors
- Embroidery needle
- Clover marbled glass head pins
- Stuffing tool, or chopstick
- Needle threader (optional)
- Low-temp hot glue gun
- Glue sticks
- Paint brush
- White wool blend felt
- Embroidery floss, medium pink (776)
- Polyester fiber fill
- Fabric pen
- 1/2″ x 36″ wood dowel
- White paint
- Fringe
Instructions
- Download and print the pattern from the source.
- Optionally, paint the dowel white.
- Draw and cut out the patterns from white felt.
- On the head, mark where the eyes and ears will go.
- Blanket stitch the ears and horn.
- Using embroidery thread, stitch a spiral on the horn.
- Sew the ears onto the head with a blanket stitch.
- Stuff the head with filling, and insert the dowel into the filling until it reaches the top of the head.
- Hot glue the bottom edge of the unicorn head to the dowel. Then stitch the bottom edge tightly closed, and tie the thread.
- Fold the fringe in half, and loop the fold around the dowel at the base of the unicorn’s neck. Sew the fringe layers together.
- Then, starting at the base of the horn, stitch the fringe onto the unicorn’s head and neck. Wrap the end of the fringe around the dowel, covering the felt at the base of the neck. Sew the fringe onto the neck.
- Stitch on buttons where you marked the unicorn’s eyes.
- Fasten a ribbon around the base of the neck. If necessary, attach with hot glue.
4. Unicorn pull-apart cake
Next on our unicorn birthday party ideas list is this amazing “cake.” Cutting and serving slices of a cake at a party can be a little chaotic, especially when your guests are on the younger side. This sugary delight has the illusion of being a cake, but it’s actually cupcakes!
That’s not the only magical thing about this cake. When guests bite into this cupcake, they will cheer in delight as colorful sprinkles pour out! Because of this cake design, the children will never forget this special occasion.
Total time: 1 hr 20 min
Servings: 10-15 people
Source: So Yummy!
Ear and horn ingredients
- Fondant
- Pink food coloring
Swiss buttercream ingredients
- 8 egg whites
- 1 1/2 cups sugar
- 6 sticks butter
- 2 teaspoons almond extract
Cupcake ingredients
- 2 boxes vanilla cake mix
- Food coloring, multiple colors
- Sprinkles
Ear and horn instructions
- Roll a small amount of fondant into a ball.
- Flatten the ball with your fingers, and shape it into a petal, and set aside.
- Roll a smaller amount of fondant into a ball.
- Add a drop of pink food coloring to the smaller ball, and squish together to evenly spread the food coloring.
- Roll the pink fondant into a small ball again. Then flatten and shape into a petal.
- Press the pink petal atop the white petal.
- Place the ear on a wax paper-lined plate.
- Roll some fondant into a long, thin tube.
- Cut the fondant tube in half.
- Twist the fondant tubes together. Shape the end into a soft point.
- Place the horn on the lined plate with the ear.
- Allow the ear and horn to dry overnight, until hard.
Swiss buttercream instructions
- Bring water in a pot to a simmer on the stove.
- Cut the butter into cubes.
- Place a metal bowl over the simmering water, with about 2 inches of space between the water and the bowl.
- Whisk the egg whites and sugar together in the bowl. Whisk continuously for 5 minutes, or until the sugar fully dissolves and the mixture is warm.
- Move the egg white and sugar mixture into a stand mixer. Whisk for about 10-15 minutes, or until the mixture has completely cooled and is forming stiff peaks.
- Gradually add the butter, one or two cubes at a time. Whisk until smooth.
- Mix in the almond extract.
Cupcake instructions
- Preheat the oven to 350 F degrees.
- Make the cake batter, following the package’s instructions.
- Pour equal amounts of batter into as many bowls as you have food coloring.
- Squeeze a few drops of food coloring into each bowl. Stir until the color is evenly mixed.
- Line a muffin tin with cupcake papers.
- Spoon batter into the muffin tins, and bake for about 15 minutes.
- Let the cupcakes cool for a little bit. Then, create a pit in the middle of each cupcake using the wide end of a piping tip. Set the removed cake aside.
- Add sprinkles to the pit of each cupcake. You can use the piping tip as a funnel.
- Plug each sprinkle-filled cupcake with the set-aside cake bits.
- On a serving tray, arrange the cupcakes in the shape of a horse head.
- Put heaping dollops of Swiss buttercream frosting onto the cupcakes.
- Then use an angled icing spatula to shape and smooth the frosting over the cupcakes.
- Add additional frosting to shape the unicorn’s jaw and nose.
- Add food coloring to the leftover frosting, and pipe the unicorn’s multi-colored mane.
- Add the fondant ear and horn.
- Pipe an eye.
5. DIY unicorn gift bag

You’ll need something to put those party favors in, so why not go for a cool unicorn bag? One of the best things about this bag is that it starts so simple. All you’re using is a plain white gift bag and transforming it into a sparkly, fun unicorn! The kids can take home sweet goodies and a beautiful bag.
Source: Tikkido
Supplies
- White paper
- Pink paper
- Scissors
- Glue or glue stick
- Gold card stock or craft foam
- Gold glitter
- Low temperature glue gun
- Artificial flowers
- Rhinestones
- Colored marker
- Plain white gift bag
Instructions
- Draw and cut out two ear shapes from the white paper.
- Draw two smaller ear shapes on the pink paper. Cut the smaller ears out.
- Glue the pink ear shapes onto the white ear shapes.
- Fold in the bottom corners of the ears. Glue them in place.
- Draw a twisty unicorn horn on the gold card stock or craft foam.
- Cut out the horn.
- Trace the lines of the unicorn horn with hot glue.
- Quickly sprinkle gold glitter on the hot glue before it cools.
- Glue the horn and ears to the inside of the gift bag.
- With the colored marker, draw eyes on the gift bag.
- Decorate the bag with artificial flowers and rhinestones.
- Optionally, use sparkly pink tulle instead of tissue paper.
6. DIY rainbow balloon arch
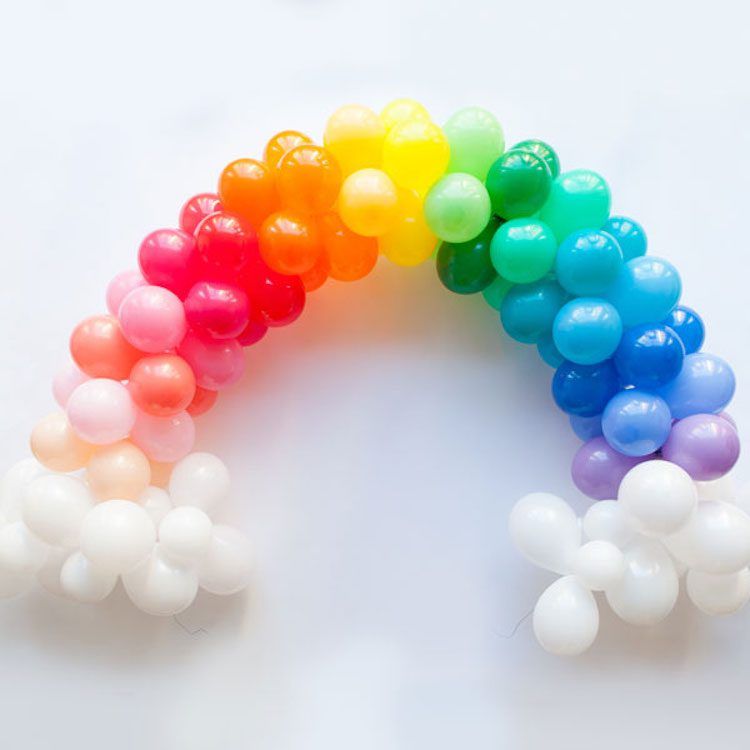
Balloon arches bring that “wow” factor to a unicorn party theme! These are cute, fun, and easier to make than you’d think. More so, they will instantly make your little unicorns feel as enchanted as they should be.
The creator of this balloon arch used about 20 different colors and a whole lot of balloons. You could also buy some unicorn balloons to go with this rainbow arch!
Source: Oh Happy Day
Supplies
- 6″ balloons
- String or twine
- Wire
- Wire cutters
- Balloon pump
Instructions
- Each layer of the arch uses 4 balloons. Using the balloon pump, inflate 4 balloons from each color except white.
- Tie two same-colored balloons together. Repeat with the other two balloons of this same color.
- Twist the two tied pairs of same-color balloons together.
- Twist the four connected balloons onto the wire. (Leave the wire on the spool until you have attached all groups of balloons.)
- Adjust the balloons on the wire until they resemble a four-leaf clover shape.
- Repeat steps 2 through 5 with each color balloon. Group the balloons closely together on the wire.
- Inflate white balloons in a variety of sizes.
- Tie the white balloons together in groups of 3 or 4 balloons.
- Twist the groups of white balloons to either end of the wire. Then cut the wire.
- Center the rainbow arch on a table or wall, using tape to hold it in place.
7. Unicorn bark milkshake
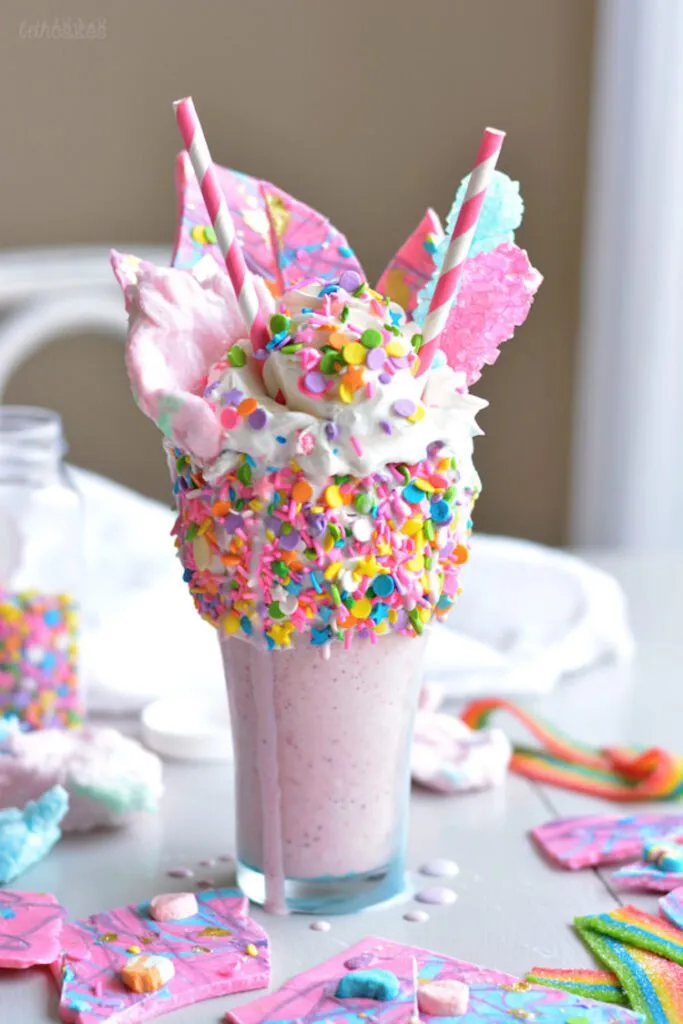
If you’re looking for a spin on the usual ice cream bar, try a milkshake bar with unicorn bark milkshakes! You can whip everything up with little difficulty, right in your kitchen. Kids will flock to this colorful, overflowing treat that is as enchanting as a unicorn. You can make this easy smoothie recipe in no time.
Source: Bethcakes
Unicorn bark ingredients
- 1 package pink candy melts
- 1 package blue candy melts
- 1 package purple candy melts
- Sprinkles
- Decorations of your choice
Milkshake ingredients
- 1/2 cup frosting
- 1 cup sprinkles
- 1.5 quart vanilla bean ice cream
- 1 container strawberries, fresh
- 1 container raspberries, fresh
- Milk
- Whipped cream
- Other toppings as desired (like cotton candy, rock candy, and sprinkles)
Unicorn bark instructions
- Line a baking sheet with plastic wrap, parchment paper, or wax paper.
- Melt each candy melt color in its own microwave-safe bowl.
- Once melted, pour the blue and purple melted candy into separate sandwich or piping bags.
- Tip the melted pink candy onto the lined baking sheet. Spread it out in a rectangle until it’s about 1/4″ thick.
- Pipe the melted blue and purple candy onto the melted pink candy. Then tap the baking sheet onto the work surface.
- Add sprinkles and other decorations to the melted candy.
- Refrigerate for 30-60 minutes, or until the bark has hardened.
- Cut or break the bark into pieces.
- Store the bark in the fridge until it’s time to top the milkshakes.
Milkshake instructions
- Ring the top of a cup with frosting. Add sprinkles to the frosting. Place the cup in the freezer to harden the frosting and keep the milkshake cool for longer.
- In a blender, add 4 to 5 scoops of ice cream, 1/2 cup diced strawberries, 1/2 cup raspberries, and 1/2 cup milk. Blend until smooth, adding more milk or ice cream until the milkshake is the desired consistency.
- Fill the frosting-ringed cup with milkshake.
- Top with a whipped cream swirl. Insert a few pieces of unicorn bark in the whipped cream.
- Add additional sprinkles, cotton candy, and rock candy as desired.
8. Unicorn headband
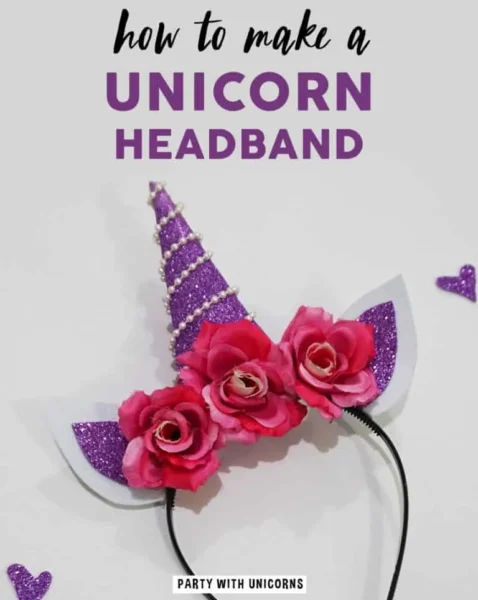
Unicorn headbands are a wonderful way to help everyone at your party feel as special as these magical creatures. You can buy unicorn headbands online or make your own.
Making them before the party does save some time, especially if you have a lot of younger guests. However, for older kids, you can turn it into a crafting game. They’ll love being able to decorate and personalize their unicorn headbands! Help them feel the unicorn vibe and encourage their imagination to run wild.
Source: Party with Unicorns
Supplies
- Felt
- Glitter foam/paper
- Scissors
- Fake flowers
- Hot glue gun
- Glue sticks
- Headband
- Bead pearl string
Instructions
- For the outer ear, draw and cut out two ear shapes from the felt.
- For the inner ear, draw and cut out two smaller ear shapes from the glitter foam.
- Use hot glue to adhere the inner ears to the outer ears.
- Draw and cut out a triangle with one rounded edge from the glitter foam.
- Roll the glitter foam into a cone. Add a line of hot glue under the edge of the glitter foam, and press down onto the glitter foam layer below.
- Glue the end of bead pearl string to the base of the cone. Then wrap bead pearl string in a spiral up the cone. You can glue as you go to make the bead pearl string extra secure, or just glue the end of the bead pearl string to the horn tip.
- Glue the ears and horn to the headband.
- Glue fake flowers to the fronts of the ears and horn.
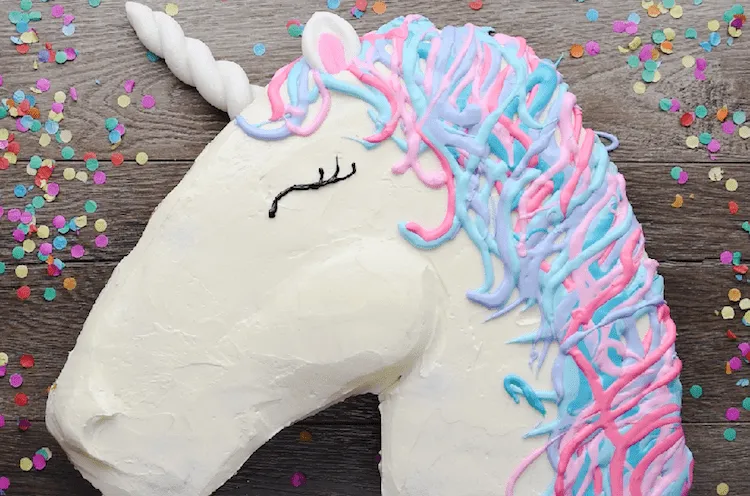
9. Rainbow unicorn cake
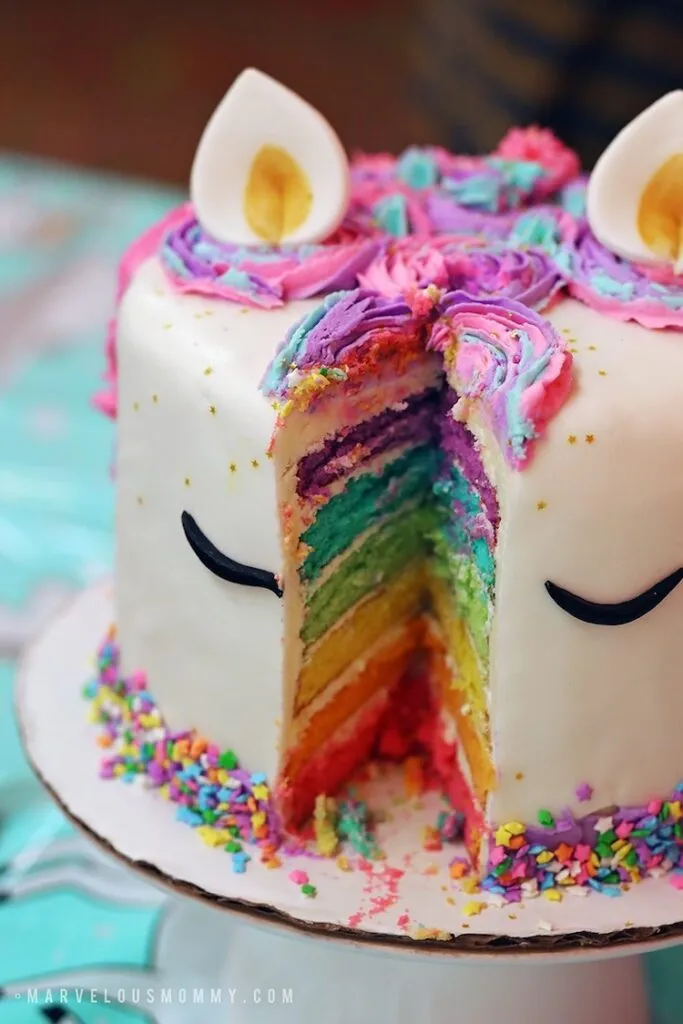
This DIY rainbow unicorn cake takes some time to do, but the result will leave you (and especially the birthday kid) excited. The cake’s outside is beautiful, and kids are sure to love the multicolored mane and glimmering gold horn. Inside they’ll discover an even bigger, more vibrant rainbow treat.
Source: Marvelous Mommy
Ingredients
- 2 french vanilla cake mixes
- Six colors of food coloring
- Buttercream frosting
- Marshmallow fondant
- Edible gold dust
- Lemon extract
Instructions
- Make the cake batter according to package’s instructions. Divide into sixths, each about 2 cups of cake batter.
- Dye each bowl of batter a different color.
- Bake each layer in a round cake tin for about 10 minutes. Let each layer cool.
- Stack the cakes in rainbow order, adding buttercream frosting between each layer.
- Cover the cake with a smooth layer of buttercream frosting. Freeze overnight.
- Wrap the cake with marshmallow fondant.
- Make the horn, ears, and eyes with fondant.
- Mix edible gold dust into lemon extract. Paint the mixture onto the horn. Use multiple layers to get a richer color.
- Pipe the unicorn’s mane onto the cake.
- Add the ears, horn, and eyes.
10. Unicorn horn pretzel
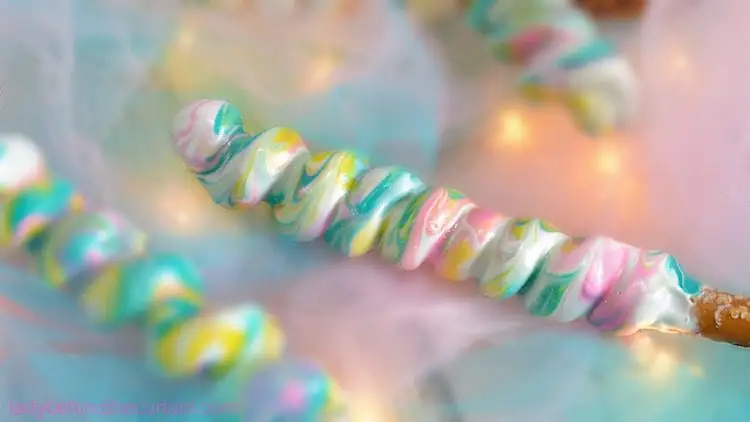
Pretzels are perfect to use as little treats whether during the party or tucked away in goodie bags. These beautiful unicorn horn pretzels combine sweet and salty effortlessly. They make such a fun treat for your unicorn-themed party! They’re not difficult to make either; you can even do them the day before, and store them away.
Servings: 3-6
Source: Lady Behind the Curtain
Ingredients
- 6 pretzel rods
- 24 Kraft chewy caramels
- 1 bag white candy melts
- 1/2 bag bright pink candy melts
- 1/2 bag turquoise candy melts
- 1/2 bag yellow candy melts
- Edible white pearl dust
- Small paint brush
Instructions
- Place each color of candy melts in four separate microwave-safe bowls.
- One color at a time, melt the candy melts in the microwave for about 1 minute on 60% power. Stir, and heat in 30-second increments until completely melted. Stir in between increments.
- In another microwave-safe bowl, microwave 4 Kraft chewy caramels on high for 10-15 seconds.
- Roll the softened caramel into a 12-inch long tube.
- Wrap the caramel around the pretzel rod in a spiral, starting at the top of the pretzel rod.
- Repeat steps 3 to 4 for each pretzel rod.
- Dip the caramel-wrapped pretzel rods into the white candy melt until thickly coated. Tap some of the excess off.
- Use a spoon or fork to drizzle the pink, turquoise, and yellow candy melt onto a pretzel rod. Then slowly rotate and tap the pretzel rod to create a marbleized effect. Drizzle more pink, turquoise, and yellow and rotate as desired.
- Decorate the rest of the pretzel rods.
- Store the candied pretzel rods upright in the freezer for at least 10 minutes.
- Put a small amount of edible white pearl dust in a bowl.
- Brush the edible white pearl dust to the pretzel rods with the small paint brush.
11. Unicorn poop cupcake cones
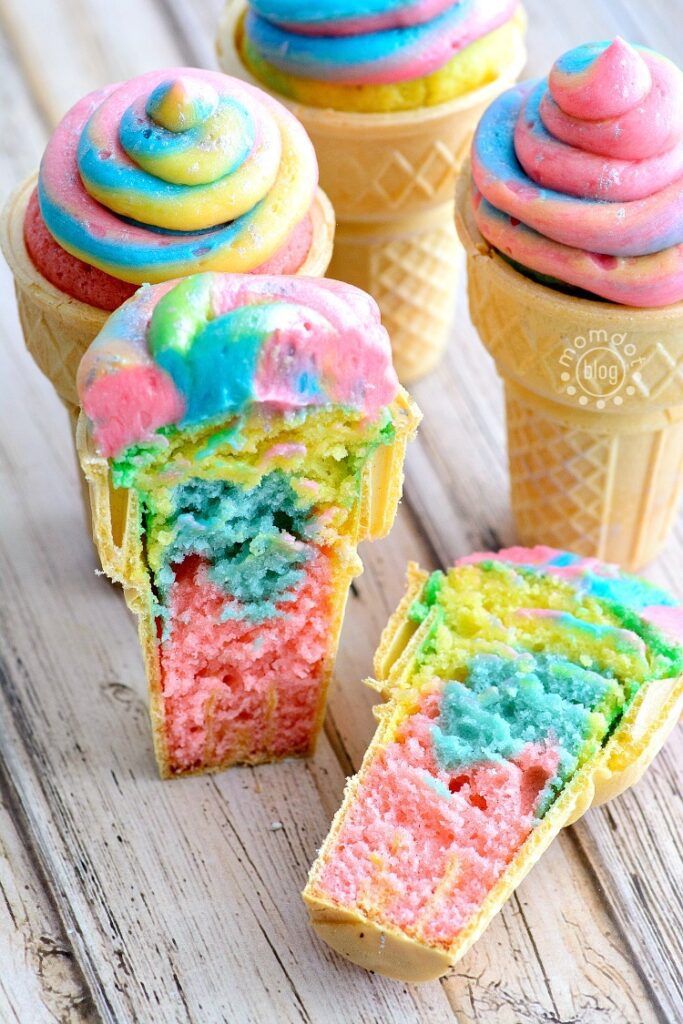
Unicorns are so magical and majestic, they poop rainbow! Kids will think these unicorn poop cupcake cones are hilarious. Play with different color schemes to bring out a true rainbow effect. They’re a fun and silly addition to your other unicorn party decorations.
Source: MomDot
Cupcake ingredients
- 1 package white cake mix
- 1 cup water
- 3 eggs
- 1/3 cup vegetable oil
- Red, blue, yellow and green food coloring
- Ice cream cones
Frosting ingredients
- 2 sticks (1 cup) of butter
- 1 teaspoon vanilla
- 1 tablespoon milk
- 2 cups powdered sugar
- Red, blue, and yellow food coloring
Cupcake instructions
- Preheat the oven 350 F degrees.
- Mix cake mix, water, eggs, and oil in a bowl.
- Then blend with an electric mixer on medium for about 2 minutes.
- Evenly distribute the batter into four bowls.
- Add food coloring to each bowl of batter. Mix until the color is even.
- Place ice cream cones into a muffin tin.
- Add a little batter to each ice cream cone, alternating batter colors, leaving 1″ of cone unfilled for the cake to rise.
- Bake for 20-25 minutes, or until a toothpick comes out clean.
- Allow the cupcakes to completely cool.
Frosting instructions
- Gradually add butter to a mixer, on medium speed, and mix until fluffy.
- Add milk, sugar, and vanilla to the butter, and mix on low until well combined.
- Divide the frosting into as many bowls as colors you want to make.
- Evenly mix the food coloring into the frosting.
- Fill piping bags with each frosting color.
- Pipe frosting onto the cupcakes. For even layers of color, use a circle tip #1A on each piping bag. Use another piping bag with a coupler to pipe all three frosting colors at once.
12. Unicorn mask invitation

What a fun way to get your guests in the party mood before it begins with this simple yet cute unicorn mask. How delightful to wear your party invitation! This size is great, too, as you can fit the necessary party details on the back and still slip it into a standard envelope.
Source: Darleen Meier
Supplies
- Printer
- Card stock
- Mask template
- Scissors
- Hole punch
- Ribbon
Instructions
- Download the printable from the source.
- Add party information to the masks, if desired. You can fill out the invitations by hand after printing, as well.
- Print the masks.
- Carefully cut the masks out.
- Punch holes in either side of each mask.
- Tie ribbon through the punched holes.
13. Unicorn doughnuts
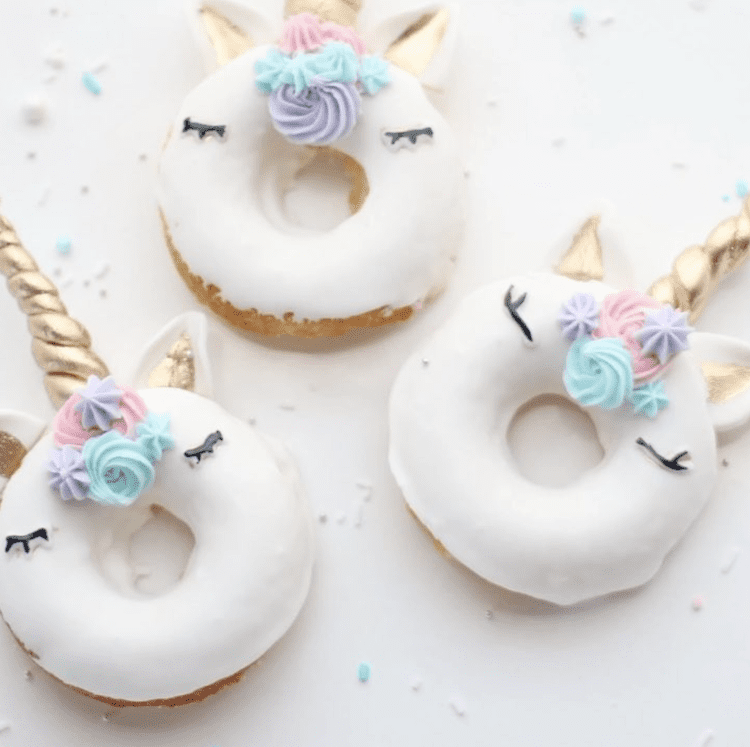
Otherwise known as the “donicorn,” doughnut lovers will adore these treats! The decorations manage to be modest and striking at the same time. They are perfect to add to a treatment table where your guests can go crazy picking them off one by one.
Prep time: 75-105 min
Cook time: 15 min
Decorating time: 15 min
Total time: 105-135 min
Servings: 18
Source: Nerdy Mamma
Doughnut ingredients
- 1 1/2 cups whole milk
- 1/2 cup, plus 3 tablespoons granulated sugar, divided
- 1/2 teaspoon salt
- 1/2 cup butter
- 1 1/2 cups warm water
- 2 .25 oz packages dry active yeast
- 2 eggs, room temperature
- 9 cups all-purpose flour, plus additional for kneading\
- Vegetable oil
Glaze ingredients
- 1/2 cup whole milk
- 4 cups powdered sugar
- 1 tablespoon corn syrup
- 1 teaspoon vanilla extract
Flower icing ingredients and supplies
- 2 cup powdered sugar
- 1/3 cup corn syrup
- 1 tablespoon milk
- 5 gel food coloring colors, including black and gold
- 5 piping bags
Doughnut instructions
- Bring 1 1/2 cups whole milk to a simmer over medium high heat in a medium saucepan.
- Remove the milk from the heat, and add 1/2 cup granulated sugar, butter, and salt.
- In a small bowl, add warm water, 1 tablespoon granulated sugar, and yeast. Stir well, and let sit for 5 minutes, or until the yeast bubbles and foams.
- In a stand mixer, combine milk mixture and yeast. Add the eggs, and beat well.
- On the stand mixer, swap the beaters out for a dough hook. Begin adding flour 1 cup at a time to the wet ingredients until the flour is just mixed in.
- Transfer the dough to a floured work surface. Knead for 5 minutes, or until the dough is smooth.
- Grease a large bowl, and move the dough to the bowl. Cover with a clean kitchen towel, and proof for about 60-90 minutes, or until the dough has doubled in size.
- Punch down the dough. Cover, and proof for another 60 minutes.
- Transfer the dough to a floured work surface. With a rolling pin, roll the dough out to 1″ thickness.
- Using a doughnut or biscuit cutter, cut circles from the dough. Use a smaller cutter to remove the center dough. Set the doughnuts aside.
- Add vegetable oil to a large pot until there is about 2″ of oil in the pot. Heat the oil to 350 F degrees.
- Use a metal spatula to lower a doughnut into the oil. Fry 1 or 2 doughnuts at a time, about 1 minute on each side or until golden brown.
- Move the fried dough to a cooling rack with something underneath to catch the dripping oil.
Glaze instructions
- Add milk, powdered sugar, corn syrup, and vanilla extract to a medium bowl, and mix well.
- Dip one side of a doughnut into the glaze. Place back on the cooling rack, and continue glazing all the doughnuts.
Icing flower instructions
- Combine milk, powdered sugar, and corn syrup into an icing that is thick, but not too thick to pipe. Add more corn syrup if the mixture is too dry. Add 1/2 tablespoon milk or water if it becomes too thick. Beat for about 2 minutes.
- Divide the icing between 6 bowls. You will need less of the black than the other colors.
- Dye each bowl of icing with one color. Add one or two drops of food coloring to a bowl, and blend until the color is even. Add another drop or two of food coloring for a darker color. Leave one bowl undyed.
- Add each color to a piping bag. Optionally, use a different piping tip for each bag.
- Pipe two different color flower shapes on the top center of the doughnut.
- Pipe another color flower on either side of the first two flowers.
- With the black icing, pipe closed eyes on either side of the doughnut hole.
- Pipe a spiral horn with gold icing, and affix it to the top of the doughnut, above the flowers.
- Pipe plain icing into ear shapes on each doughnut. Use gold icing to pipe the inner ears.
14. Unicorn ice cream
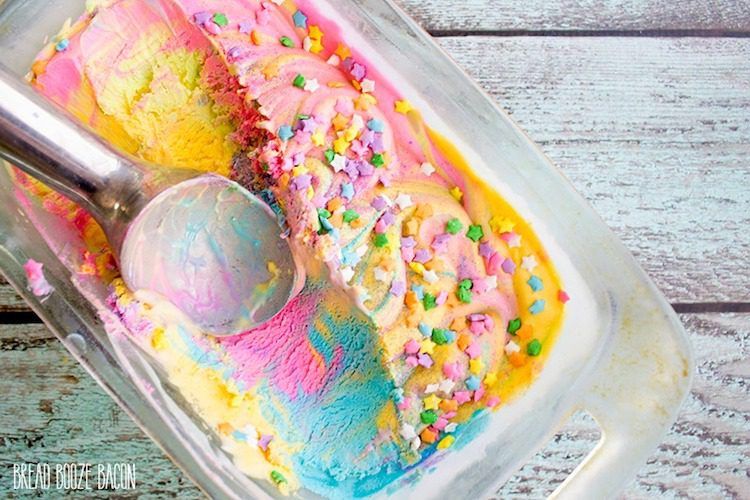
Unicorn ice cream is a delicious treat on those warmer party days. Every bite is like a spoonful of magic.
Unicorn ice cream is super simple – it’s just vanilla ice cream blended with food coloring! That’s all it takes to elevate traditional ice cream into something worthy of a unicorn. Try it with cones or bowls. Add sprinkles and other toppings for even more magic!
Prep time: 8 hr 10 min
Total time: 8 hr 10 min
Servings: 5 cups
Source: Bread Booze Bacon
Ingredients
- 1 cups whipping cream
- 14 oz can sweetened condensed milk
- 1 teaspoon vanilla extract
- Electric Blue gel food coloring
- Electric Green gel food coloring
- Egg Yellow gel food coloring
- Magenta gel food coloring
- Purple gel food coloring
- Star-shaped sprinkles
- Purple Disco Dust, optional
- Green Disco Dust, optional
Instructions
- In a large mixing bowl, beat the whipping cream until it forms medium peaks.
- Fold in the sweetened condensed milk and vanilla until fully combined. This is your ice cream base.
- Evenly divide the ice cream base into 5 bowls.
- Add 2-4 drops of food coloring to each bowl, one color per bowl, and mix until the color is even. Add more food coloring until you achieve the desired shade.
- Layer the colored ice cream into a loaf pan. Begin with half of each color, layering them alternately. Repeat the layering process.
- Marble the colors by running a butter knife through the ice cream in each direction.
- Shake sprinkles and disco dust onto the ice cream.
- Cover the loaf pan with plastic wrap. Place in the freezer for at least 8 hours, until the ice cream sets.
15. Unicorn photo booth props
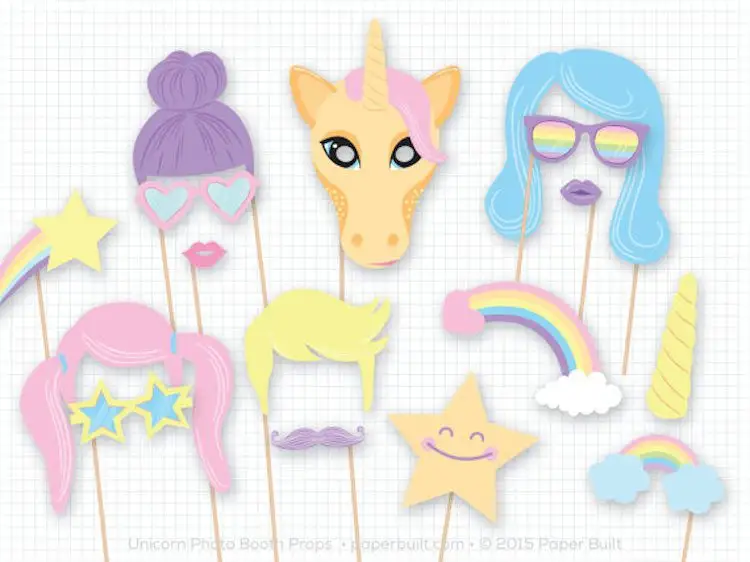
Adding in a photo booth has long been a party favorite. For a unicorn-themed birthday party, masks such as these will come in handy. Also, they’re bright, cute, and amusing.
Kids (and adults) love playing around with props and taking silly photos. As a bonus, guests can take props home as adorable tokens from a fun party.
16. DIY unicorn piñata
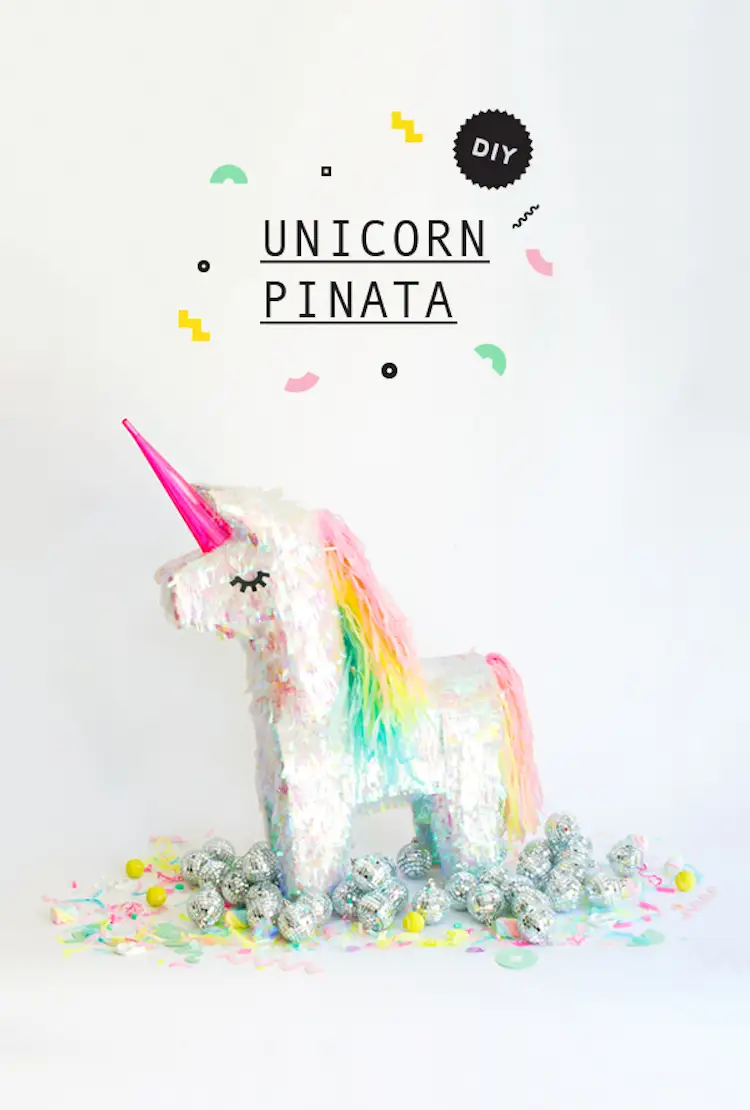
A birthday party gets a true festive kick once someone brings out the piñata. Guests will flock to the delicious treats that spill out of this cute unicorn.
This in particular though is a DIY project that isn’t quick to complete by any means. However, it comes out beautiful in the end. This guide is especially useful if you can’t find a pre-made unicorn piñata in time for the party.
Source: Oh Happy Day
Supplies
- Donkey piñata
- Unicorn eyes printable (see source)
- Printer
- White spray paint
- Scissors
- X-acto knife
- Cutting mat
- Ruler
- White card stock
- Hot glue gun
- Glue sticks
- Iridescent cellophane roll
- Pastel-colored tissue paper
- Neon pink plastic champagne flute
Instructions
- Begin by clearing the donkey piñata of existing tissue and decorations.
- Use scissors to trim down the ears, making them smaller.
- Apply white spray paint evenly across the entire surface of the piñata.
- Measure and cut a 15″ piece from the iridescent cellophane roll.
- Place the 15″ piece of iridescent cellophane roll on the cutting board. Along the long edge, slice 1.5″ wide strips with the X-acto knife. Cut the strip of fringe from the 15″ piece of cellophane, leaving half an inch or so of uncut cellophane at the top.
- Repeat step 5 until you have enough iridescent fringe to cover the piñata.
- Glue the iridescent cellophane fringe to the entire piñata, starting from the hooves and working your way up. When you get to the belly, start in the middle, and move outward towards the sides.
- For the mane and tail “hair,” use the X-acto knife and ruler to create fringe with the long sheets of tissue paper. Leave about 2″ of space at the top. You need about 1/4 page of tissue paper in each color to create the whole mane.
- Measure a 3″ wide piece from the long side of card stock. Cut it out, fold it in half, and then fold each side in half again in the opposite direction. Compare the card stock to the length of the piñata’s neck, and cut off any excess length.
- Glue the middle crease of the card stock together. Then attach the fringed tissue paper on either side, creating the mane. Add enough fringed tissue paper to completely conceal the card stock.
- Hot glue the mane to the piñata’s neck, and then add more iridescent cellophane fringe to hide the card stock base.
- Cut out a 2.5″ x 1″ piece of card stock. Fold it in half, and then fold the edges in. Hot glue fringed tissue paper to the card stock, forming the tail.
- Glue the tail securely to the back of the piñata.
- Remove the bottom part of the champagne flute. Glue it wide-side down to the piñata’s forehead, creating the horn.
- Print unicorn eyes on white paper. Cut them out, and glue them to each side of the piñata’s head.
17. Unicorn popcorn
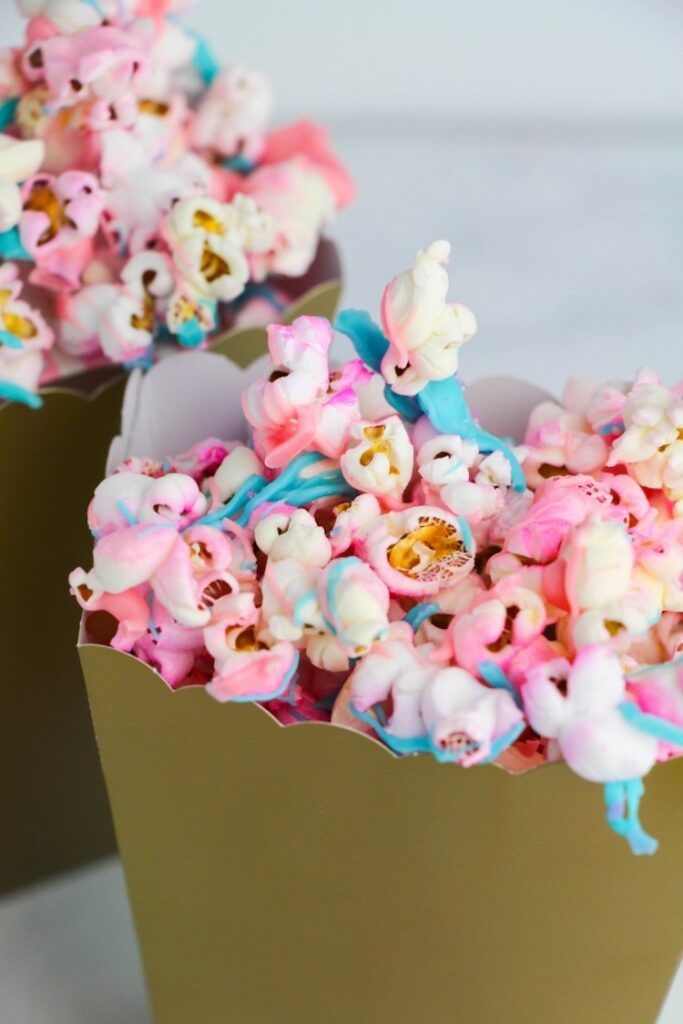
How simple and enjoyable is it to make some popcorn for a party snack? To add flair and make this classic snack truly pop (pun intended!), try out this easy recipe with a unicorn twist. Consider placing the unicorn popcorn in containers that build on the party’s theme.
Source: Life Love Liz
Ingredients
- 6 cups popped popcorn
- Pink food spray (or 3 tablespoons coconut oil and red food coloring)
- 1/2 cup pink candy melts
- 1/2 cup blue candy melts
- 1-2 teaspoons coconut oil or shortening
- Cotton candy extract, optional
- Pink and blue sprinkles
Instructions
- Spread the popped popcorn onto two baking sheets.
- Spray one side with pink food spray. Turn over and spray the other side. If you aren’t using pink food spray, melt coconut oil, and mix in red food color. Toss the popcorn with dyed coconut oil.
- Let the popcorn dry.
- Melt the candy melts in microwave-safe bowls. Stir in coconut oil to thin the candy melt. Stir in cotton candy extract.
- Drizzle the popcorn with half the candy melt. Shake sprinkles over the popcorn, and then let the candy melt dry.
- Remelt the candy melt, and turn over the popcorn. Repeat step 3.
- Let the candy melt set before serving or storing.
18. Unicorn invitations
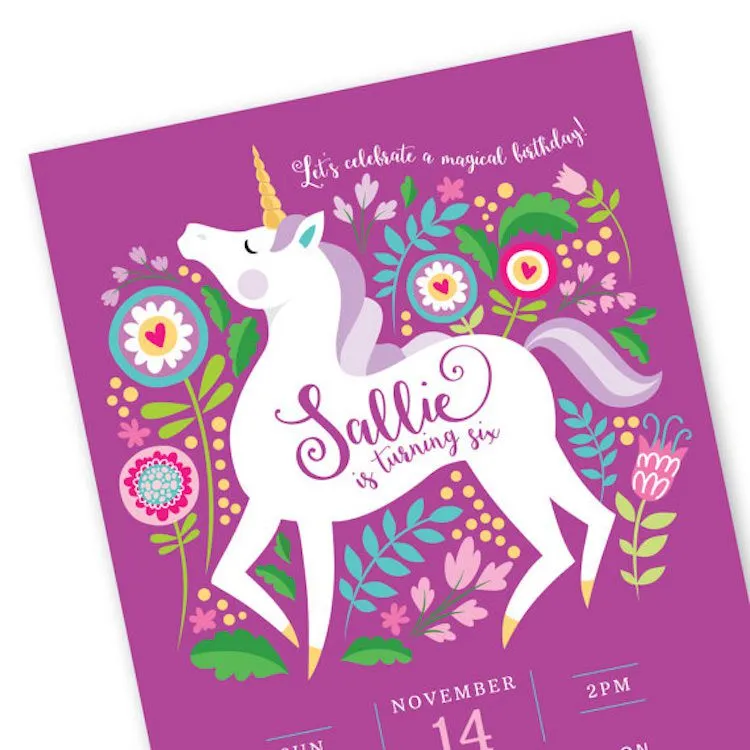
The right birthday party invitation is an excellent indicator of the theme you’re going with. Check out this fascinating unicorn invitation that leaves no doubt about what the party is going to be. Guests will be excited to wear a suit accordingly.
Everything from the artwork to the colors makes it look like this invitation belongs more in a fairytale book. Several different color scheme options allow you to personalize the invitations even more.
Source: crazyfoxpaper
19. Unicorn bark

Unicorn bark is so versatile! You can garnish another tasty recipe with it, add it to goodie bags, or give your buffet table some sugar. This unicorn party favor or treat has amazing splashes of multiple colors! And the rainbow sprinkles are perfect to finish them off with.
Prep time: 15 min
Chill time: 25 min
Total time: 40 min
Servings: 16
Source: The Spruce Eats
Ingredients
- 1 pound white candy coating
- 4-6 oz candy coating, multiple colors
- 1 teaspoon rainbow sprinkles
- 1 package candy pearls, for garnish
Instructions
- Line a baking sheet with wax paper or aluminum foil.
- In separate bowls, melt each color of candy coating. Heat and stir until the color is smooth and even.
- Transfer the white candy coating to the baking sheet. Spread it out to an even 1/4″ thickness.
- Quickly and randomly drizzle the other colors of candy coating.
- Run a knife or toothpick through the candy coating to create marbleized swirls.
- Before the candy hardens, add sprinkles and candy pearls randomly but evenly.
- Place the baking sheet in the fridge for at least 25 minutes.
- Cut or break the bark into pieces.
20. Unicorn hot chocolate
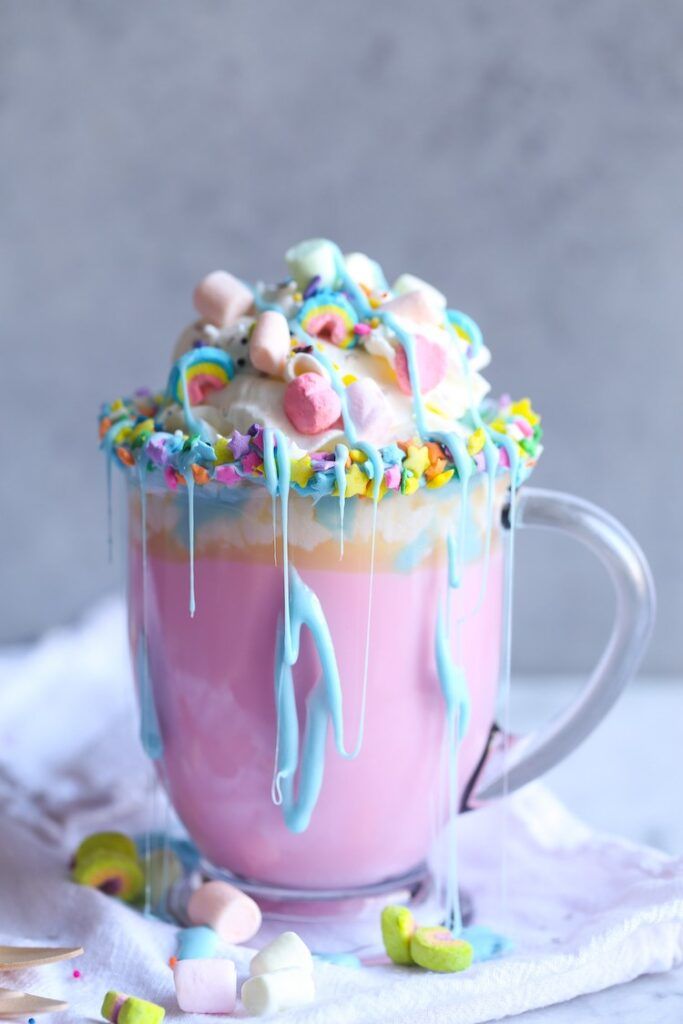
Not every birthday party takes place in warm weather that calls for ice cream and shakes. If you’re looking for a way to warm up guests while still keeping to the theme, unicorn hot chocolate is the route to go.
This colorful and creamy hot chocolate blends rich white chocolate with tasty marshmallows, which melt wonderfully in with the whipped cream. Line the cup rim with frosting and sprinkles for a decadent and cozy unicorn-inspired drink.
Prep time: 10 min
Total time: 10 min
Servings: 2
Source: Imperial Sugar
Ingredients
- 2 cups whole milk
- 1 teaspoon vanilla
- 1 tablespoon extra fine granulated sugar
- 4 ounces white chocolate, chopped
- Pink food coloring
- Whipped cream
- Pastel sprinkles
- Colored mini marshmallows
- Blue icing
Instructions
- Mix milk, vanilla, sugar, white chocolate, and 2 drops food coloring in a medium saucepan on low heat.
- Stir constantly until the sugar dissolves and the white chocolate melts. Remove hot chocolate from heat.
- Line two mug rims with blue icing, and then dip the rims into sprinkles.
- Fill the mugs with hot chocolate, leaving a little room.
- Add whipped cream to the mugs.
- Garnish with sprinkles, mini marshmallows, and blue icing drizzles.
21. Simple DIY unicorn horn
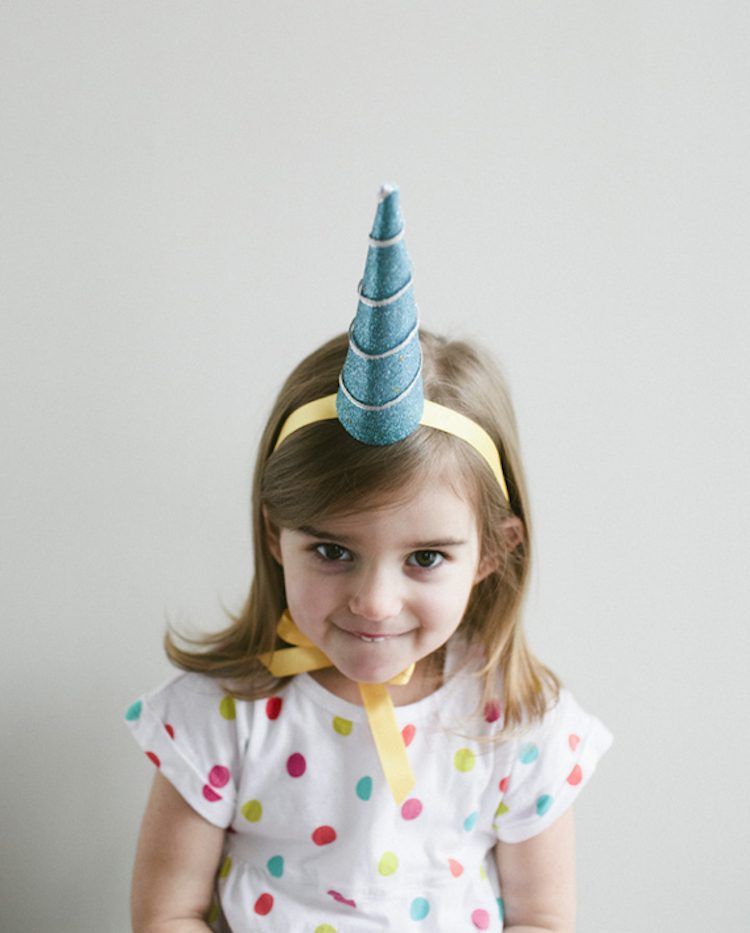
Do away with traditional party hats and go for unicorn horns. This DIY project will easily put a smile on everyone’s face. They are all made in a way that every kid, no matter the age, can wear and enjoy. Go for a rainbow theme, too, and make several different colors to give your guests more options.
Source: A Subtle Revelry
Supplies
- Unicorn horn template
- Scissors
- Glitter foam paper
- Glue gun
- Glue sticks
- Metallic wired ribbon
- Ribbon
Instructions
- Download and print the unicorn horn template from the source.
- Cut out the template with scissors.
- Place the template on glitter foam paper, and trace around the template to mark where to cut.
- Cut out the shape.
- Roll the glitter foam paper into a cone.
- Remove a strip of the glitter foam paper backing. Add hot glue alongside the exposed adhesive. Press the glitter foam paper edge down onto the cone.
- Add more hot glue as needed.
- Glue metallic wired ribbon to the tip of the horn, and wrap the ribbon around the cone in a spiral. Glue the other end of the ribbon to the horn base.
- Cut out a length of ribbon, long enough to tie under a child’s chin.
- Lift glitter foam backing inside the base of the horn. Affix the ribbon here, using hot glue to keep it in place.
22. Unicorn marshmallow pops
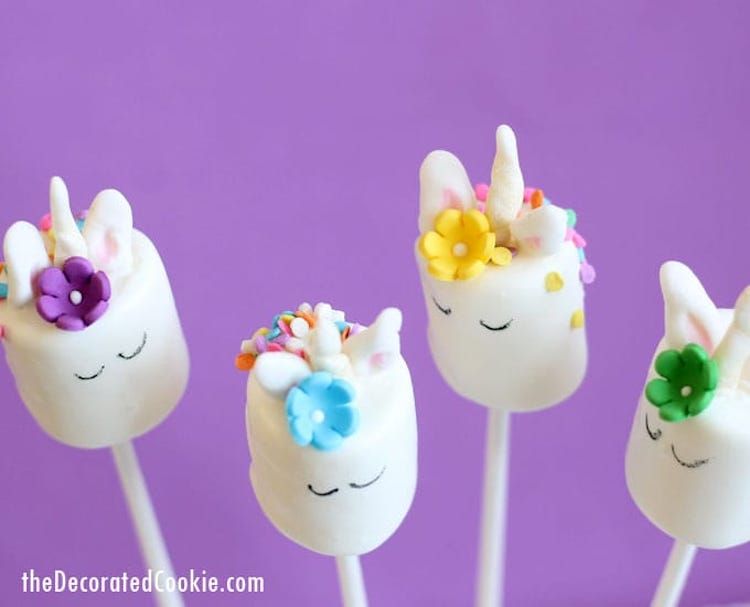
For those looking for a way to mix up marshmallows, this recipe gives you several ways to turn a marshmallow into a unicorn. They are so charming that kids will just pop them without care during a party. You can even decorate them differently so that each marshmallow pop is truly a unique unicorn. Then you can make make your own easy dip recipe that matches the flavor.
Source: The Decorated Cookie
Ingredients
- Marshmallows
- Lollipop sticks
- Bright white candy melts
- EZ Thins (optional)
- White fondant
- Gold pearl dust
- Pink edible writer
- Black candy color
- Mini flower icing decorations
- Mini confetti sprinkles
- Paint brushes
- Styrofoam block
Horn instructions
- Roll, form, and twist a piece of white fondant into a horn shape.
- Add gold pearl dust to the horn with the paintbrush and by rolling the horn in the dust.
- Set the horn aside to harden.
- Repeat steps 1 through 3 until you have all the horns you’ll need.
Ear instructions
- Shape a bit of white fondant into an ear shape.
- Color in the inner ear with pink edible writer.
- Set the ear aside to harden.
- Repeat steps 1 through 3 until you have all the ears you’ll need.
Marshmallow pop instructions
- Place marshmallows onto lollipop sticks, and set aside.
- Melt candy melts and EZ Thins in the microwave for about 90 seconds on 70% power. Stir, and continue heating in 15 second intervals until the candy melts. Stir between intervals.
- Dip the marshmallows into the candy melt.
- Add a horn and 2 ears before the candy melt hardens.
- Garnish each marshmallow with an icing flower decoration and sprinkles.
- Stick a finished marshmallow pop into the Styrofoam block. Let the pops set for about an hour.
- Paint on eyes with black candy color.
23. Unicorn fudge
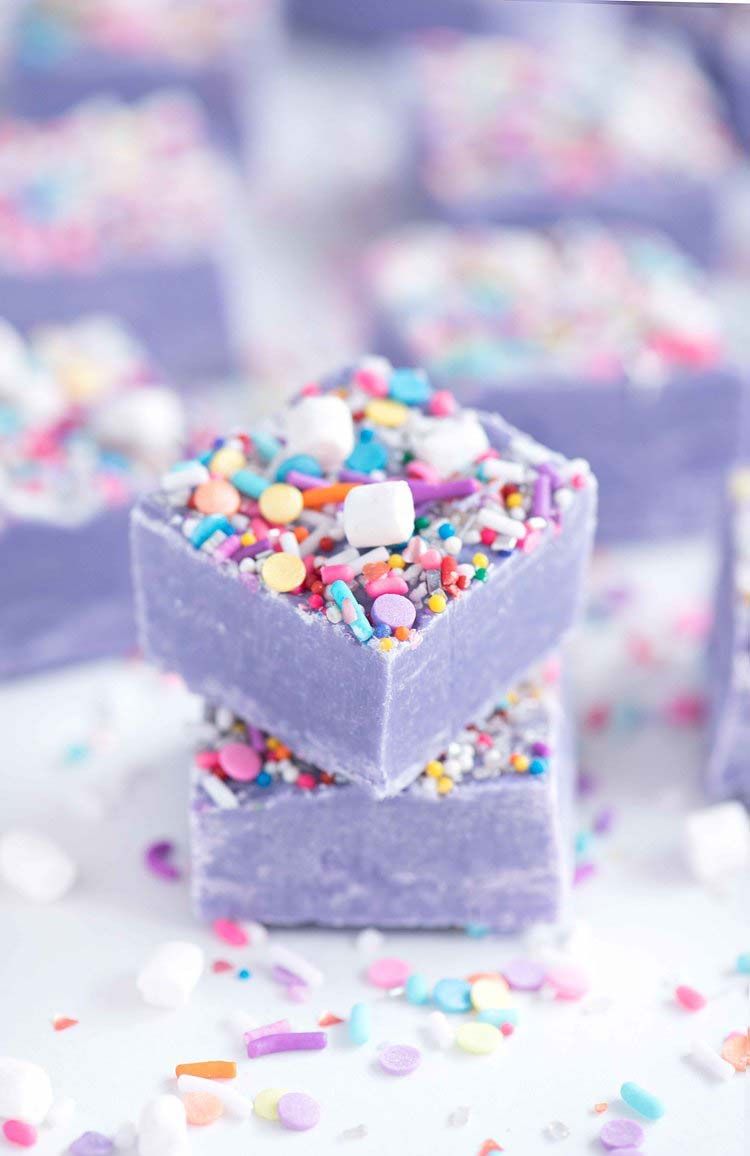
When your party guests see these fudge treats piled high, they’ll be rushing to snag a piece or two. They are the perfect little dessert to go along with cake or even to take home as a “thank you” treat. Don’t forget to cover them in the brightest, most vivid sprinkles you can find to bring out the unicorn in them.
Servings: 25 pieces
Source: Sprinkles for Breakfast
Ingredients
- 24 oz white chocolate chips
- 1/2 cup heavy cream
- 1/2 teaspoon vanilla extract
- Purple food coloring
- Sprinkles
Instructions
- Line an 8″x8″ pan with parchment paper.
- In a microwave-safe bowl, melt white chocolate, heavy cream, and vanilla extract in the microwave. Heat in 30 second intervals, stirring in between until smooth.
- Add 1-3 drops of food coloring to the bowl. Add more drops until desired color achieved.
- Transfer the mixture to the pan. Smooth the top with a spatula.
- Evenly shake sprinkles onto the fudge, and gently press the sprinkles into the fudge.
- Refrigerate the pan for at least an hour.
- Cut into squares, and serve at room temperature.
24. Unicorn party sign
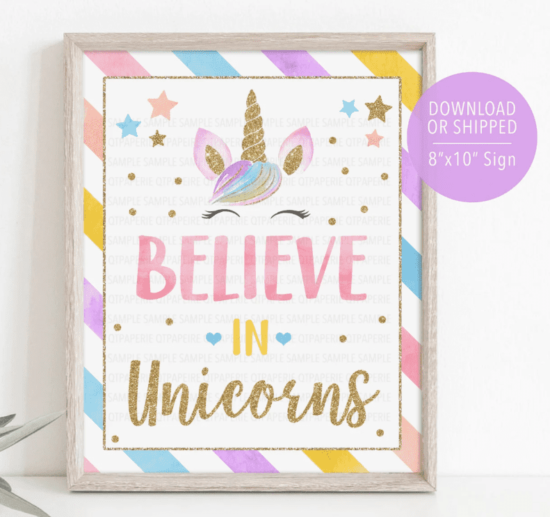
Setting down a sign for the birthday party is always a nice gesture. It adds to the decorations as it’s typically the first thing your guests see. So, this unicorn sign will do the job of getting people into the spirit of the unicorn. The sign is just bright enough to get people’s attention without overwhelming other decor.
Source: qtpaperie
25. Unicorn yogurt bites
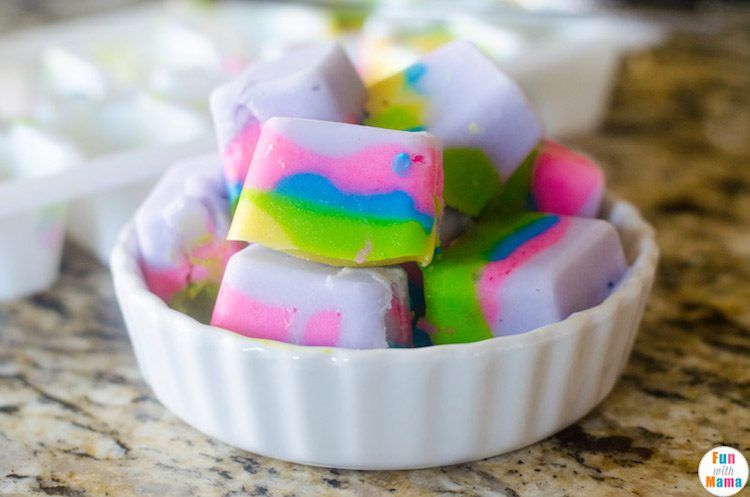
Yogurt bites are incredible, especially in warm weather where you just want something easy and not too heavy to munch on. Even the kids can help you make these easy unicorn yogurt bites before the party starts. So, it’s a fun activity to get everyone in the right mood. These rainbow-colored treats fit right in with the rest of the decor.
Prep time: 10 min
Chill time: 3 hr
Total time: 3 hr 10 min
Servings: 16 bites
Source: Fun with Mama
Ingredients
- 2 cups plain yogurt
- Purple food coloring
- Deep Pink food coloring
- Sky Blue food coloring
- Neon Yellow food coloring
- Neon Green Food coloring
- 16 cube ice cube tray
Instructions
- Portion out 3 tablespoons yogurt per color.
- Add 1-2 drops of food coloring to each 3-tablespoon portion of yogurt. Add more drops for a darker color. Mix until color is even.
- Repeat step 2 for the remaining 5 food coloring colors.
- Spoon a layer of purple yogurt into each cube of the ice cube tray.
- Repeat step 4 for each color yogurt until the ice cube tray is full.
- Freeze the ice cube tray for about 3 hours before serving.
26. Unicorn glassware
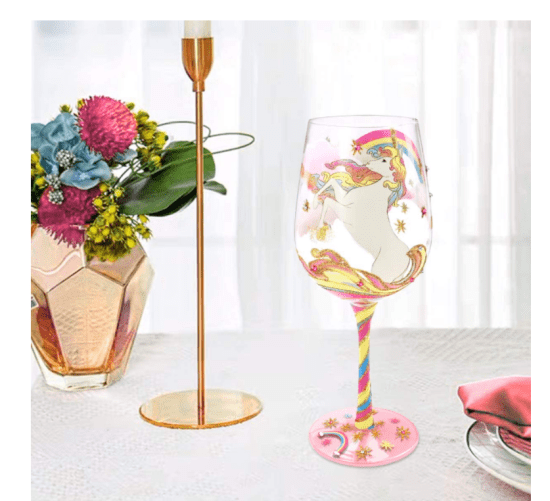
Why not serve drinks in these cute unicorn glasses? They are the perfect kid-size, and their style allows them to blend with whatever other decorations you have going on.
If your party guests are too young for glass cups, save the unicorn glasses for the after party. Substitute apple juice for some fancy wine after guests have all gone home.
Source: Amazon
27. Unicorn Birthday Decorations at Home: Unicorn Confetti
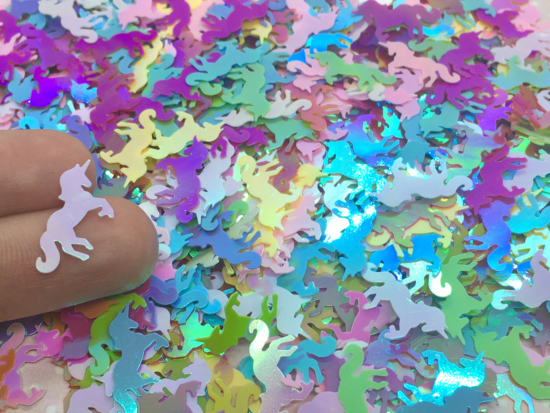
Holographic unicorn-shaped confetti adds a shimmery, jewel-toned pizazz to any party, especially a unicorn-themed one. You can use it to stuff your birthday invitations, decorate tables, embellish presents, or throw them in the air.
Source: KawaiiCorgiCraftsLLC
Suggested Read: The Ultimate Guide for Planning A Back to School Party
What Are Your Favorite Unicorn Birthday Party Ideas?
Whether you want craft, recipe, or shopping inspiration, these 27 unicorn-themed ideas are a good starting point. Also, each unicorn idea explained here will enchant anyone and make for a memorable birthday party. Just imagine the look of delight on the birthday person’s face!
Leave us a comment below about which of these 27 magical unicorn party ideas you’ve used. What did you do different? What ideas did you love best? Best of luck with your unicorn birthday parties!
Melanie – this turned out so cute! Happy birthday to the princess!!
That is so adorable. It is always a challenge to throw a party on a budget. You did great! Belated birthday wishes to the little princess!!!
Thank you so much Anjana!
This is amazing! Do you mind me asking how you made the take and toss cups?
Having a princess party, would love to have the punch recipe!